The Blackest Sacrament Achievement for the Elder Scrolls Online requires you to kill 21 targets in daily quests you receive from Speaker Terenus in the Dark Brotherhood’s Sanctuary, which you can find in the Gold Coast zone. These targets may seem random, but they actually have a very specific pattern — and you can even get lucky and have 2 targets in one quest!
TABLE OF CONTENTS
- How To Start The Blackest Sacrament Quest
- Rules Of Engagement
- Schedule of Primary Targets
- Schedule of Secondary Targets
- Target Locations/Maps
HOW TO START THE BLACKEST SACRAMENT QUEST
You must complete the first four quests of the Dark Brotherhood quest line (Voices in the Dark, Signed In Blood, Welcome Home, and A Lesson In Silence). This unlocks the Blackest Sacrament daily quests, which you can receive from Speaker Terenus in a side room of the Dark Brotherhood Sanctuary.

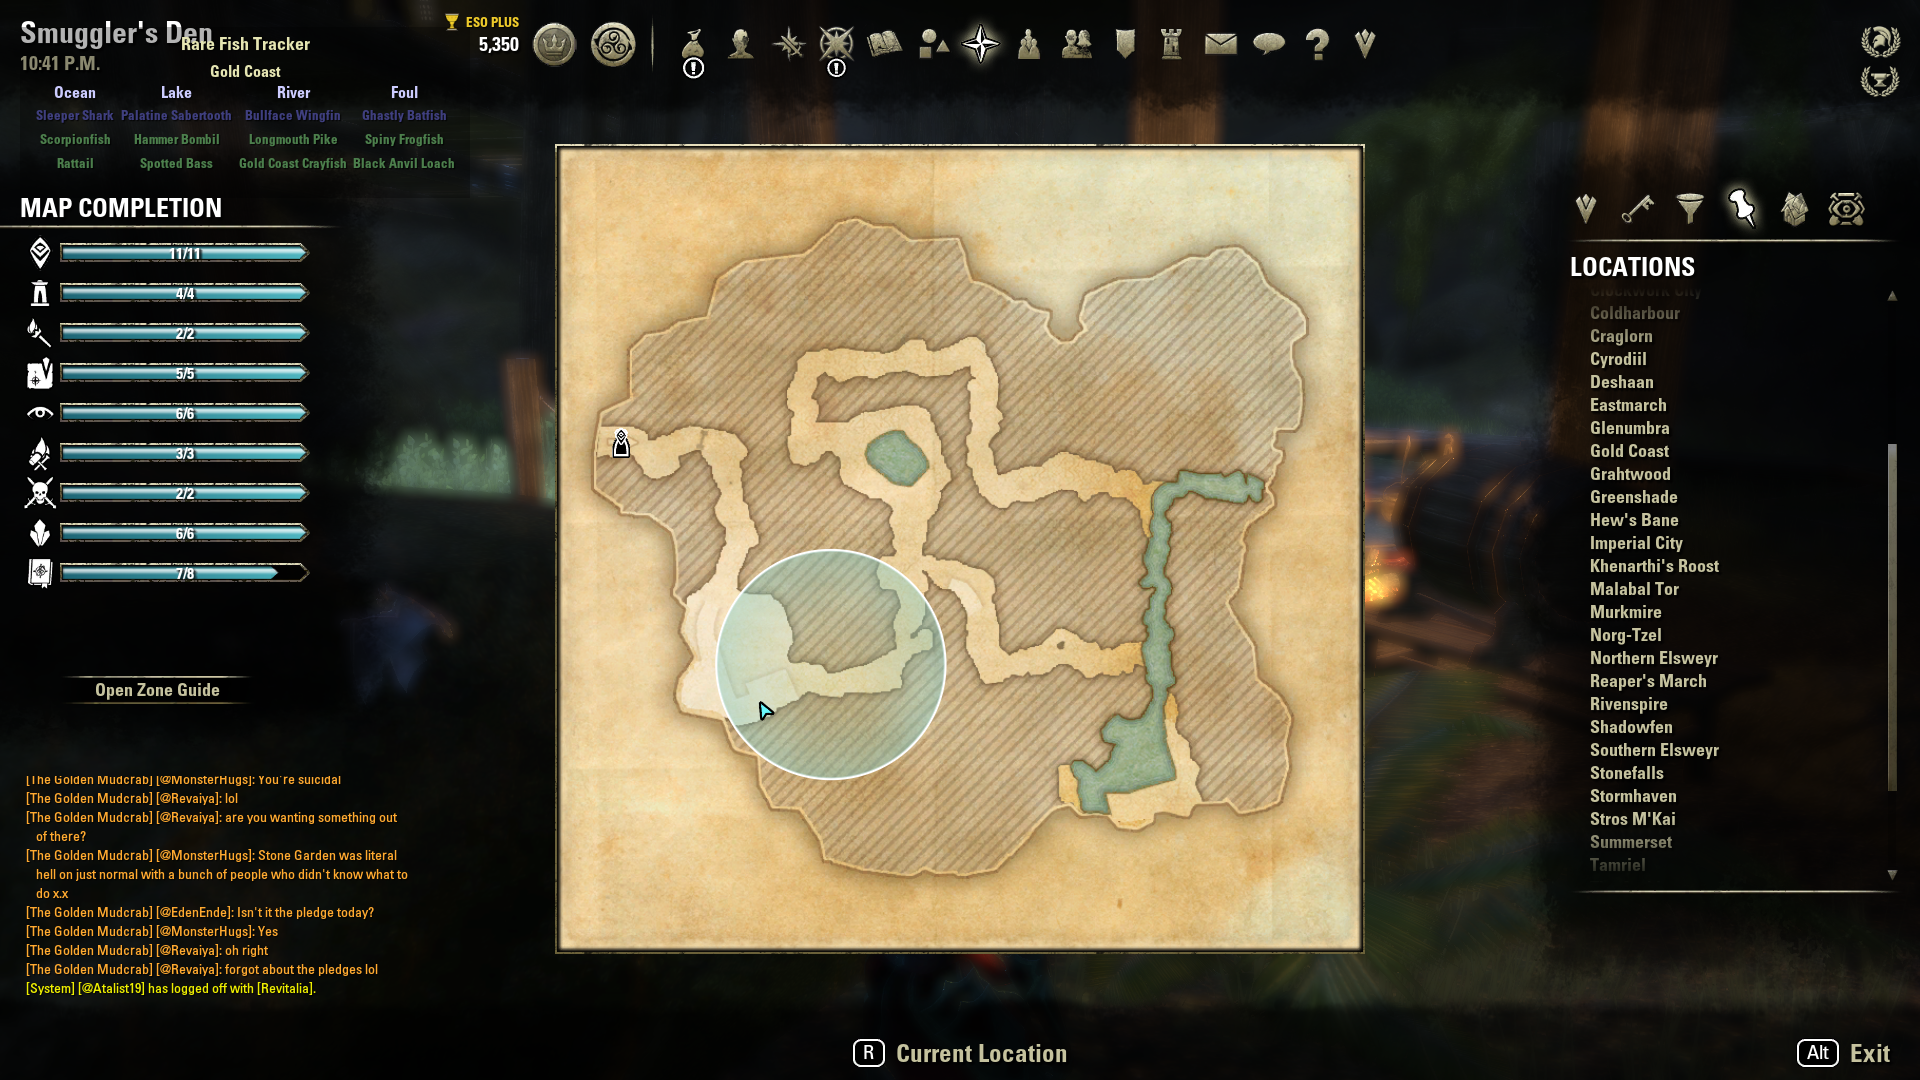
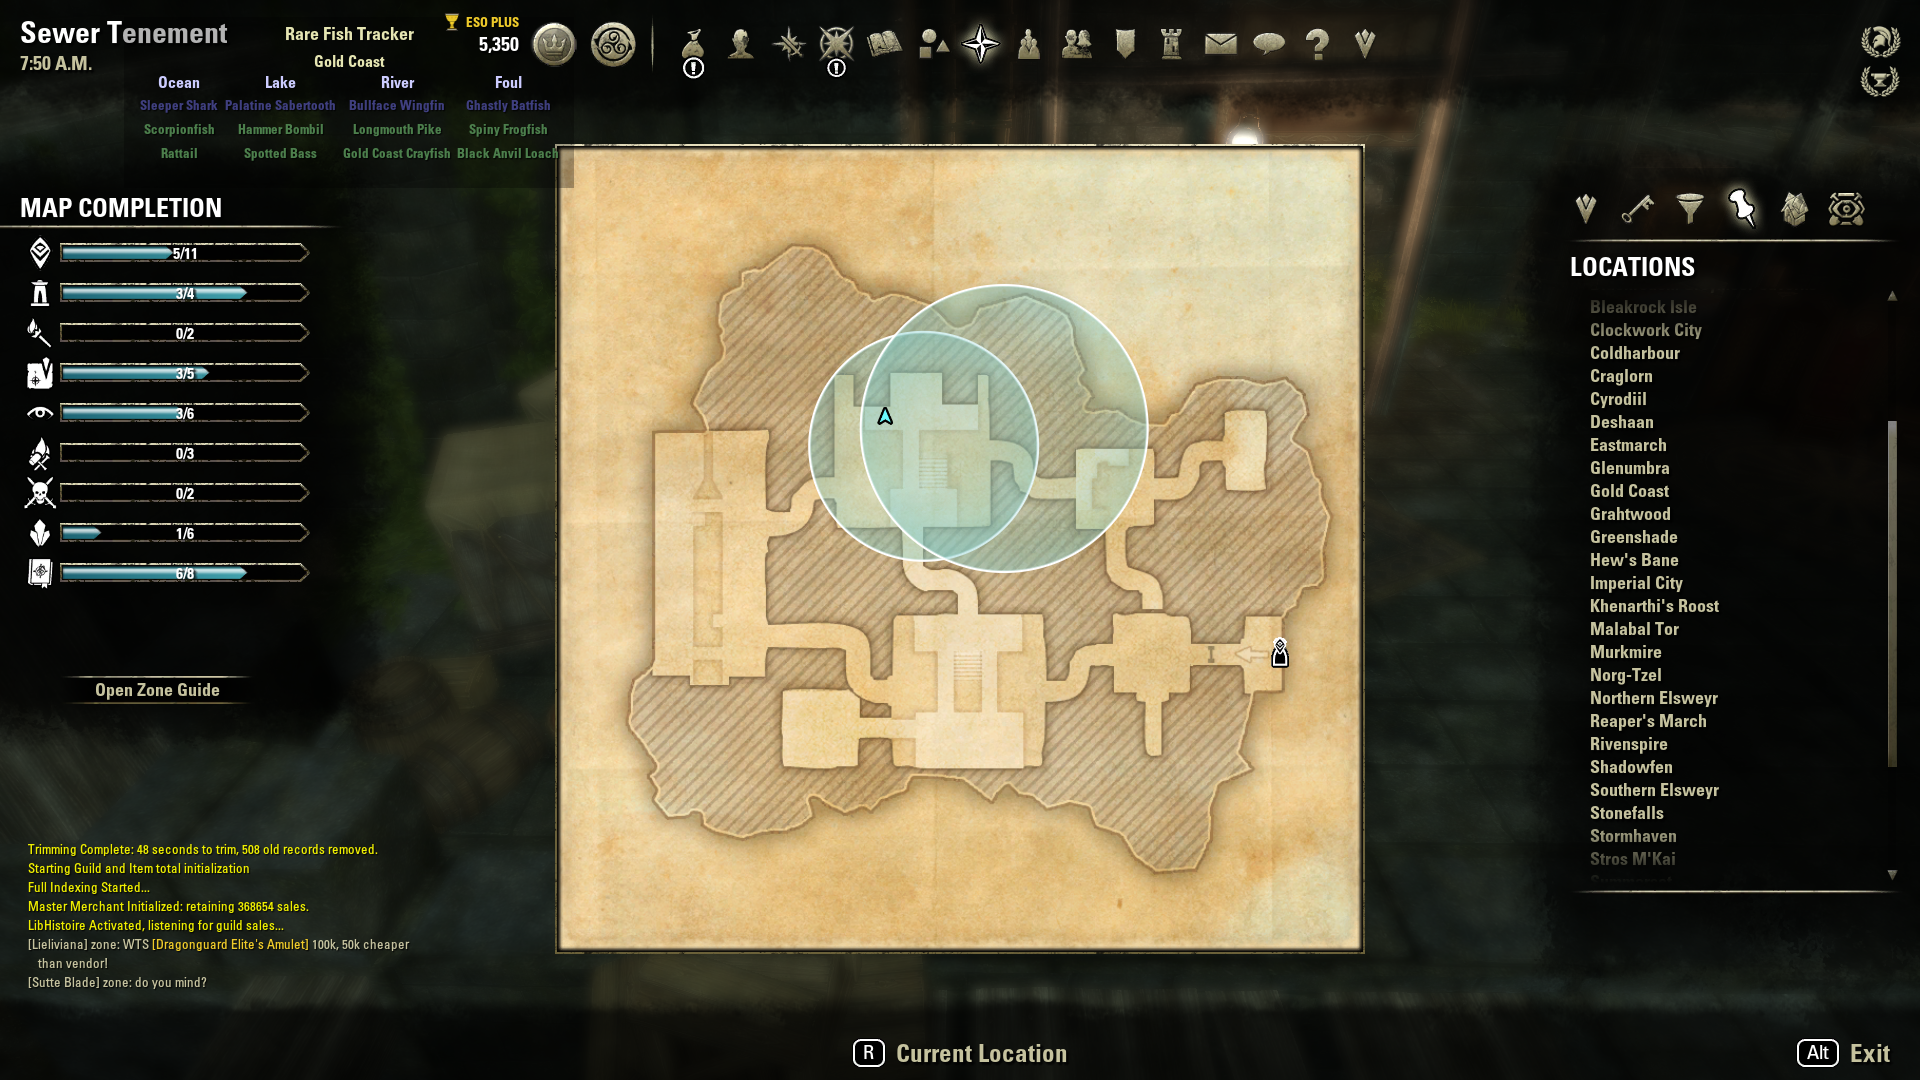
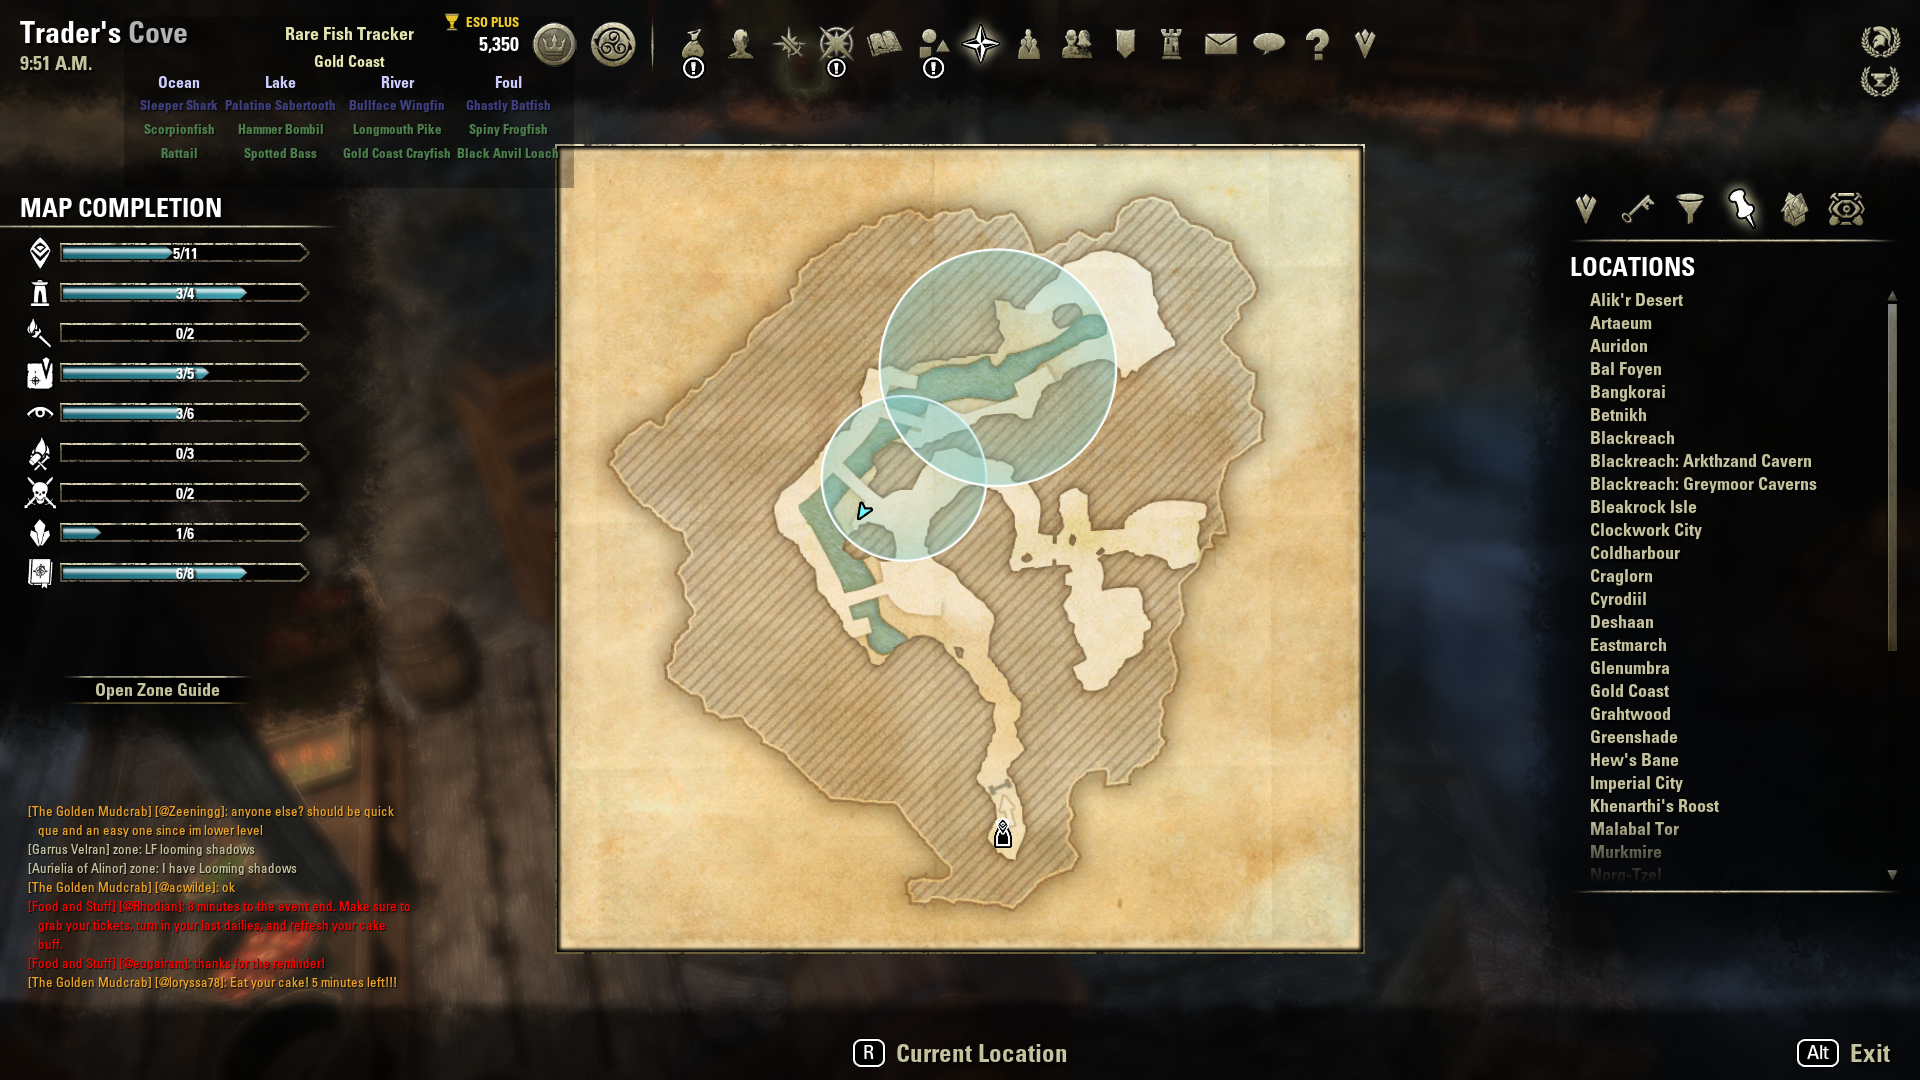
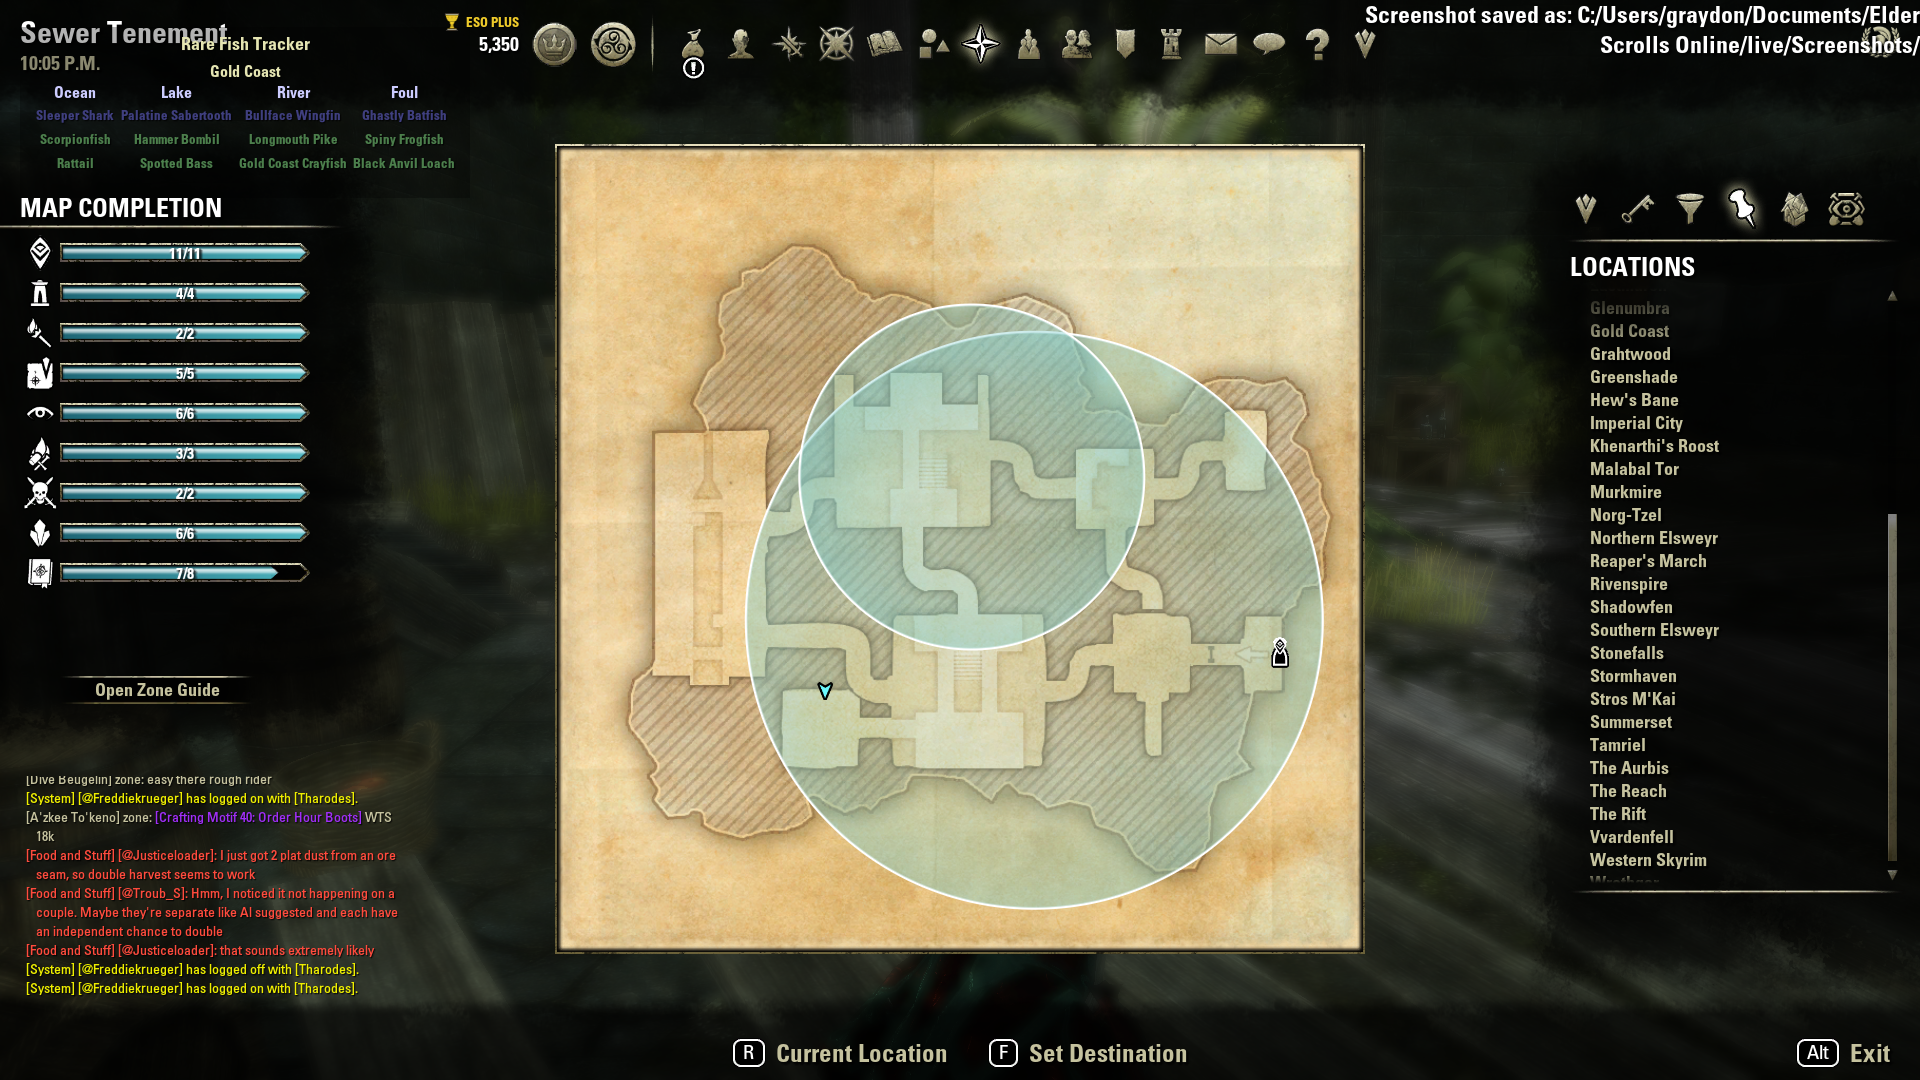
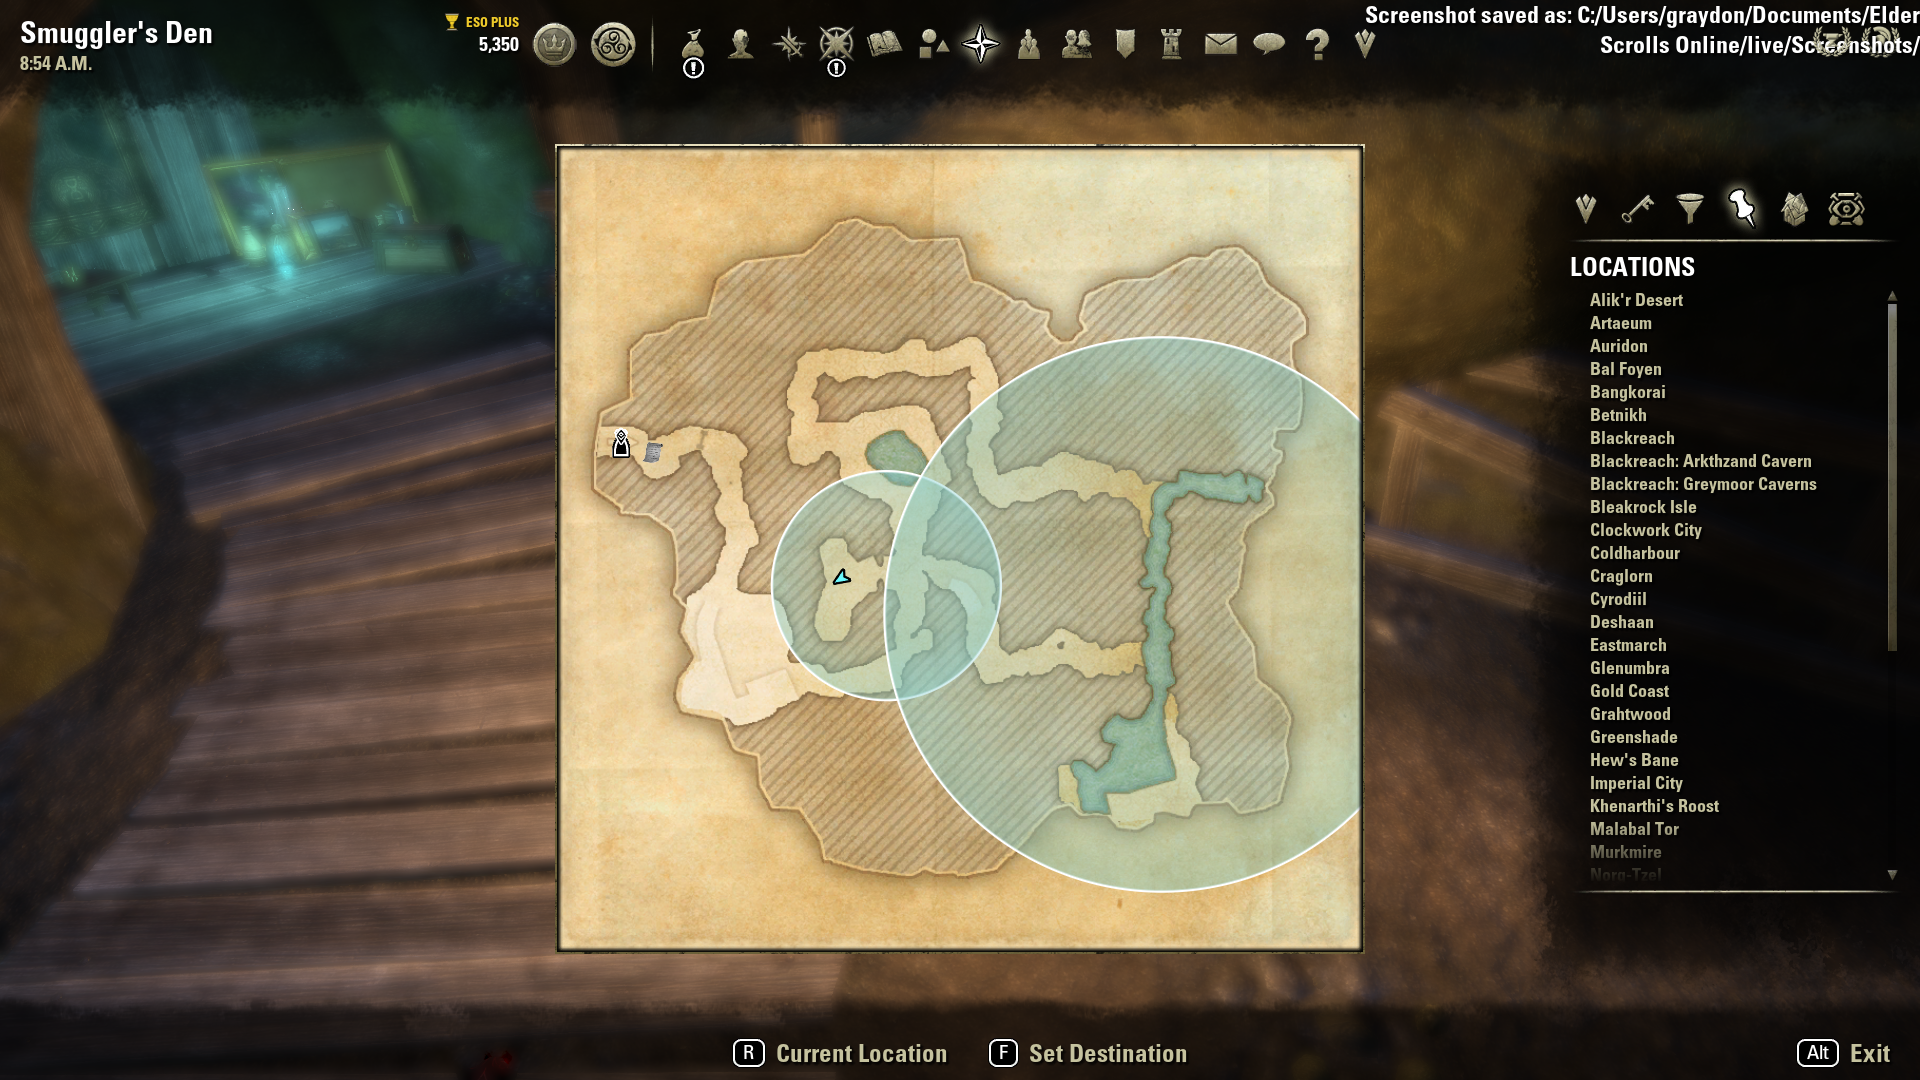
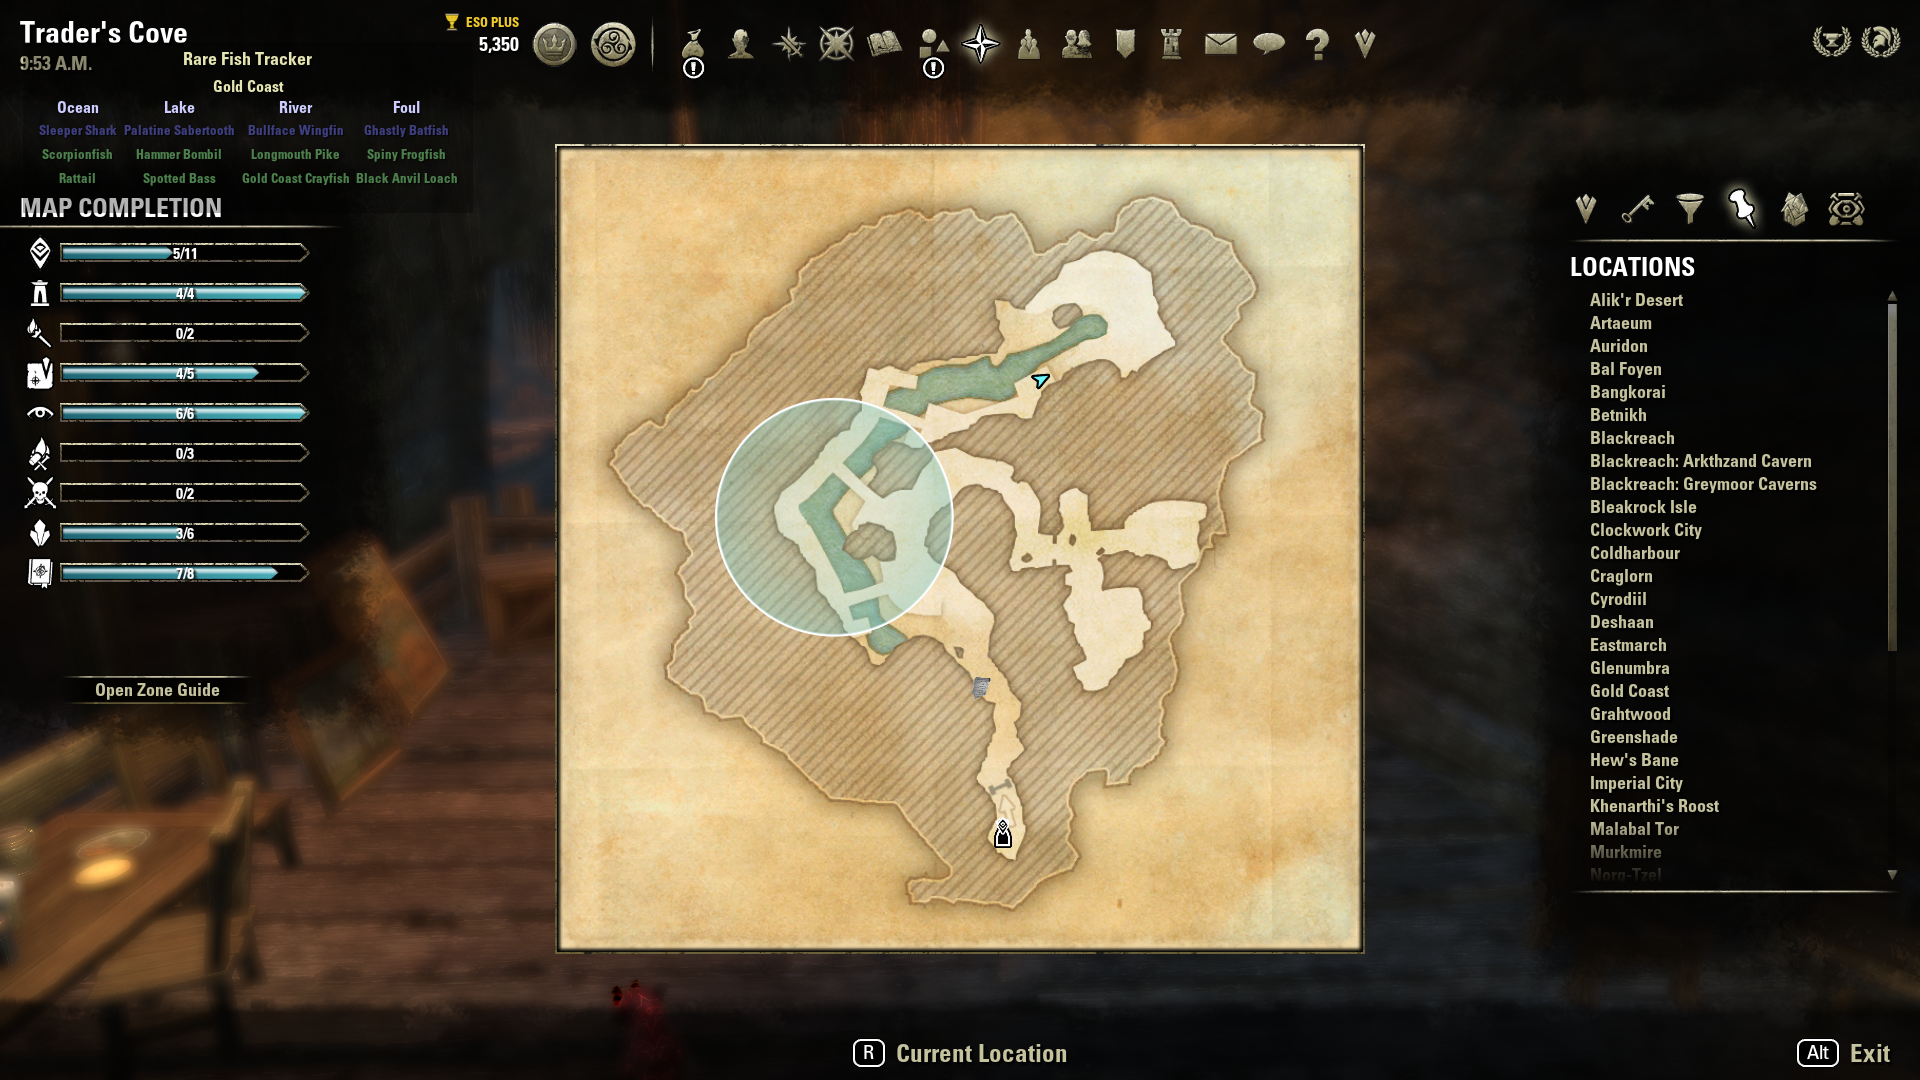
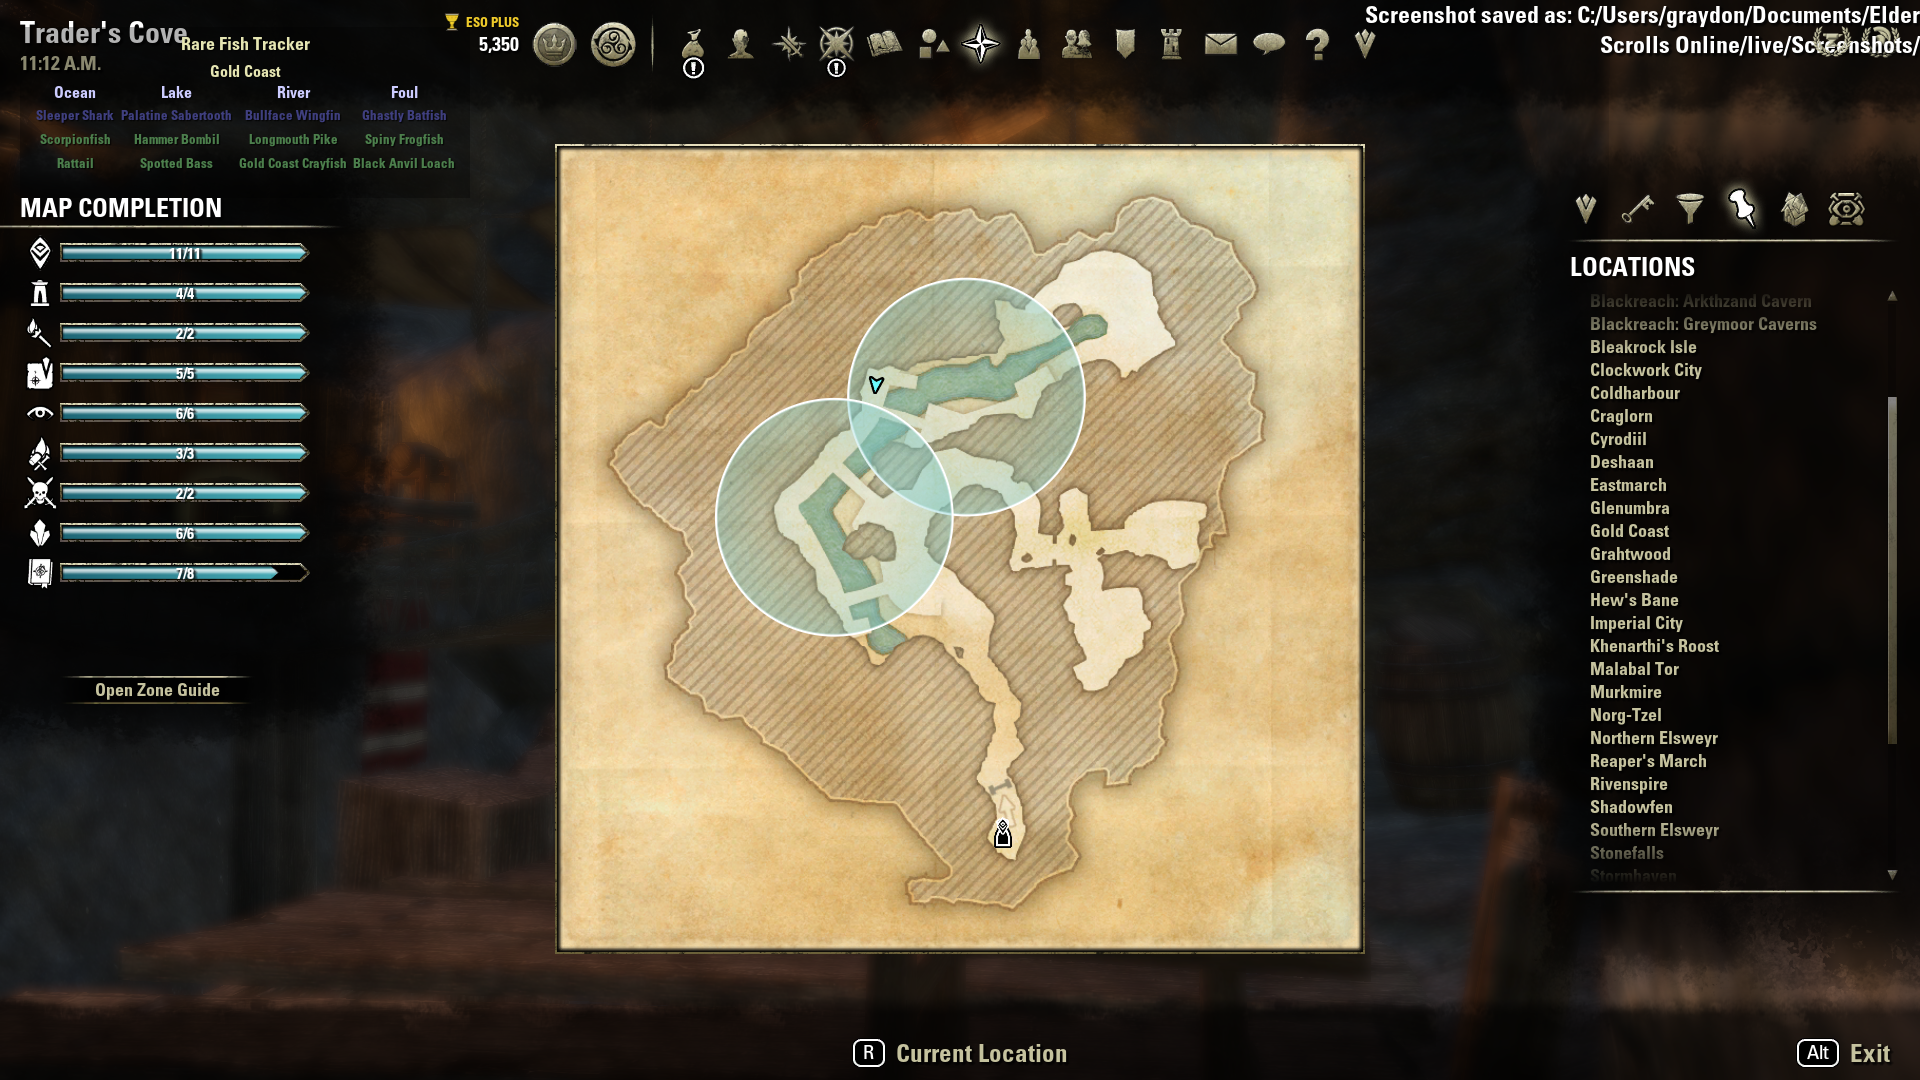
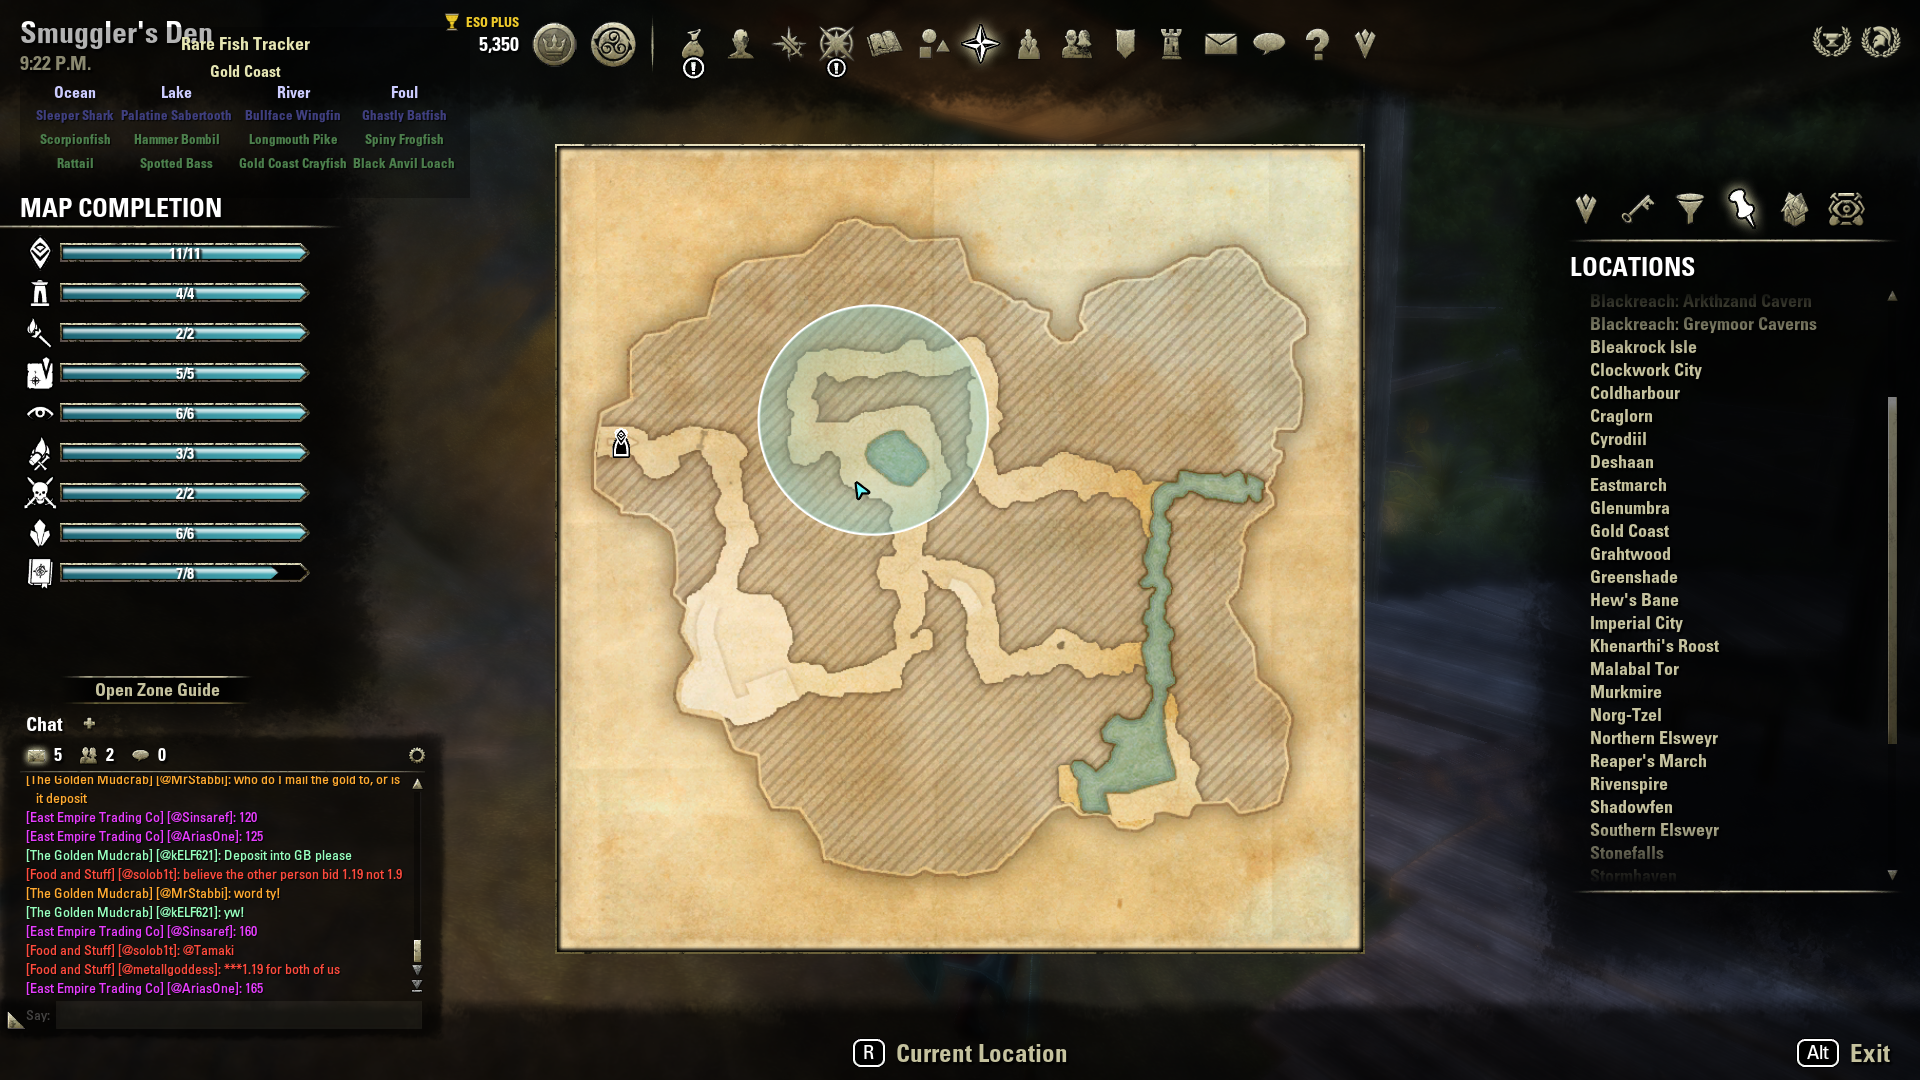
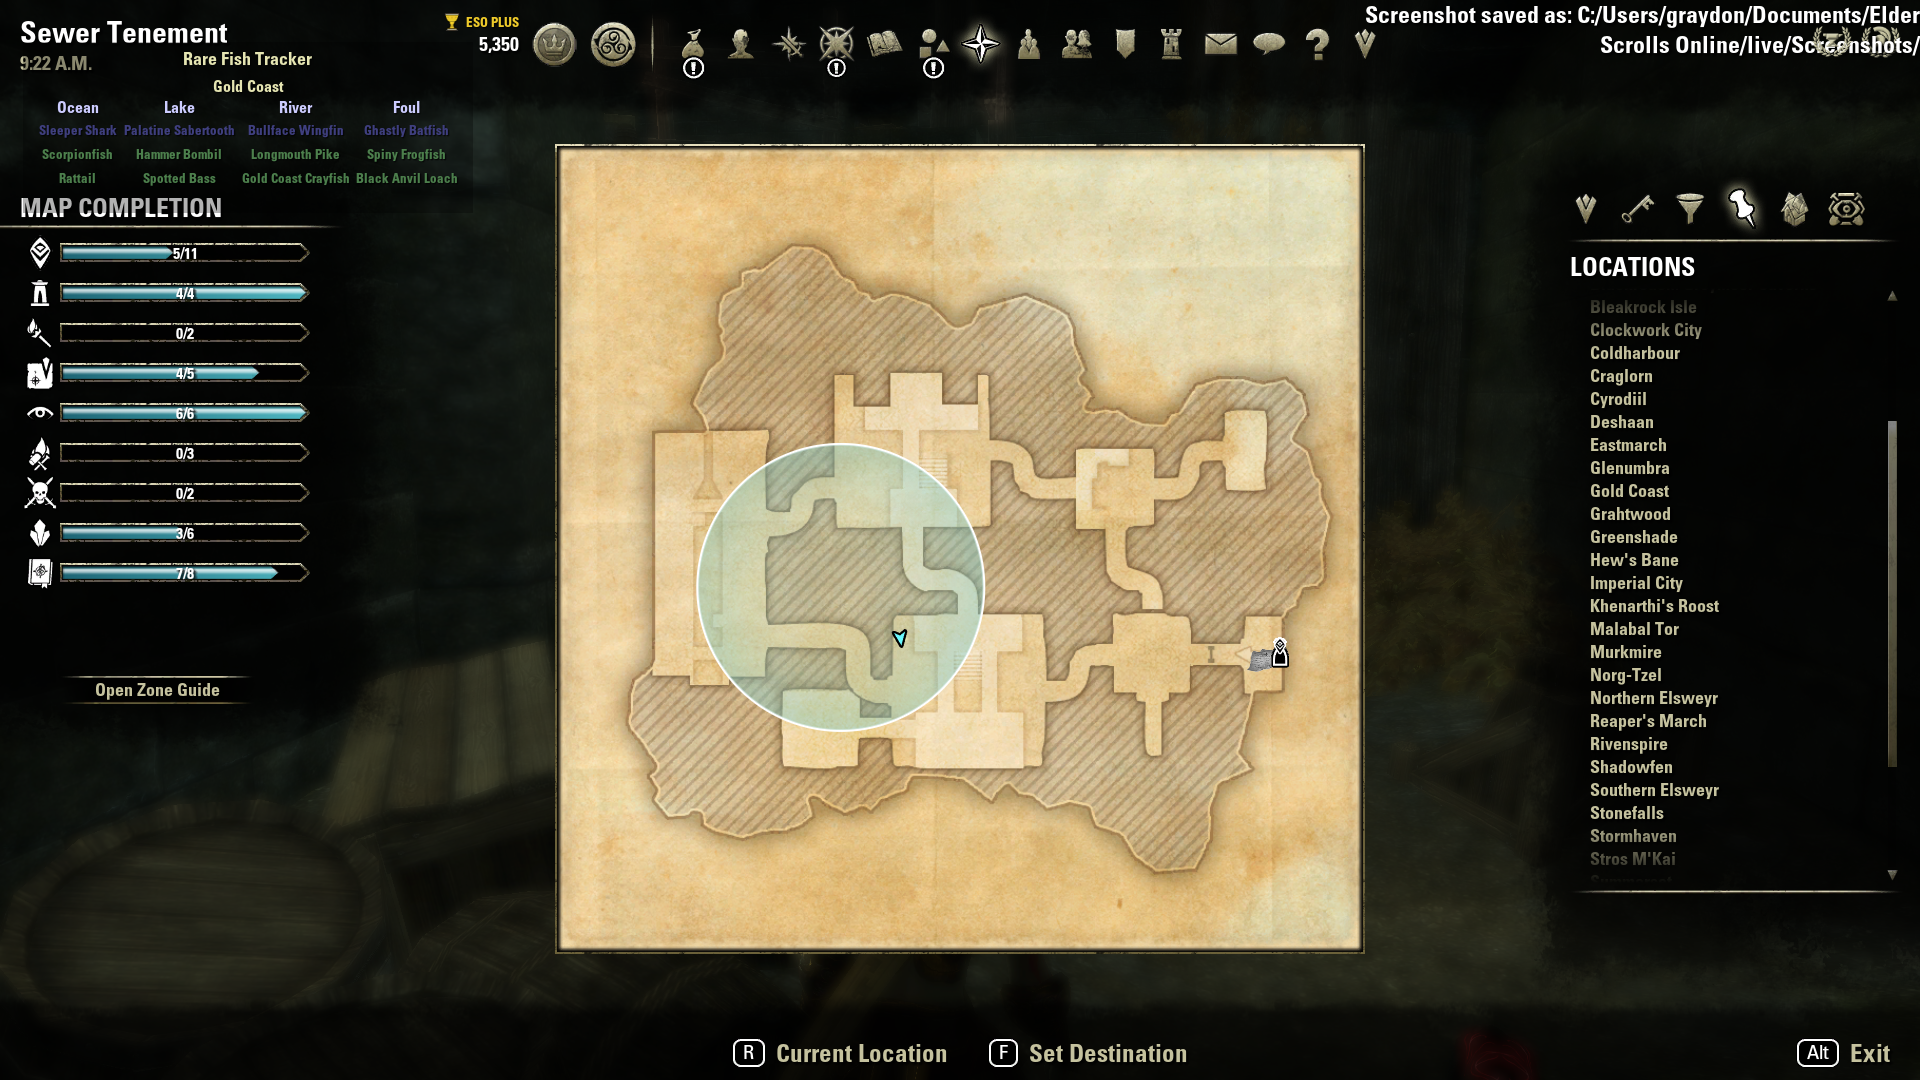
The quests themselves take place in one of three instanced dungeon maps: Trader’s Cove, the Sewer Tenement, and the Smuggler’s Den. Each map has some secret areas and shortcuts that can make your quest experience easier to complete successfully. Each quest also has extra challenges (or “rules of engagement”, if you will) that you must follow to get a maximum reward from Speaker Terenus.
RULES OF ENGAGEMENT
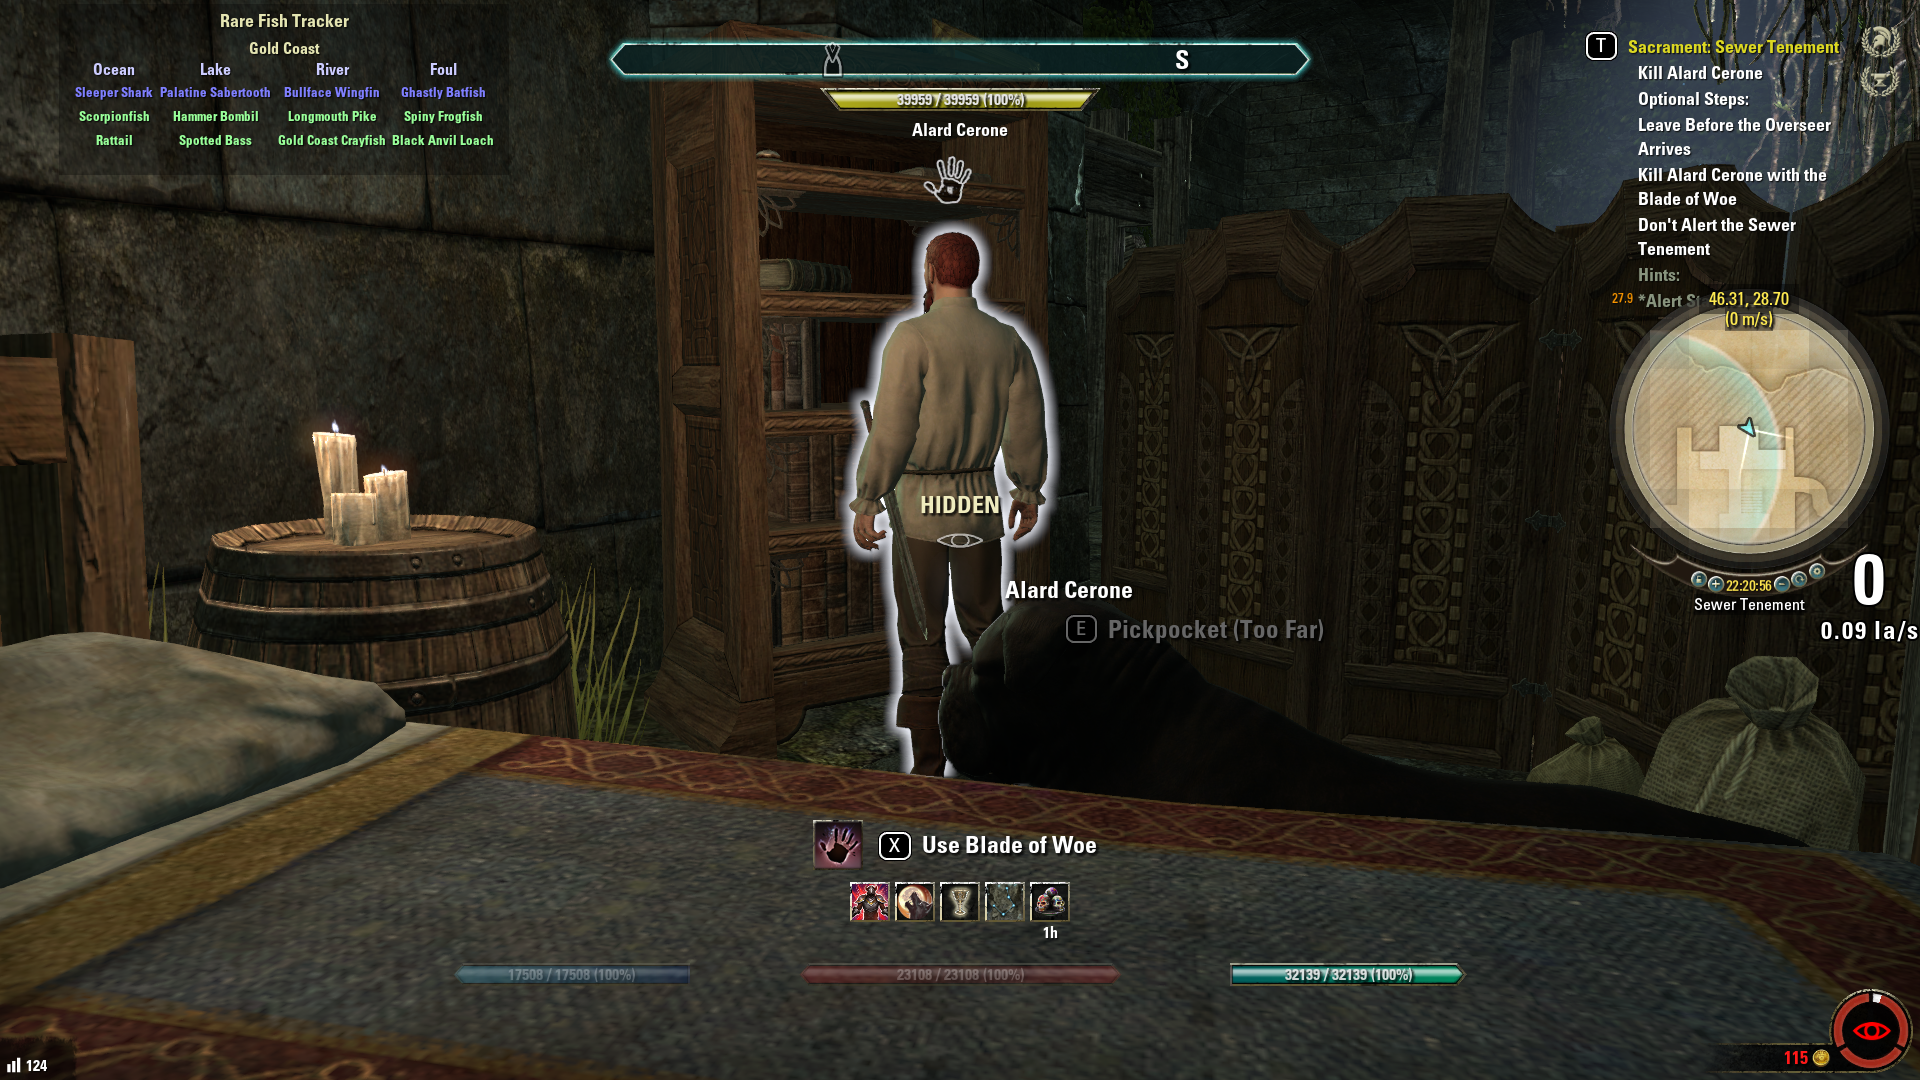
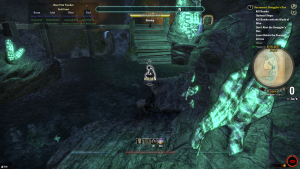
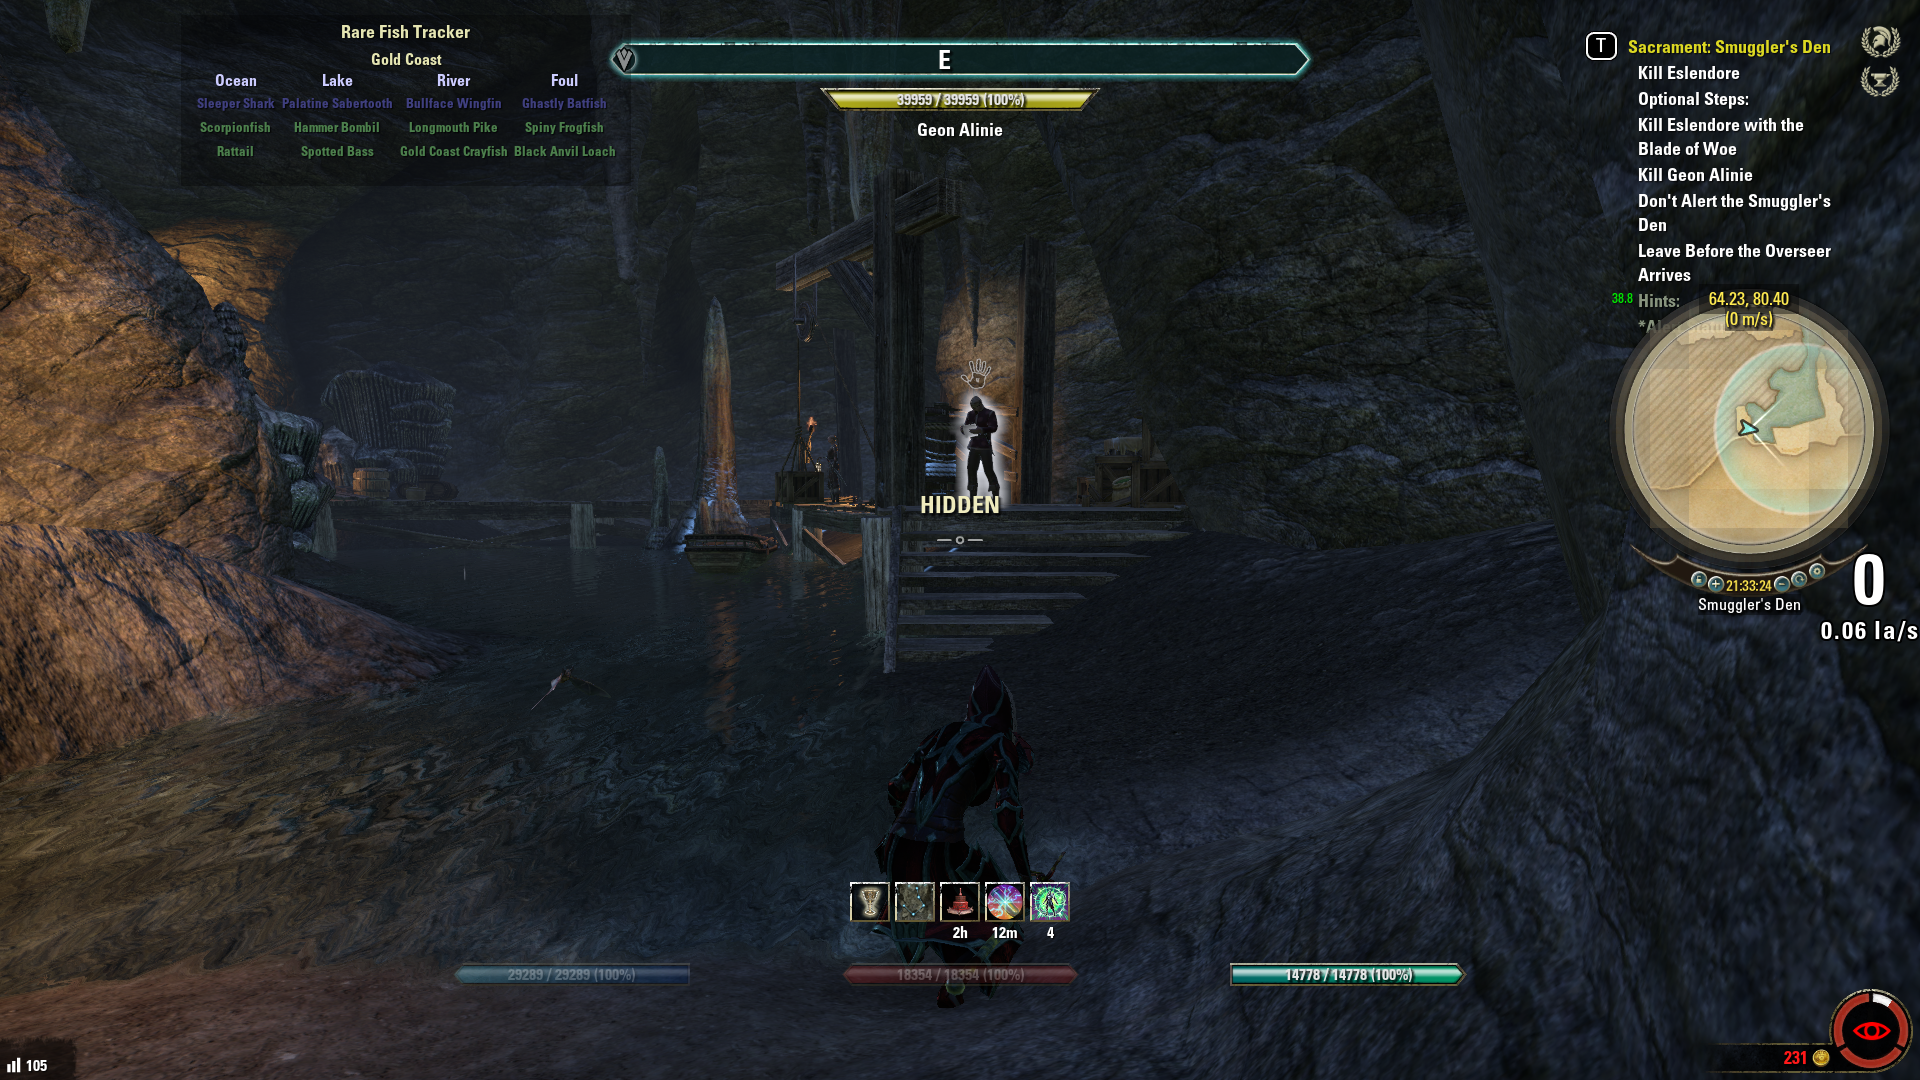
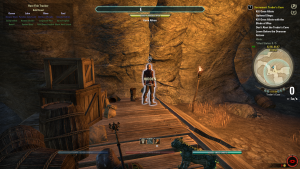
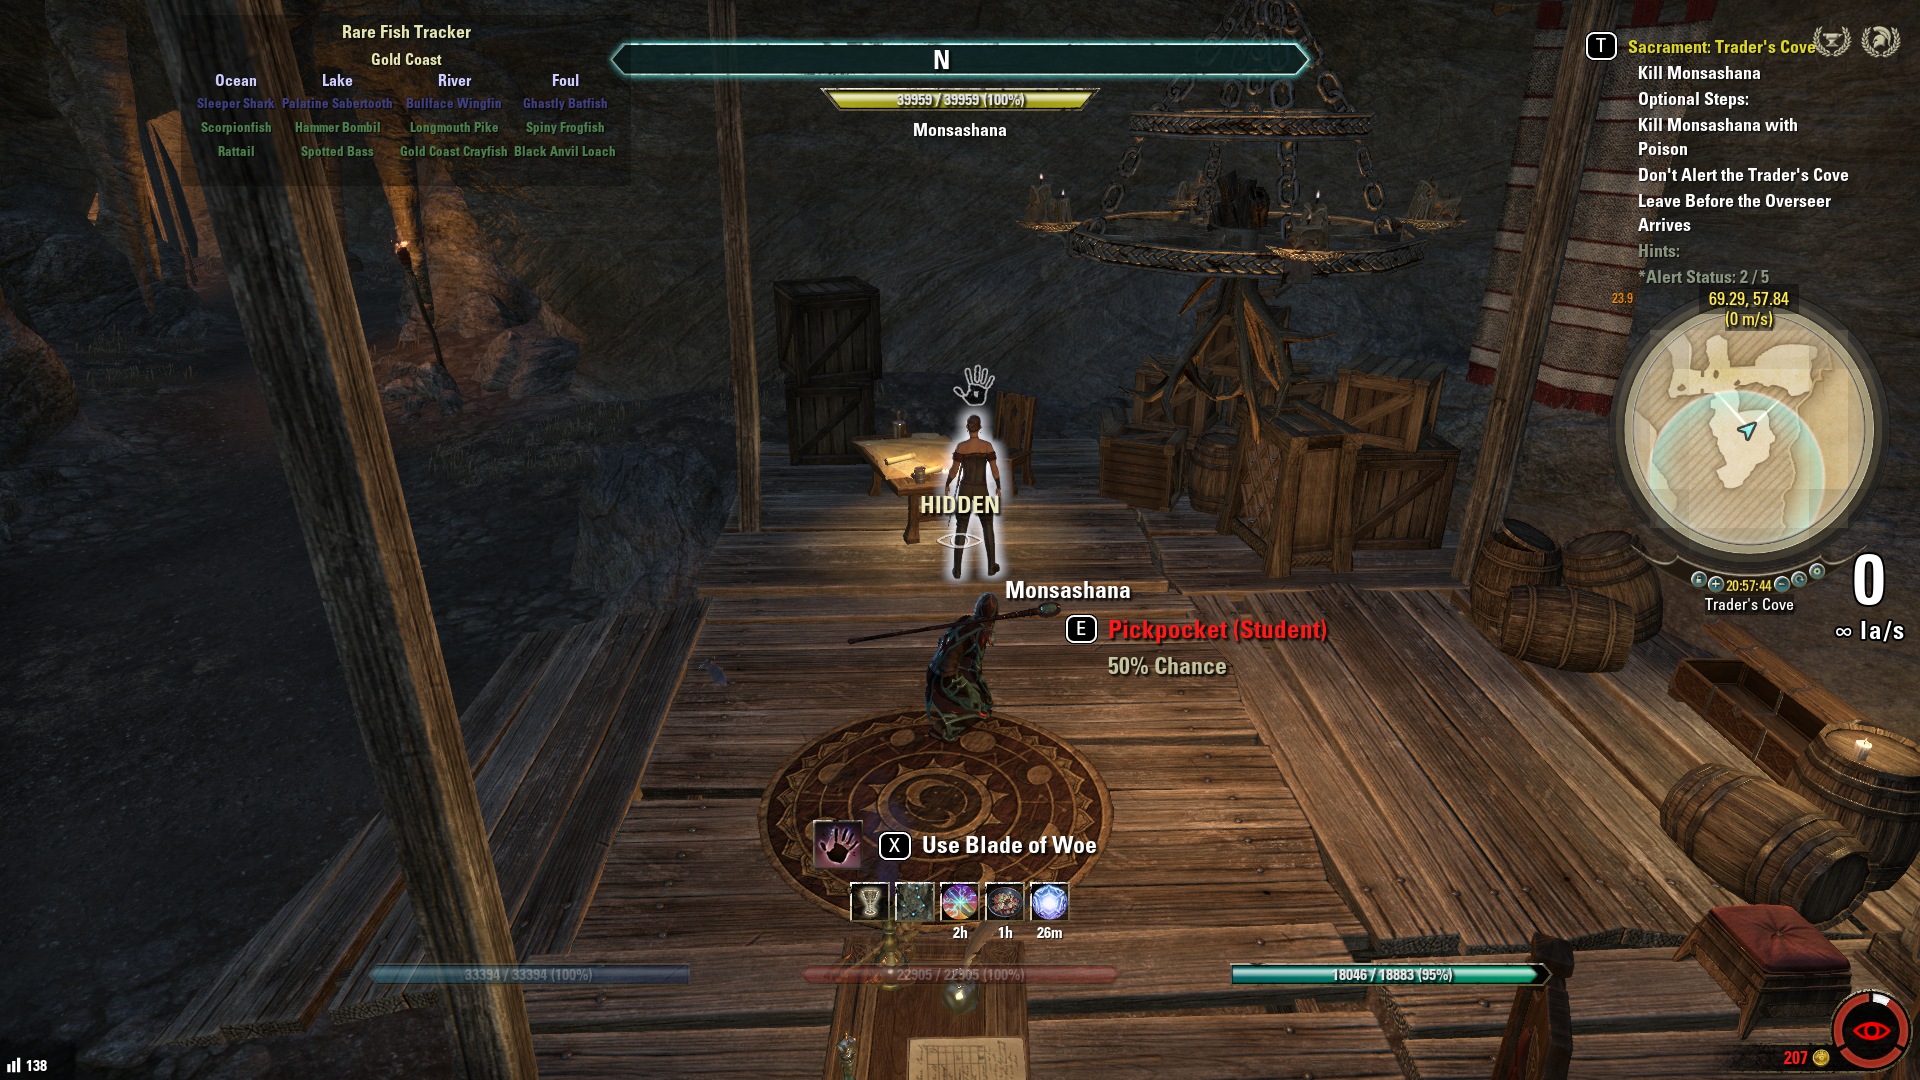
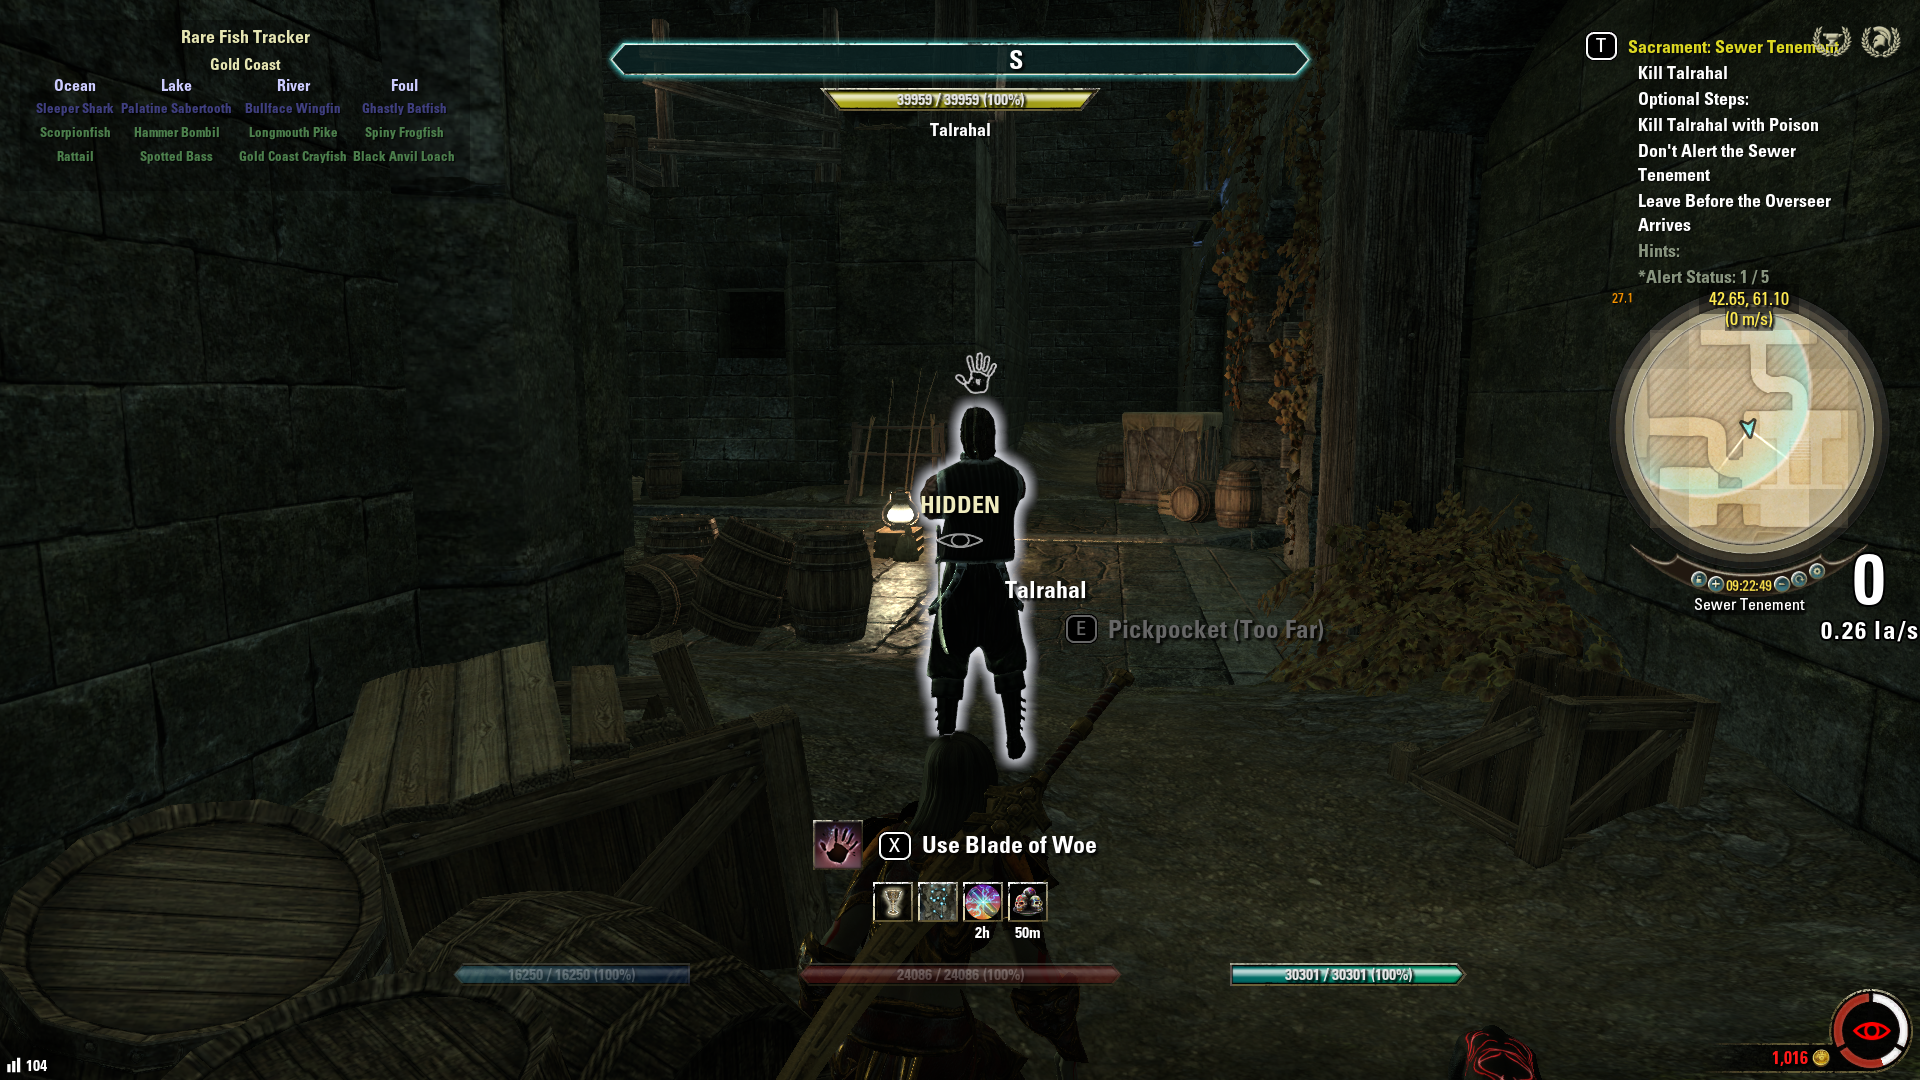
Blade of Woe vs. Poison: One of the extra challenges involves using either the Blade of Woe (which you receive when starting the Dark Brotherhood quest line) or Poison to kill your target. Using the Blade of Woe requires you to be crouched and hidden from your target. Once you are close enough you will see a prompt (“press X to use Blade of Woe”) and when you press the key a short animation shows you stealthily killing your target. Using Poison to kill your target only requires you to have any kind of poison equipped on your current weapon when you kill the target — even if you kill the target with the Blade of Woe.
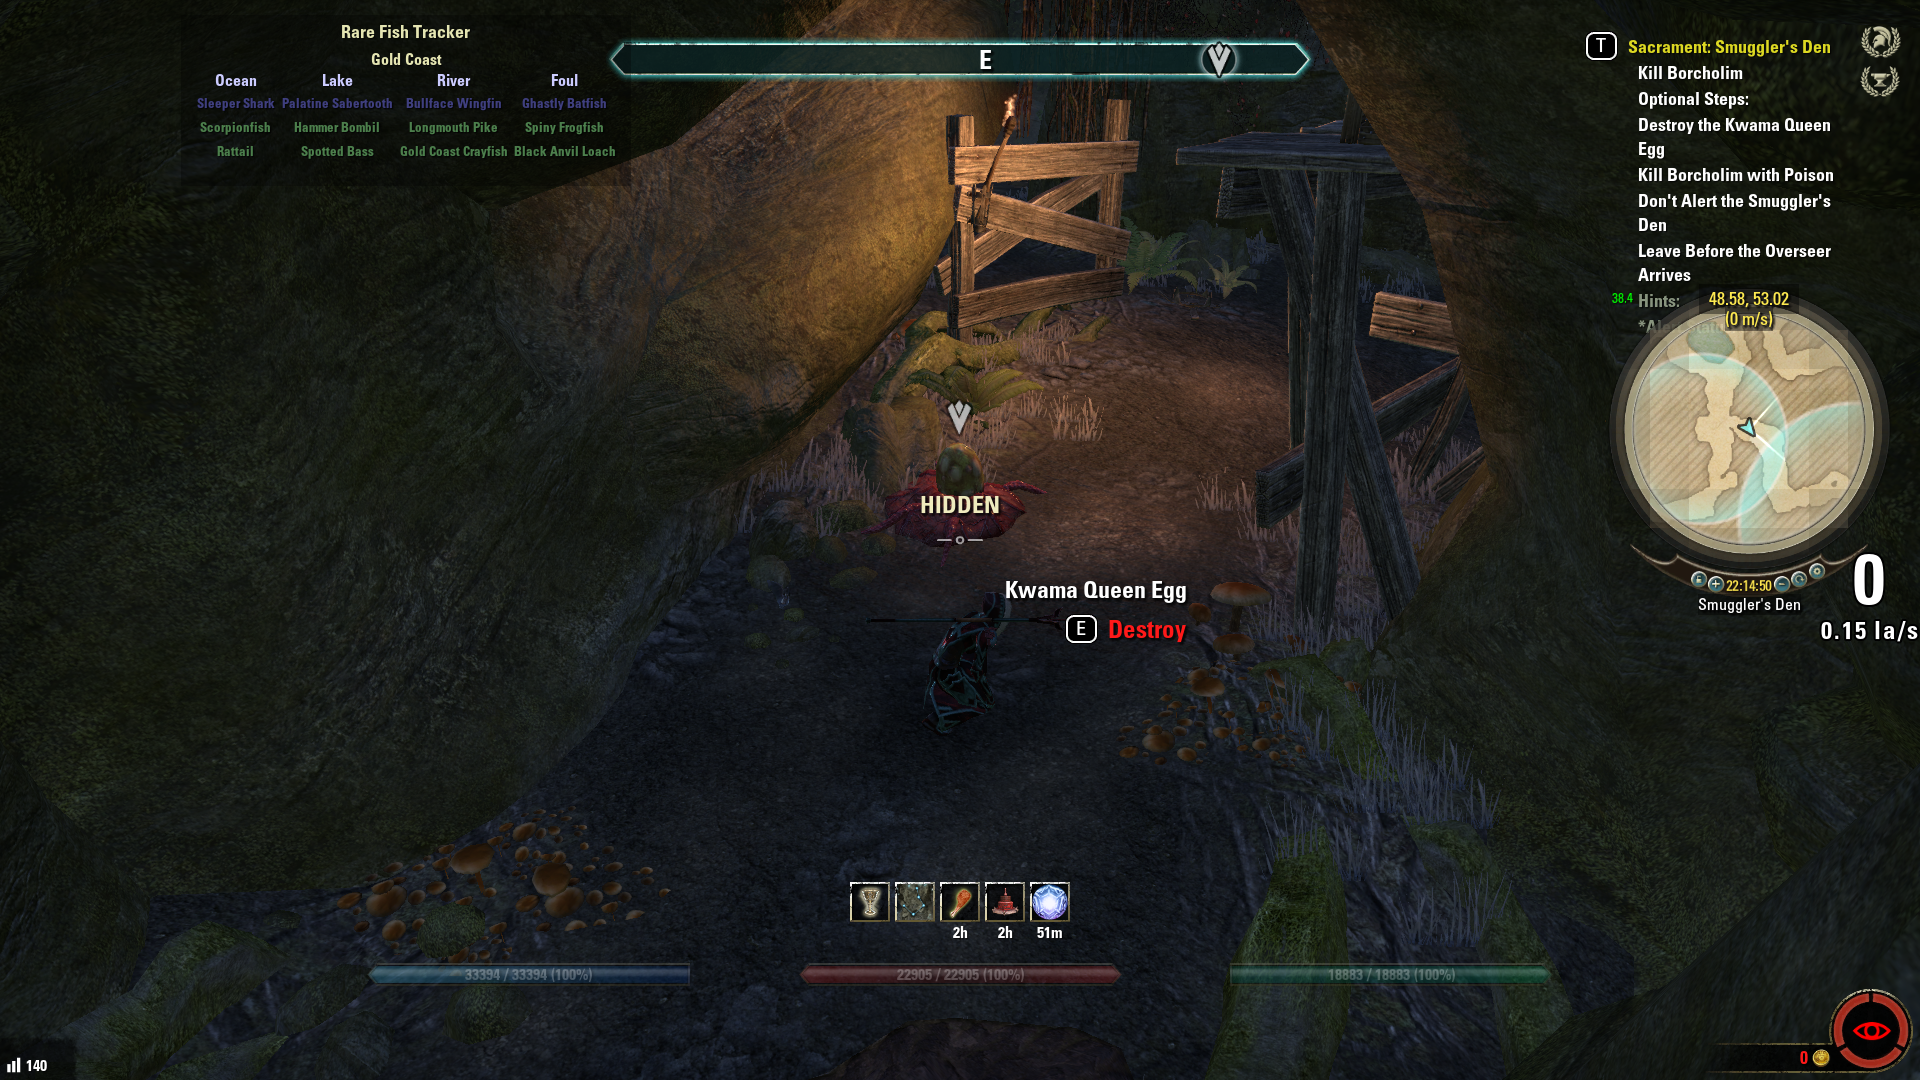
Secondary Target: You will always have a secondary target or objective to complete for each quest. This could be another named character in the same dungeon, or a specific artifact that must be destroyed, or a pet that must be killed. See the Secondary Target table below.
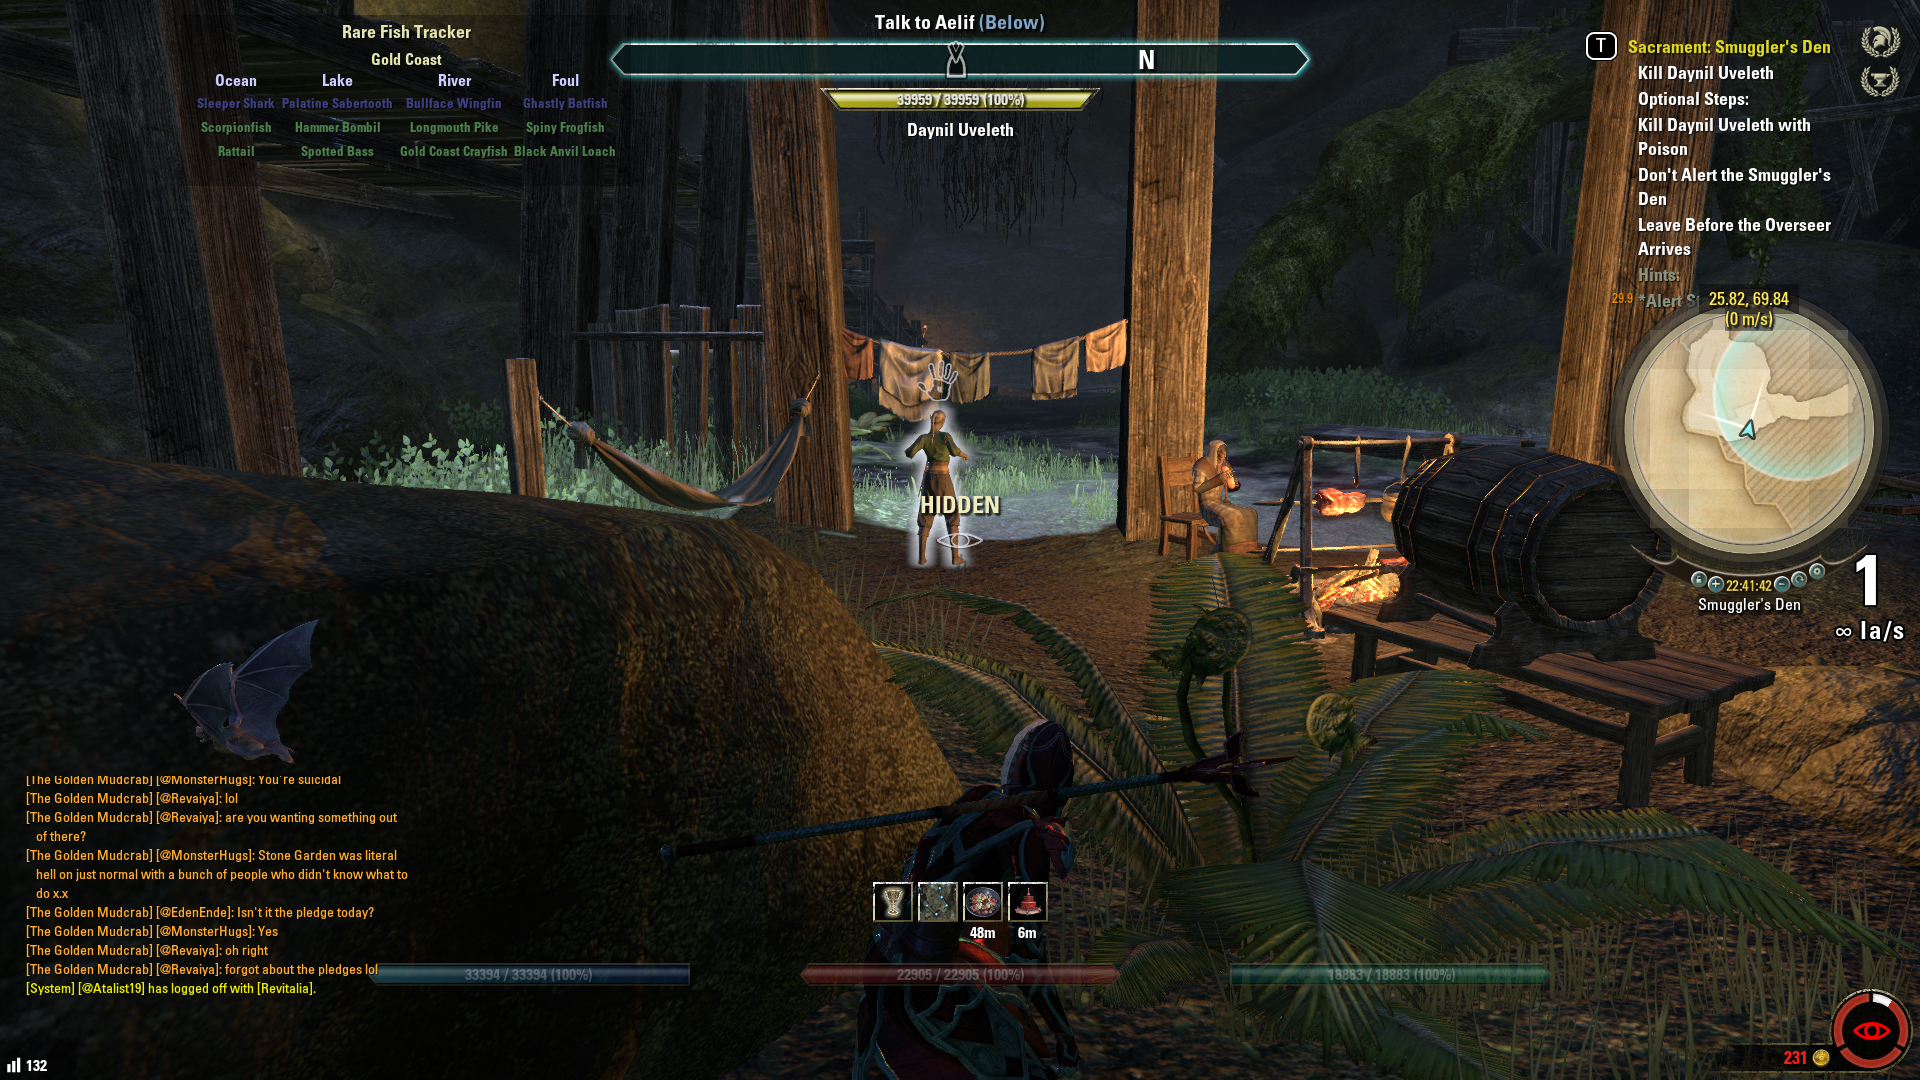
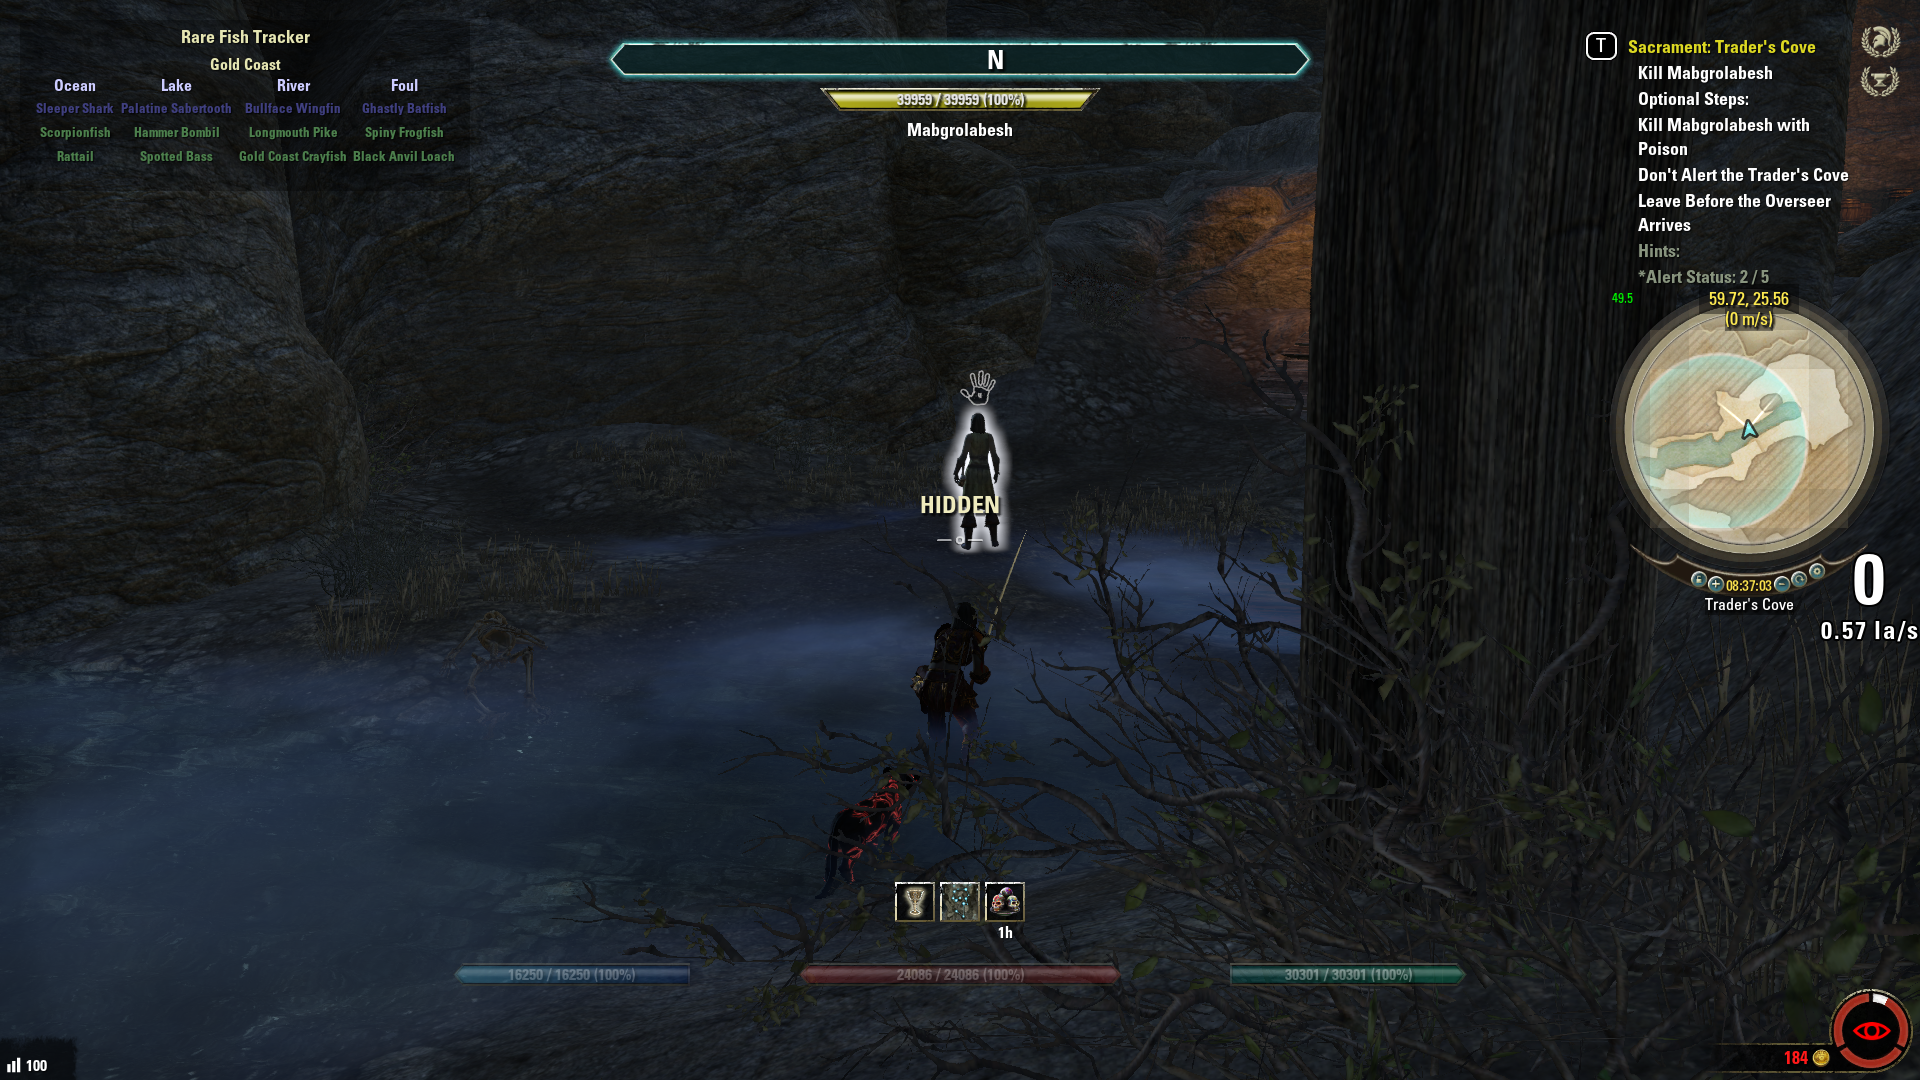
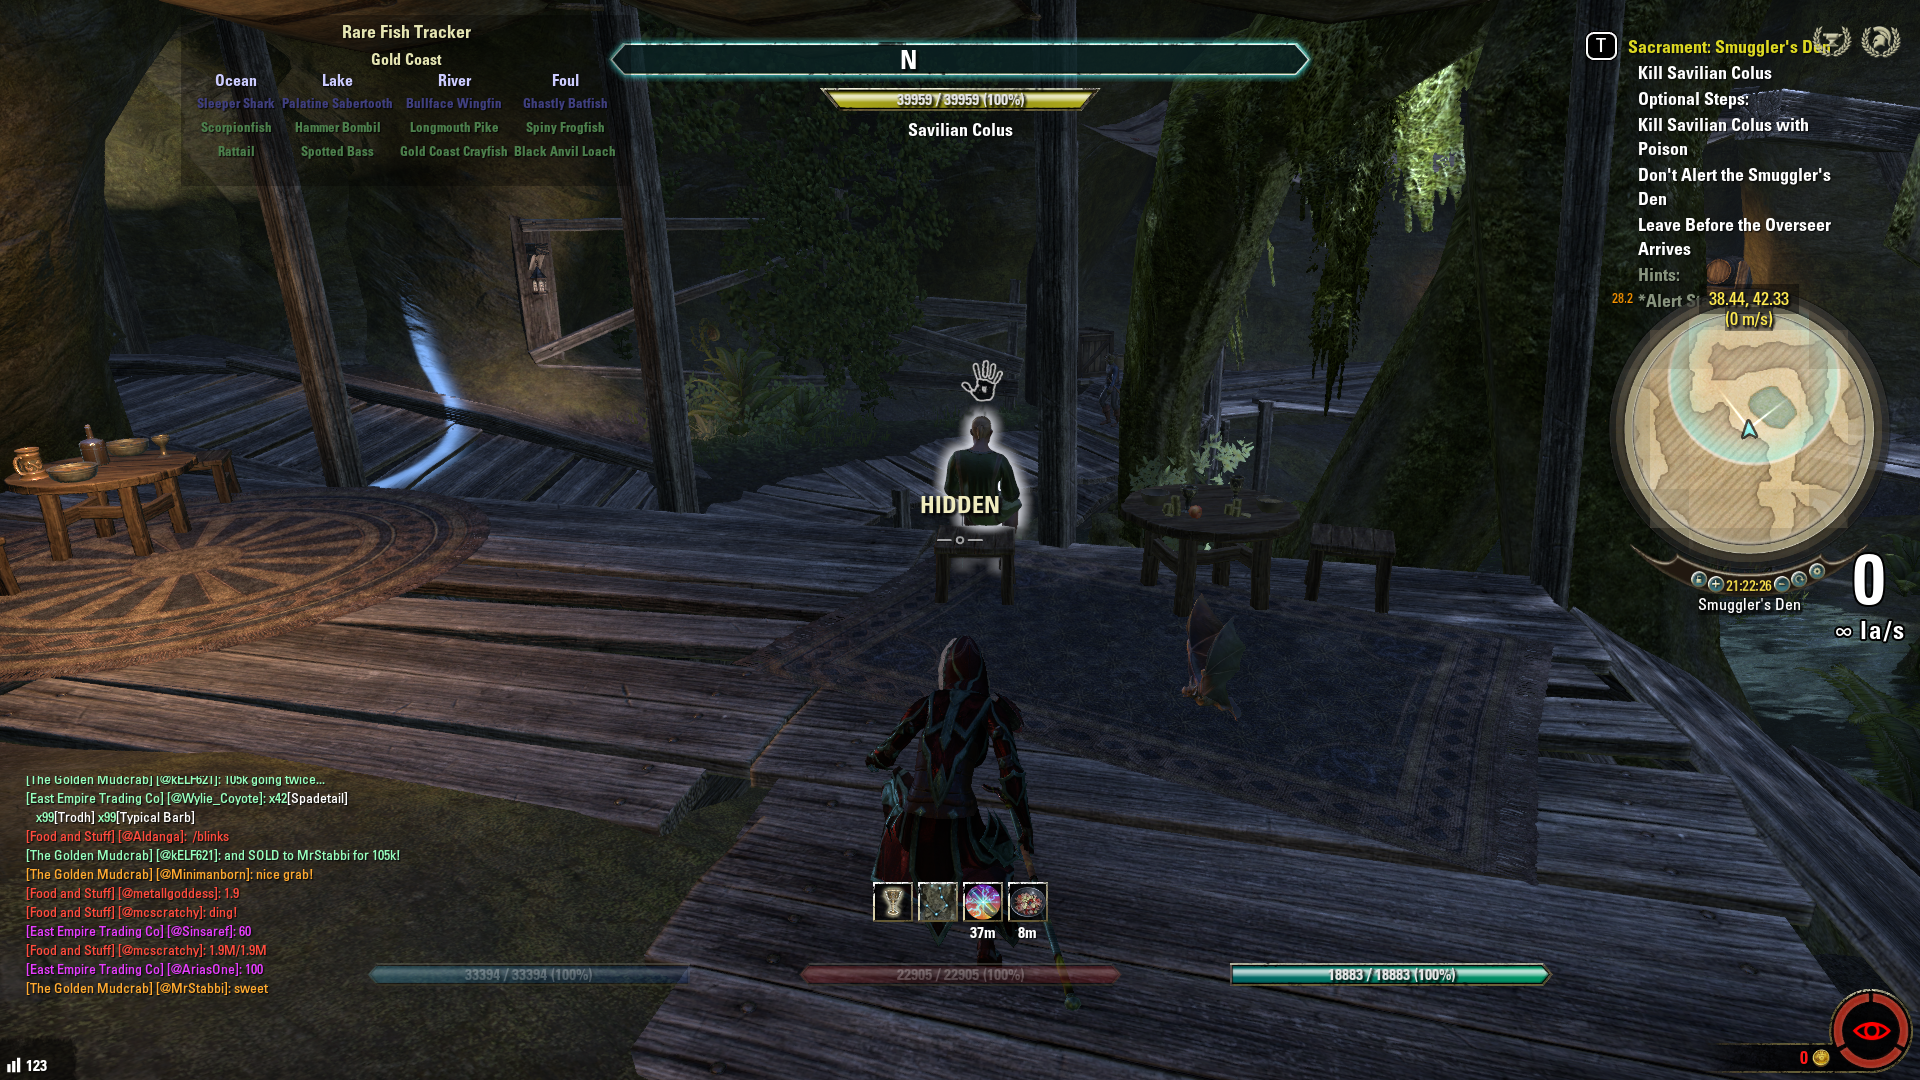
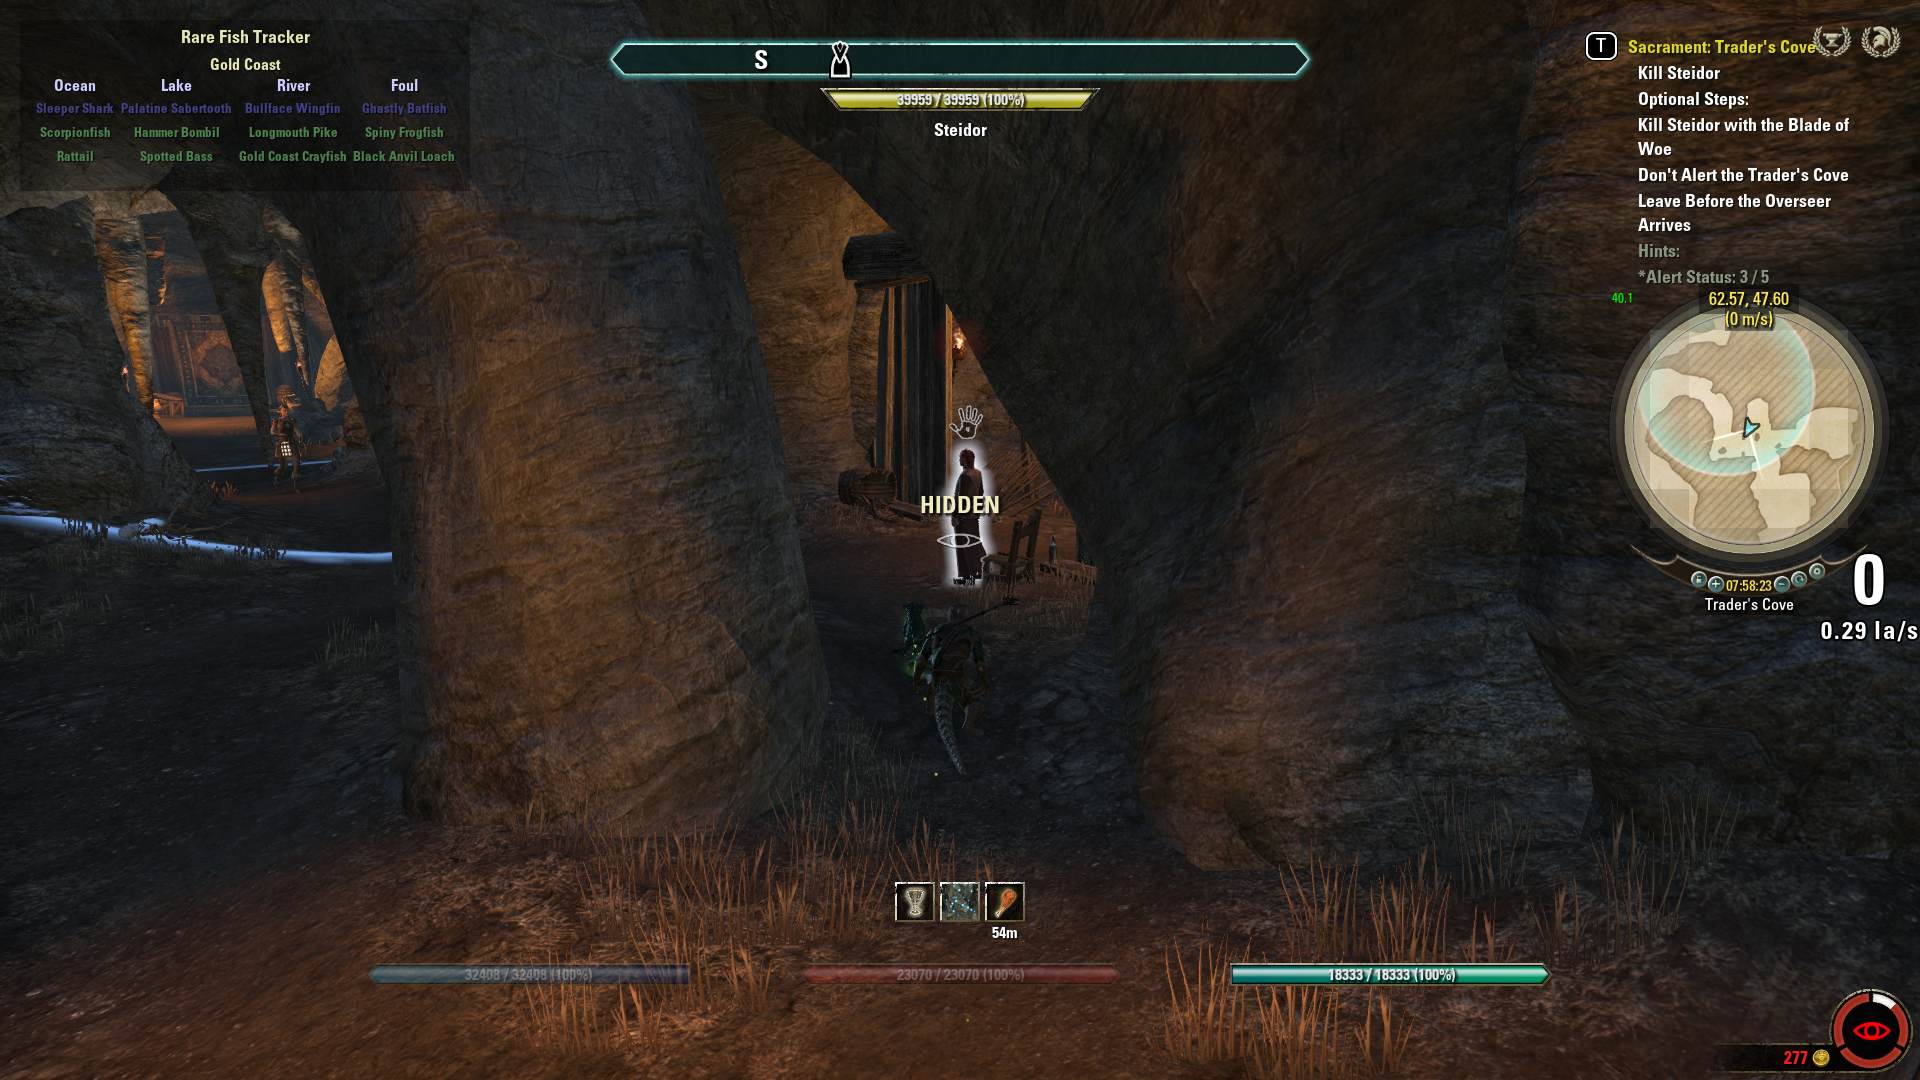
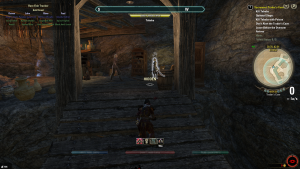
Leave Before the Overseer Arrives: Always kill your primary target last, because once you kill your primary target you will start a 2-minute timer. You must get to the exit area to stop the timer and achieve this objective. Note that you don’t actually have to leave within the time limit, just make sure you get to the exit/entrance. If you don’t make it in time, a large enemy appears near the entrance and begins stalking the dungeon looking for you.
Don’t Get Spotted: Speaker Terenus asks you to complete the quest without being seen, but what that really means is that if you are spotted 5 times (ie. “Detected” while sneaking, or killing someone) then you will lose this objective. You can safely be spotted 4 times without losing this objective. There is, however, an extra achievement for completing a Blackest Sacrament quest without being detected at all! Note that you can actually kill the Warden enemies — the ones who walk around with a lantern that interrupts your ability to stealth — without officially being detected so long as you kill them in 1 or 2 hits. It’s tricky to do, but since the Wardens can slow you down a lot, it can be helpful in getting you out of the dungeon much faster if you strategically kill a Warden or two.
SCHEDULE OF PRIMARY TARGETS
The Primary Target changes at 8PM and 2AM (confirmed by ESO wunderkind Benevolent Bowd. Thanks!), so there is a “Morning” schedule (2AM – 7:59PM) and an “Evening” schedule (8PM – 1:59AM) to the target list. The rotation is fixed, so it is the same for everyone, and just keeps looping around. Targets followed by (P) require you to use poison to kill them, otherwise you will need to use the Blade of Woe. If you look closely, you can see that the schedule is the same, just shifted by 6 days. The quests always cycle through the three dungeons and the 21 targets in the following order:
| DUNGEON | MORNING SCHEDULE | EVENING SCHEDULE |
|---|---|---|
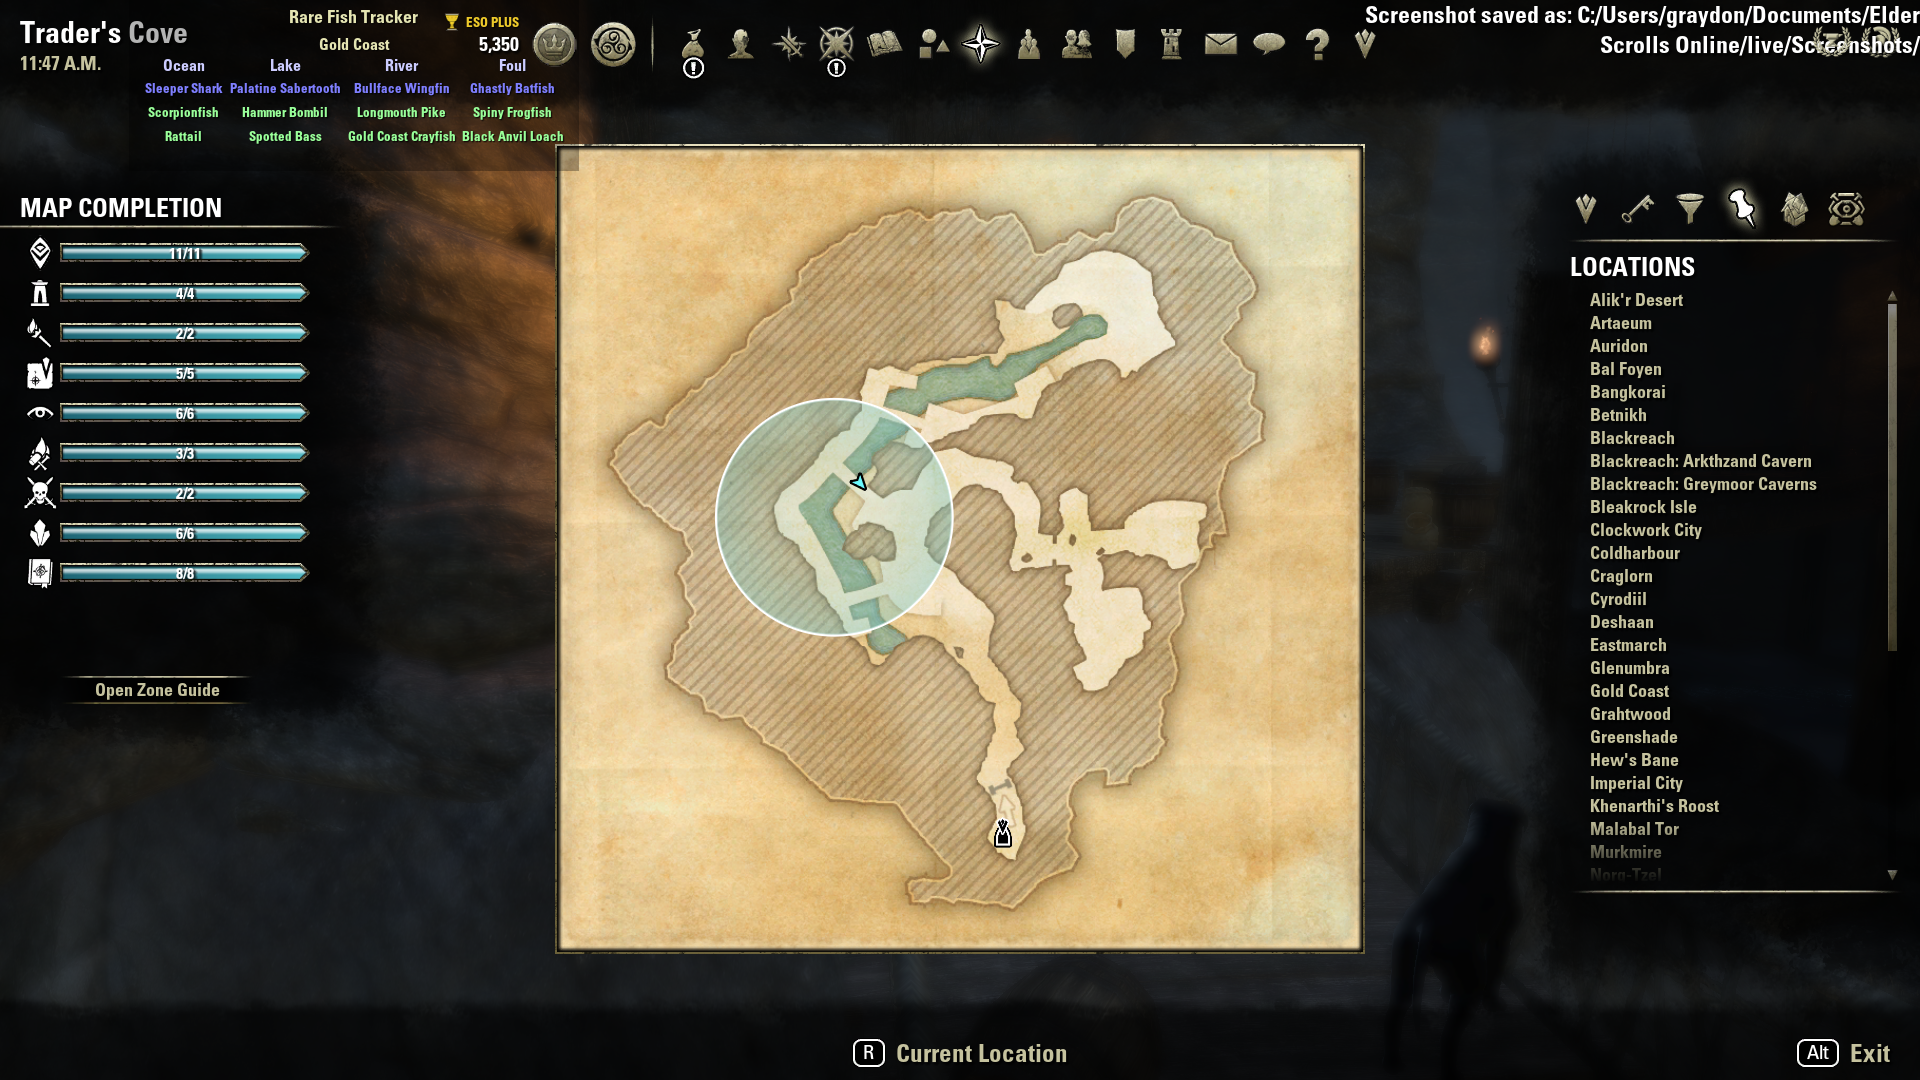
| Trader’s Cove | Tebeba (P) | Nalosi Orethi |
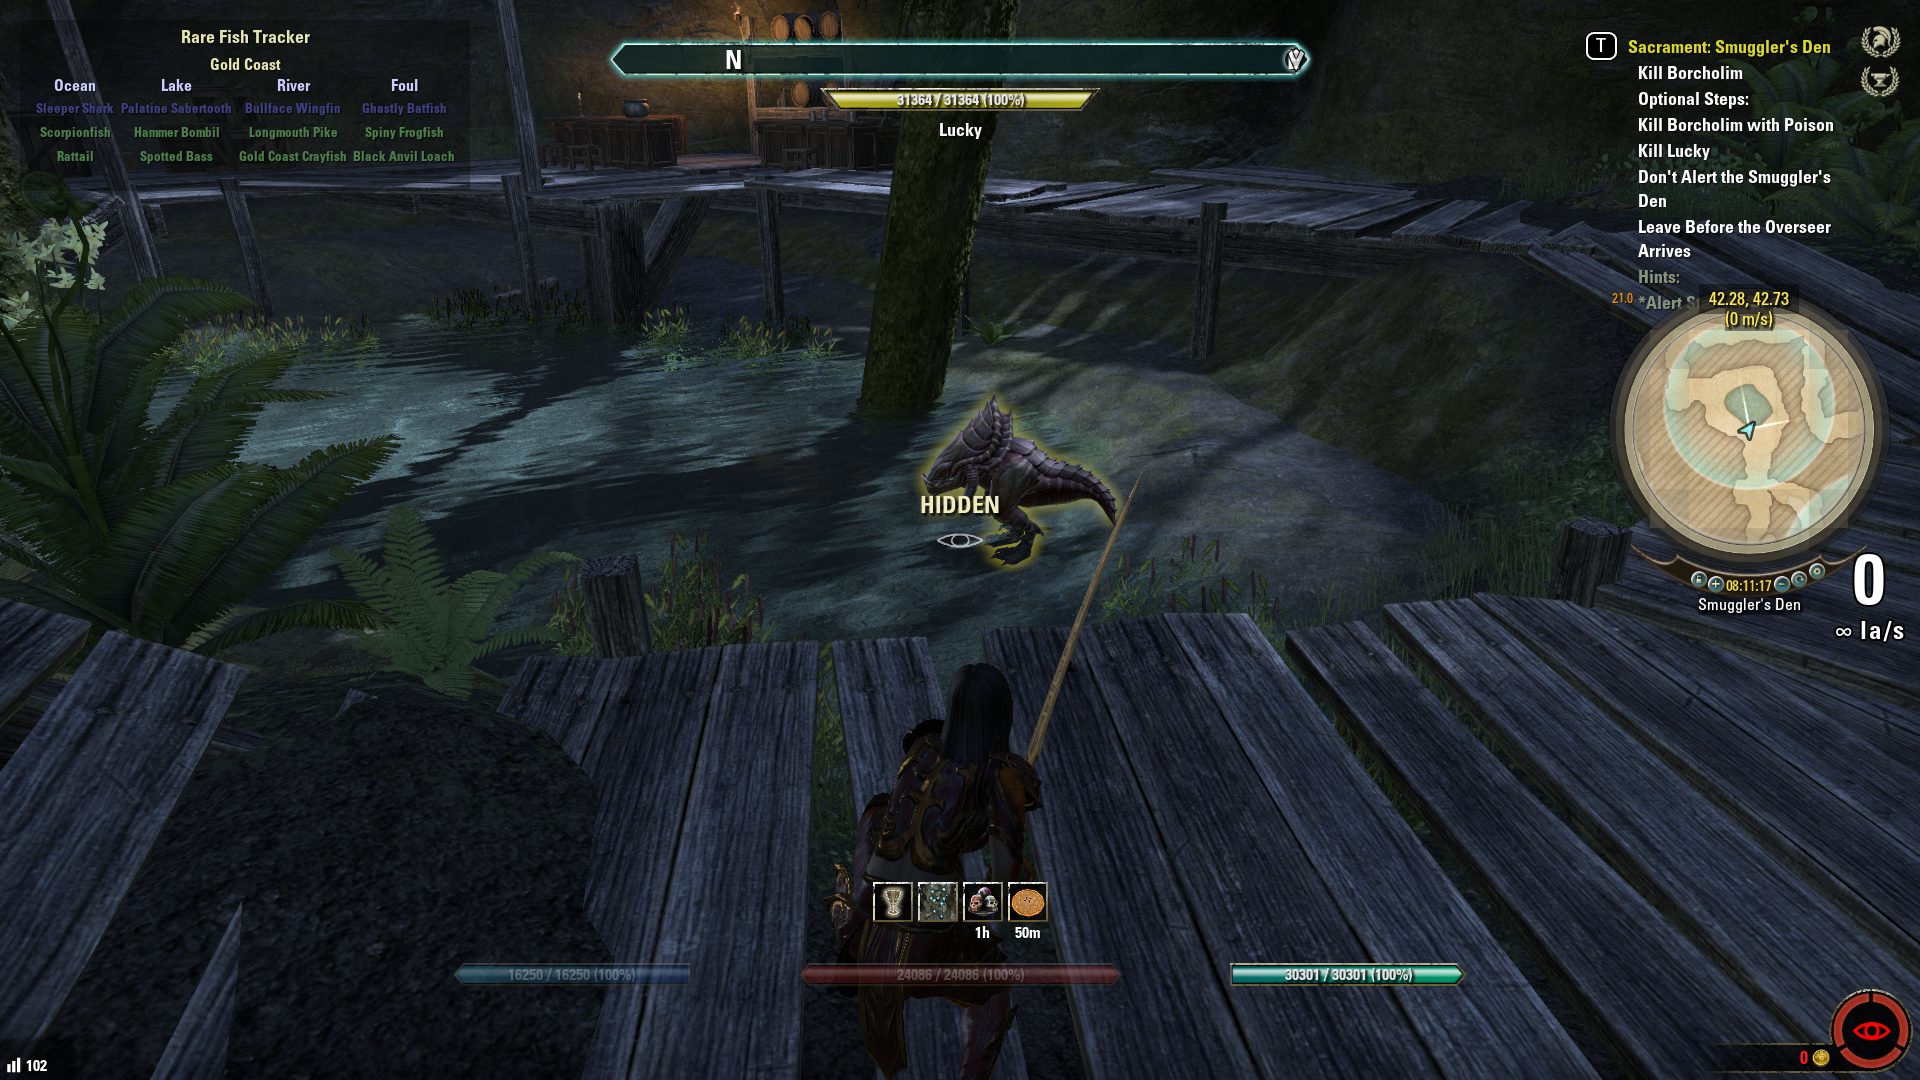
| Smuggler’s Den | Brunka | Borcholim (P) |
| Sewer Tenement | Andilo Andrano (P) | Herminius Andus |
| Trader’s Cove | Steidor | Monsashana (P) |
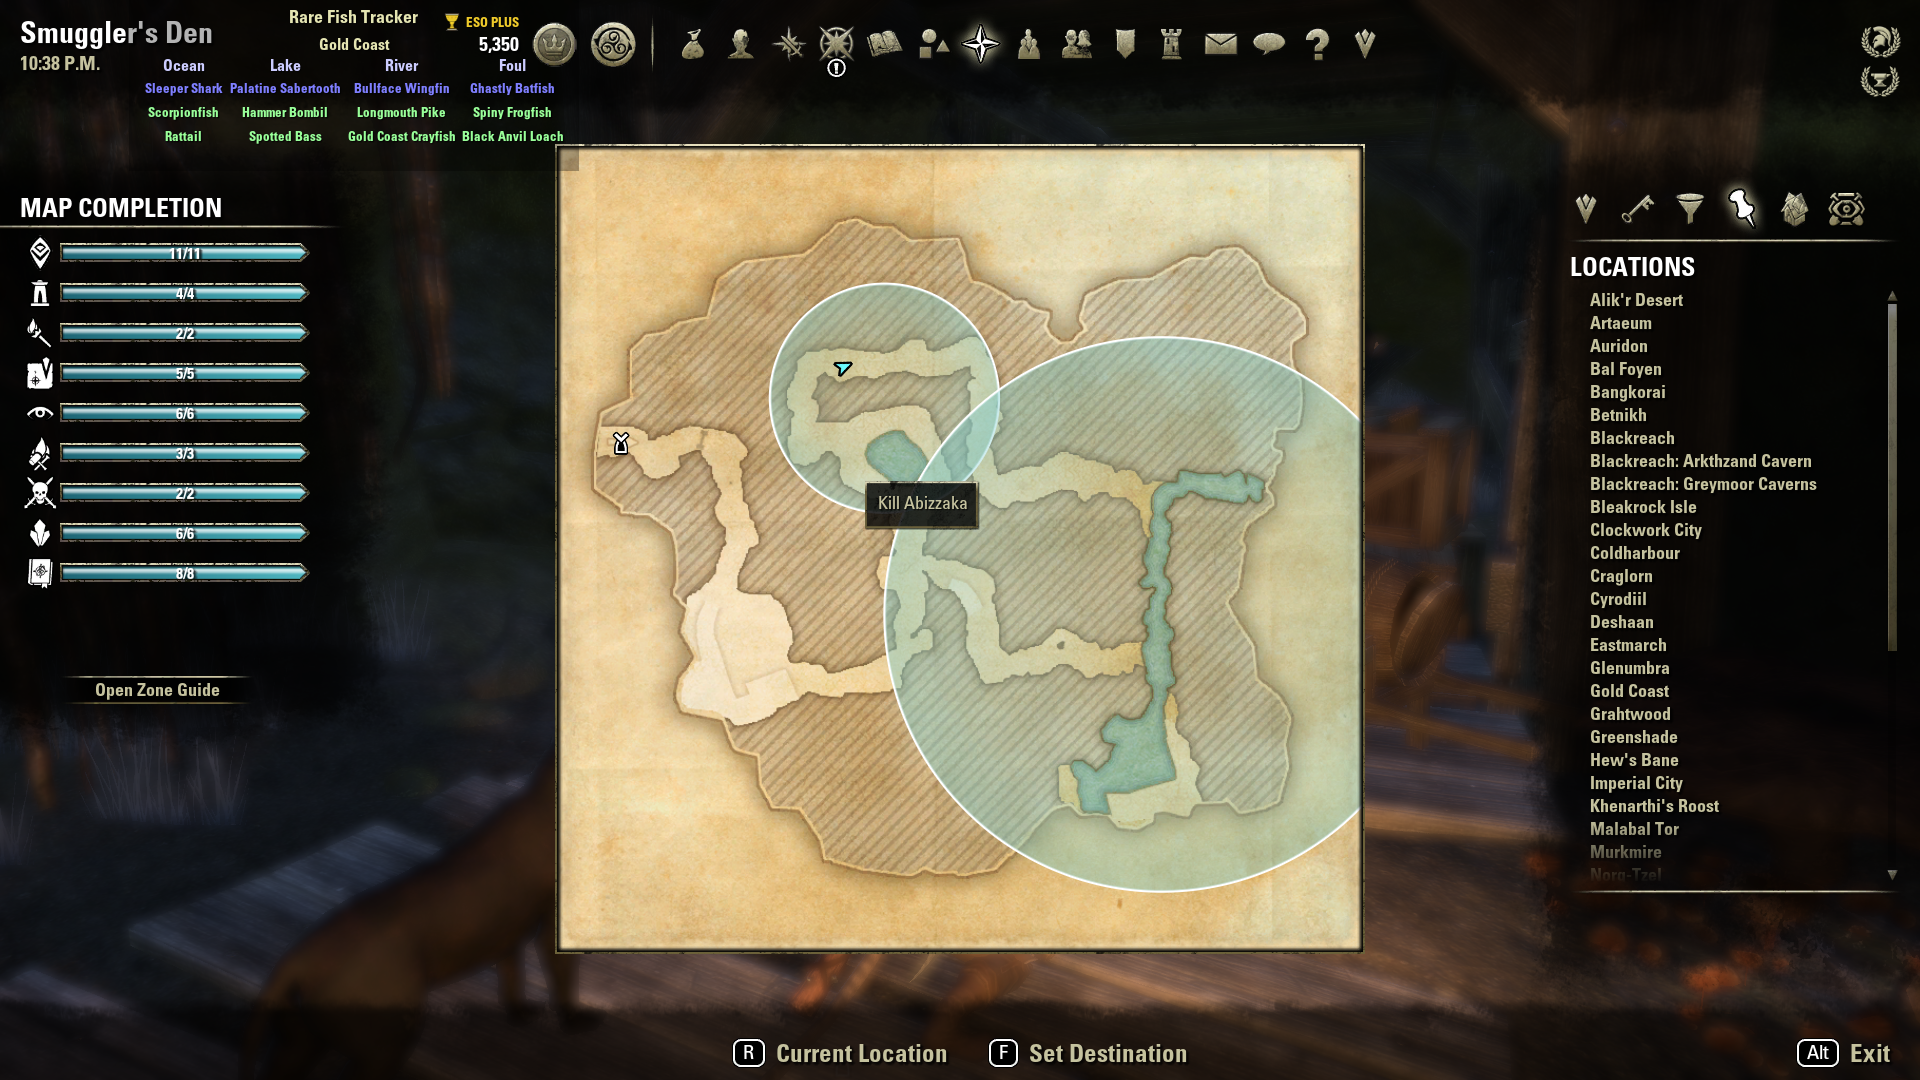
| Smuggler’s Den | Abizzaka (P) | Savilian Colus (P) |
| Sewer Tenement | Talrahal (P) | Alard Cerone |
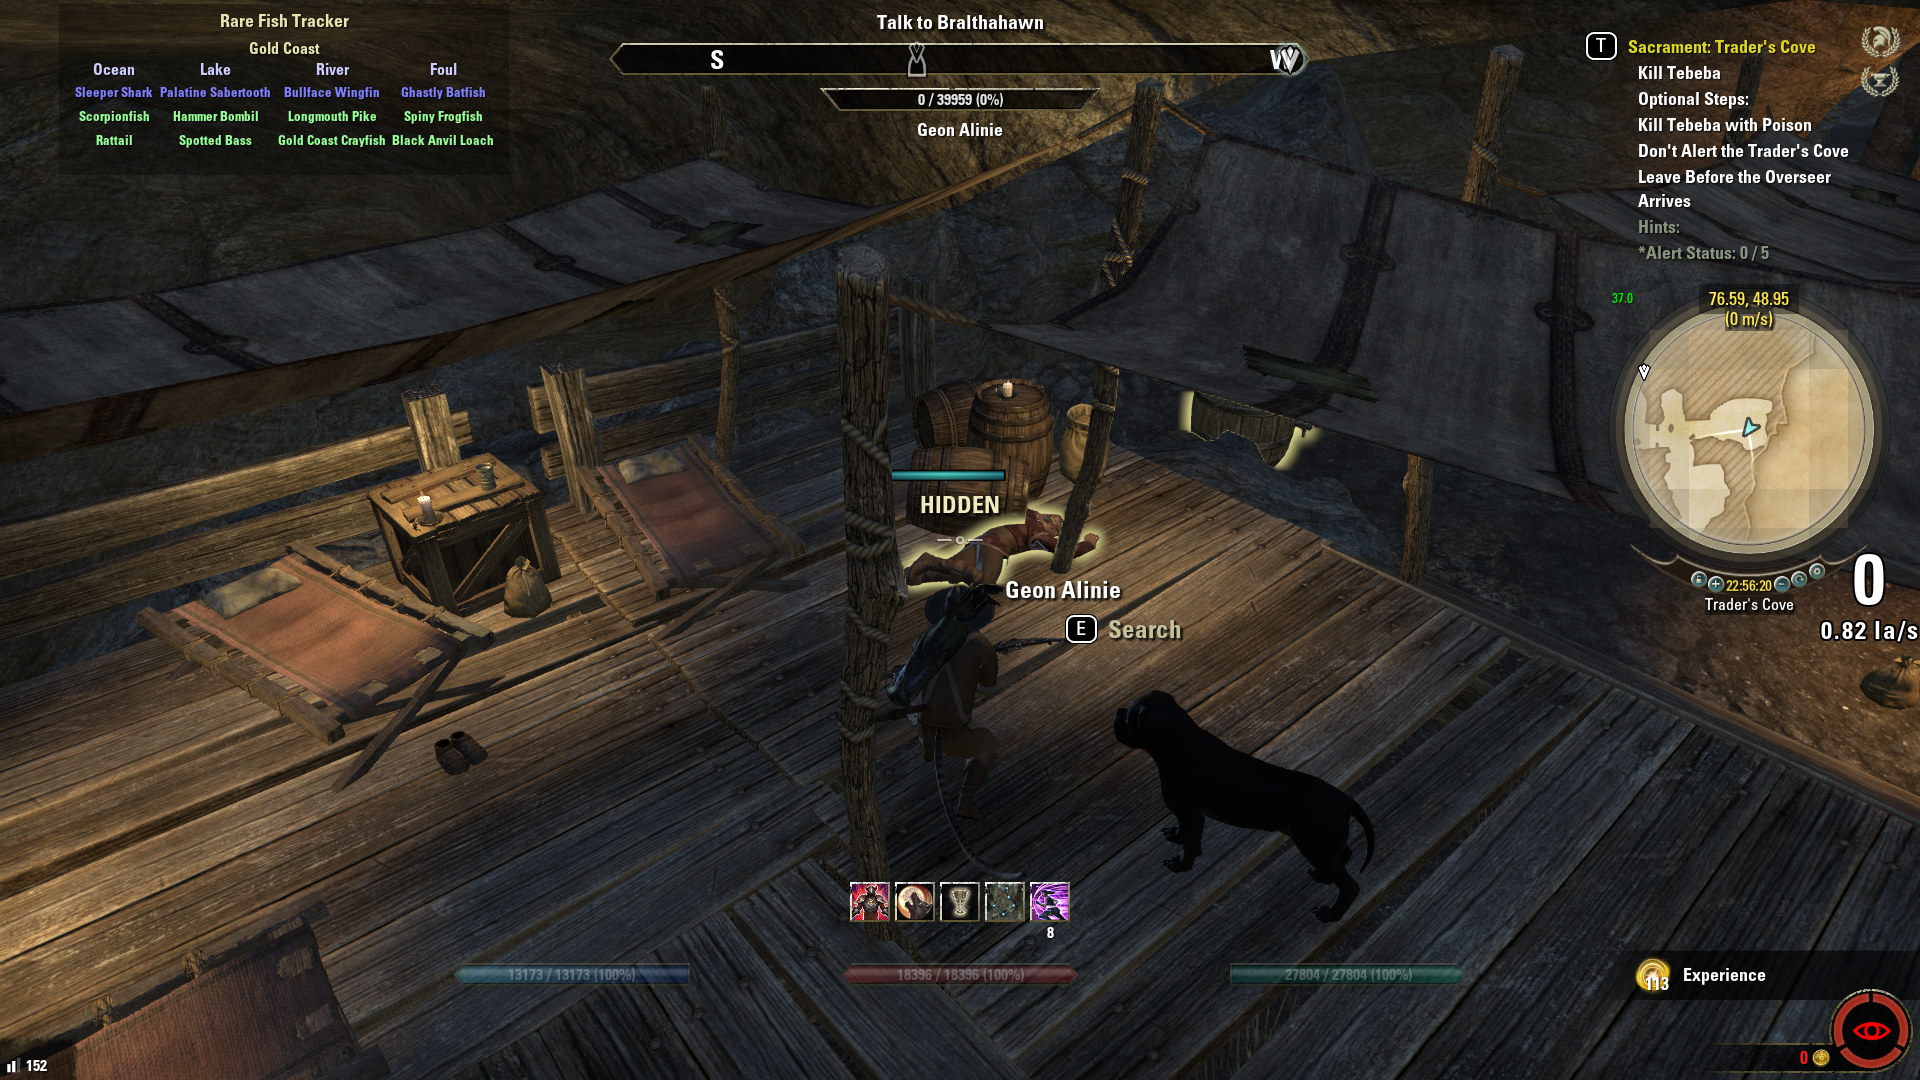
| Trader’s Cove | Geon Alinie | Tebeba (P) |
| Smuggler’s Den | Daynil Uveleth (P) | Brunka |
| Sewer Tenement | Aojee-Ei | Andilo Andrano (P) |
| Trader’s Cove | Mabgrolabesh (P) | Steidor |
| Smuggler’s Den | Eslendore | Abizzaka (P) |
| Sewer Tenement | Lamzakha (P) | Talrahal (P) |
| Trader’s Cove | Rinweril (P) | Geon Alinie |
| Smuggler’s Den | Bur-Waska | Daynil Uveleth (P) |
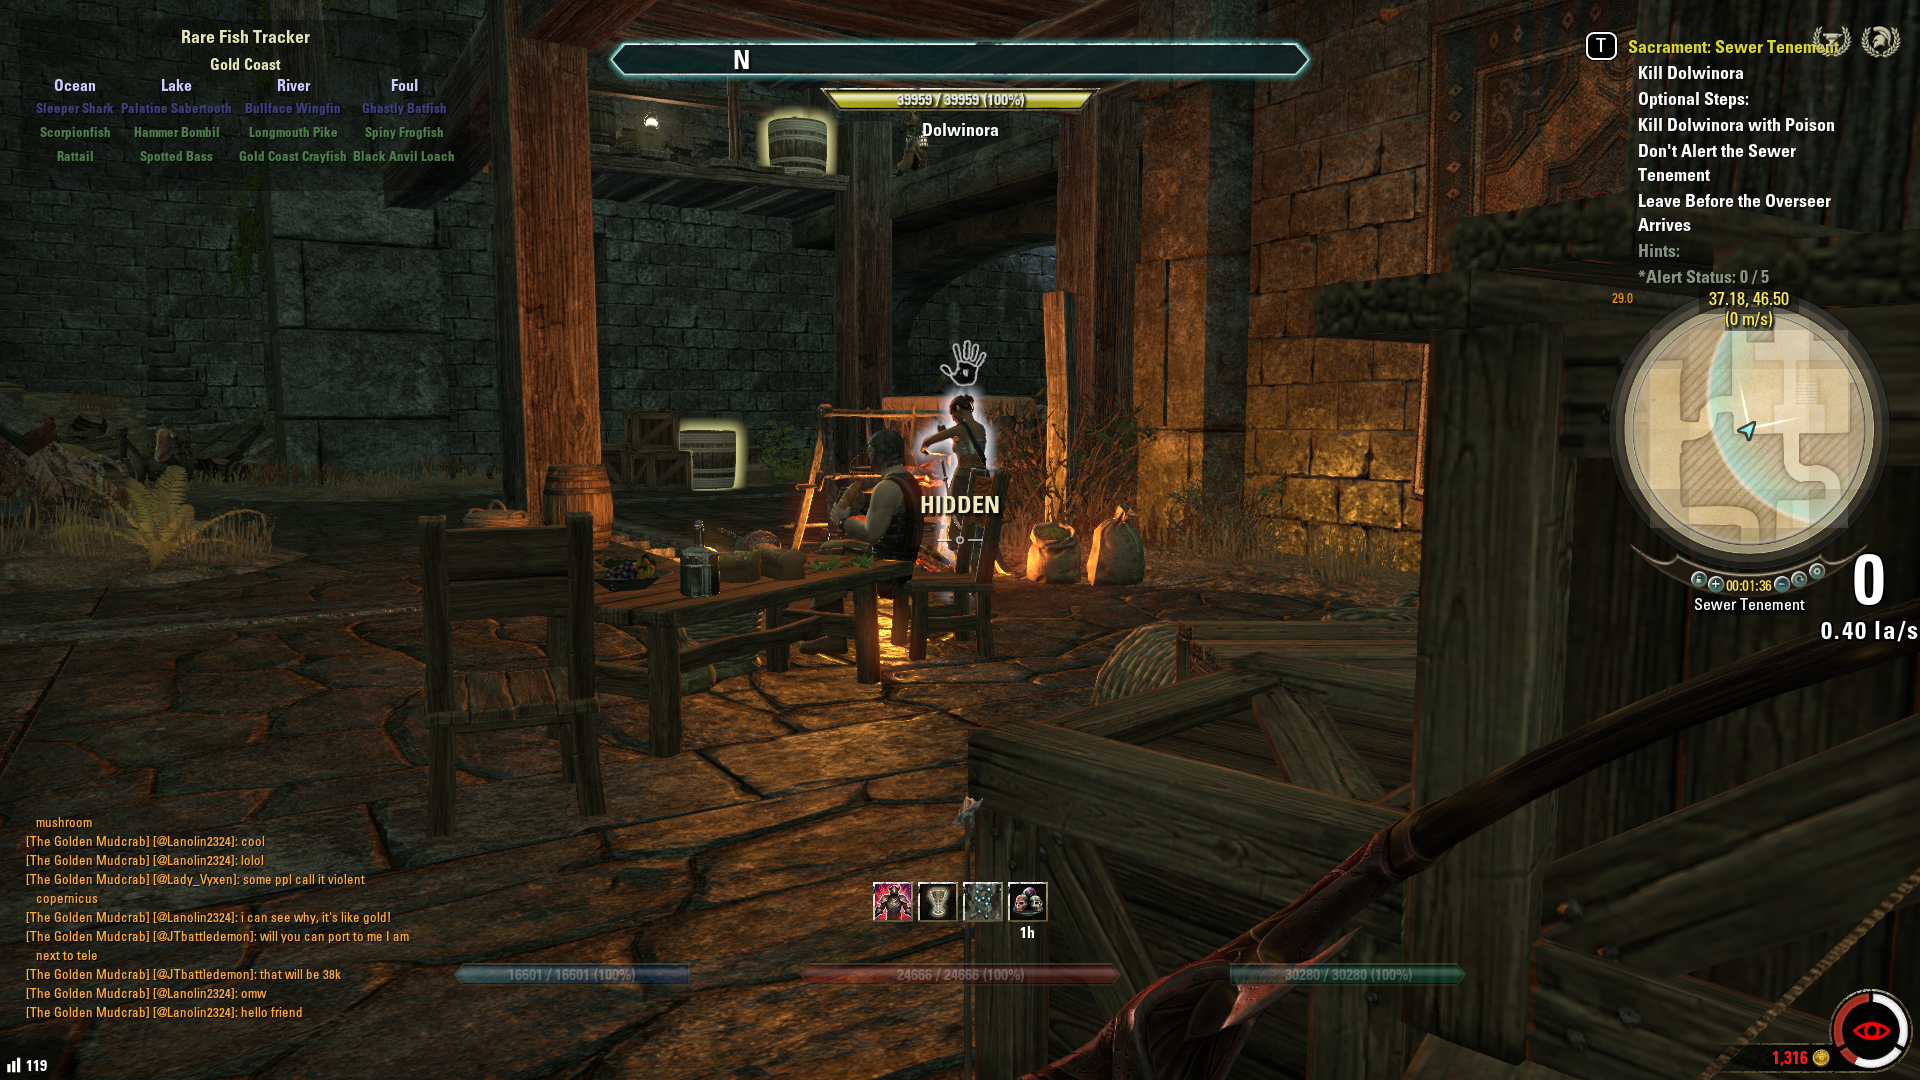
| Sewer Tenement | Dolwinora (P) | Aojee-Ei |
| Trader’s Cove | Nalosi Orethi | Mabgrolabesh (P) |
| Smuggler’s Den | Borcholim (P) | Eslendore |
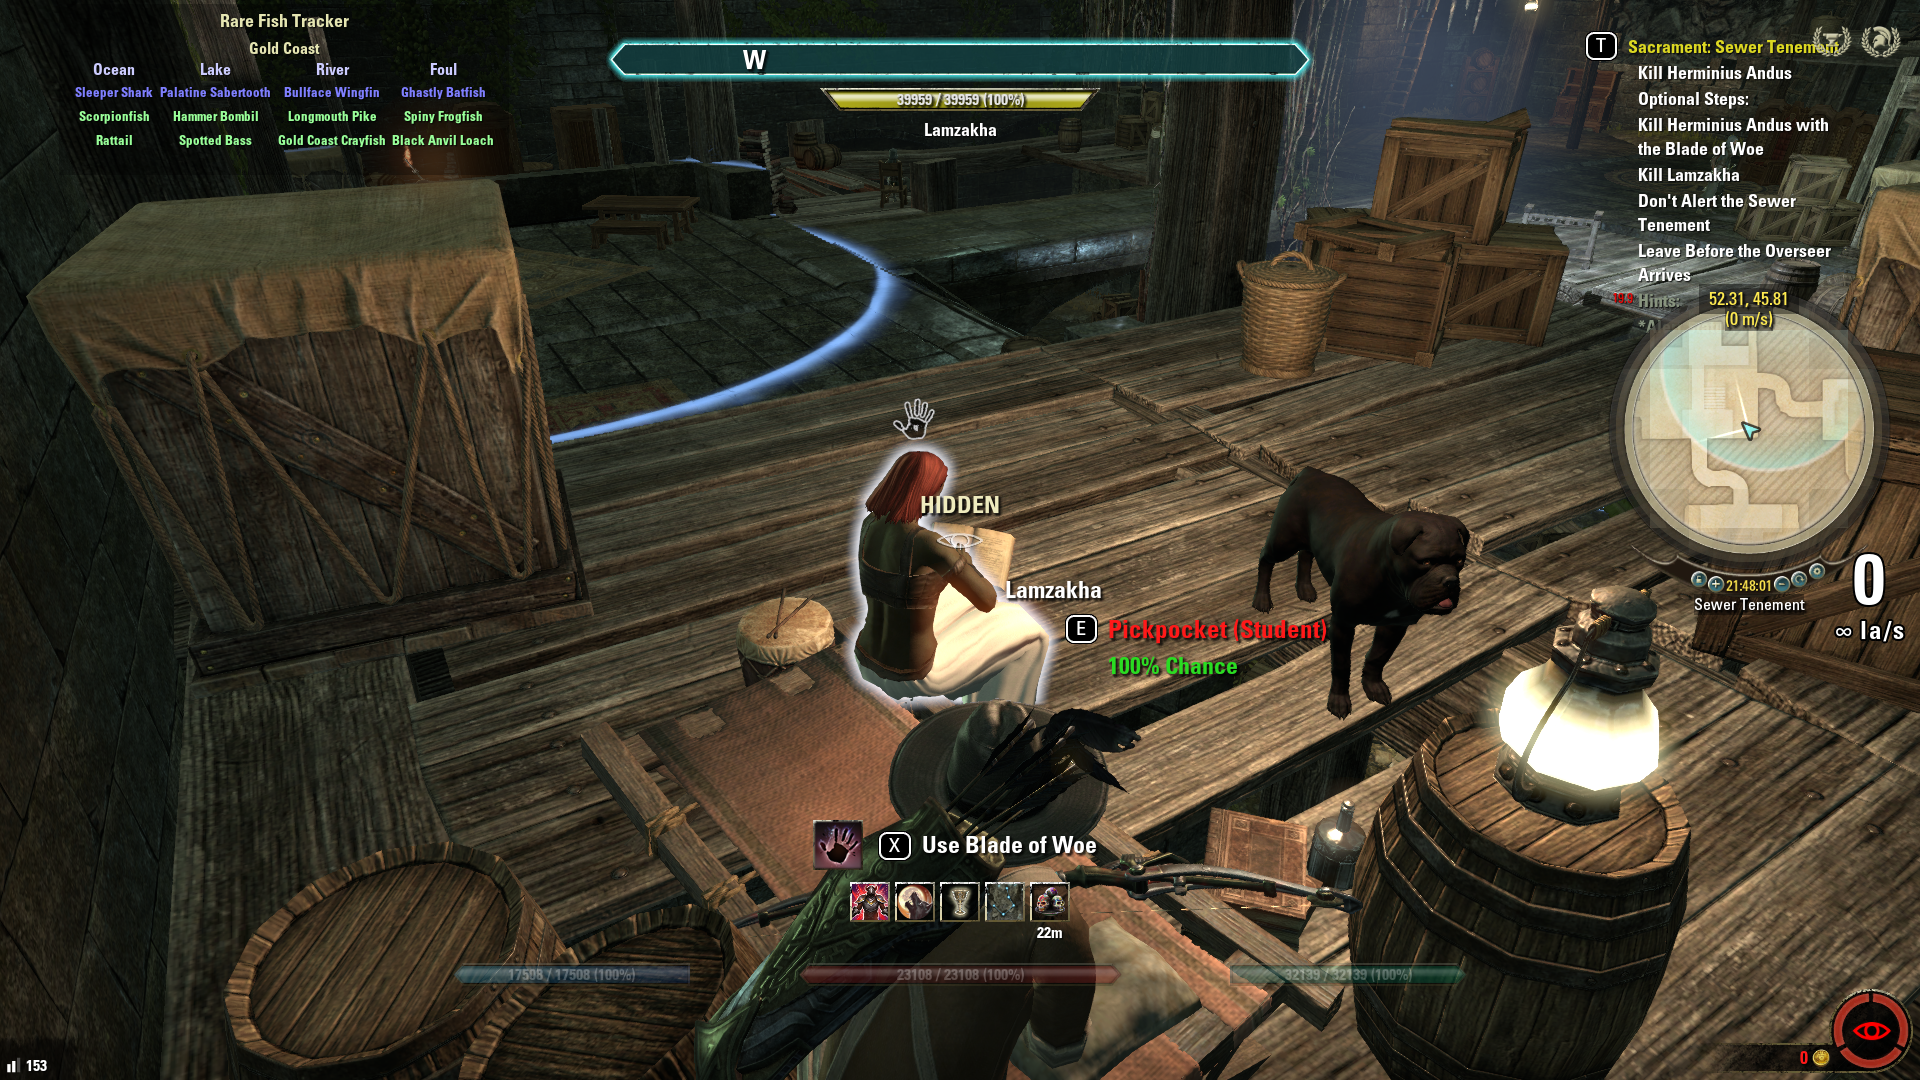
| Sewer Tenement | Herminius Andus | Lamzakha (P) |
| Trader’s Cove | Monsashana (P) | Rinweril (P) |
| Smuggler’s Den | Savilian Colus (P) | Bur-Waska |
| Sewer Tenement | Alard Cerone | Dolwinora (P) |
SCHEDULE OF SECONDARY TARGETS
The Secondary Target cycles through 9 targets/objectives, but each target has an alternate for a total of 18 possible Secondary Targets. Killing a named Secondary Target does count toward the achievement! You will see the following pattern in Secondary Targets:
| DUNGEON | SECONDARY TARGET #1 | SECONDARY TARGET #2 |
|---|---|---|
| Trader’s Cove | Destroy the Engraved Flute | Destroy the Special Mead Formula |
| Smuggler’s Den | Destroy the Kwama Queen Egg | Destroy the Important Documents |
| Sewer Tenement | Destroy the Custom-made Hookah | Destroy the Dwarven Relic |
| Trader’s Cove | Geon Alinie | Tebeba |
| Smuggler’s Den | Geon Alinie | Lucky* |
| Sewer Tenement | Herminius Andus | Andilo Andrano |
| Trader’s Cove | Monsashana | Nalosi Orethi |
| Smuggler’s Den | Bur-Waska | Savilian Colus |
| Sewer Tenement | Aojee-Ei | Lamzakha |
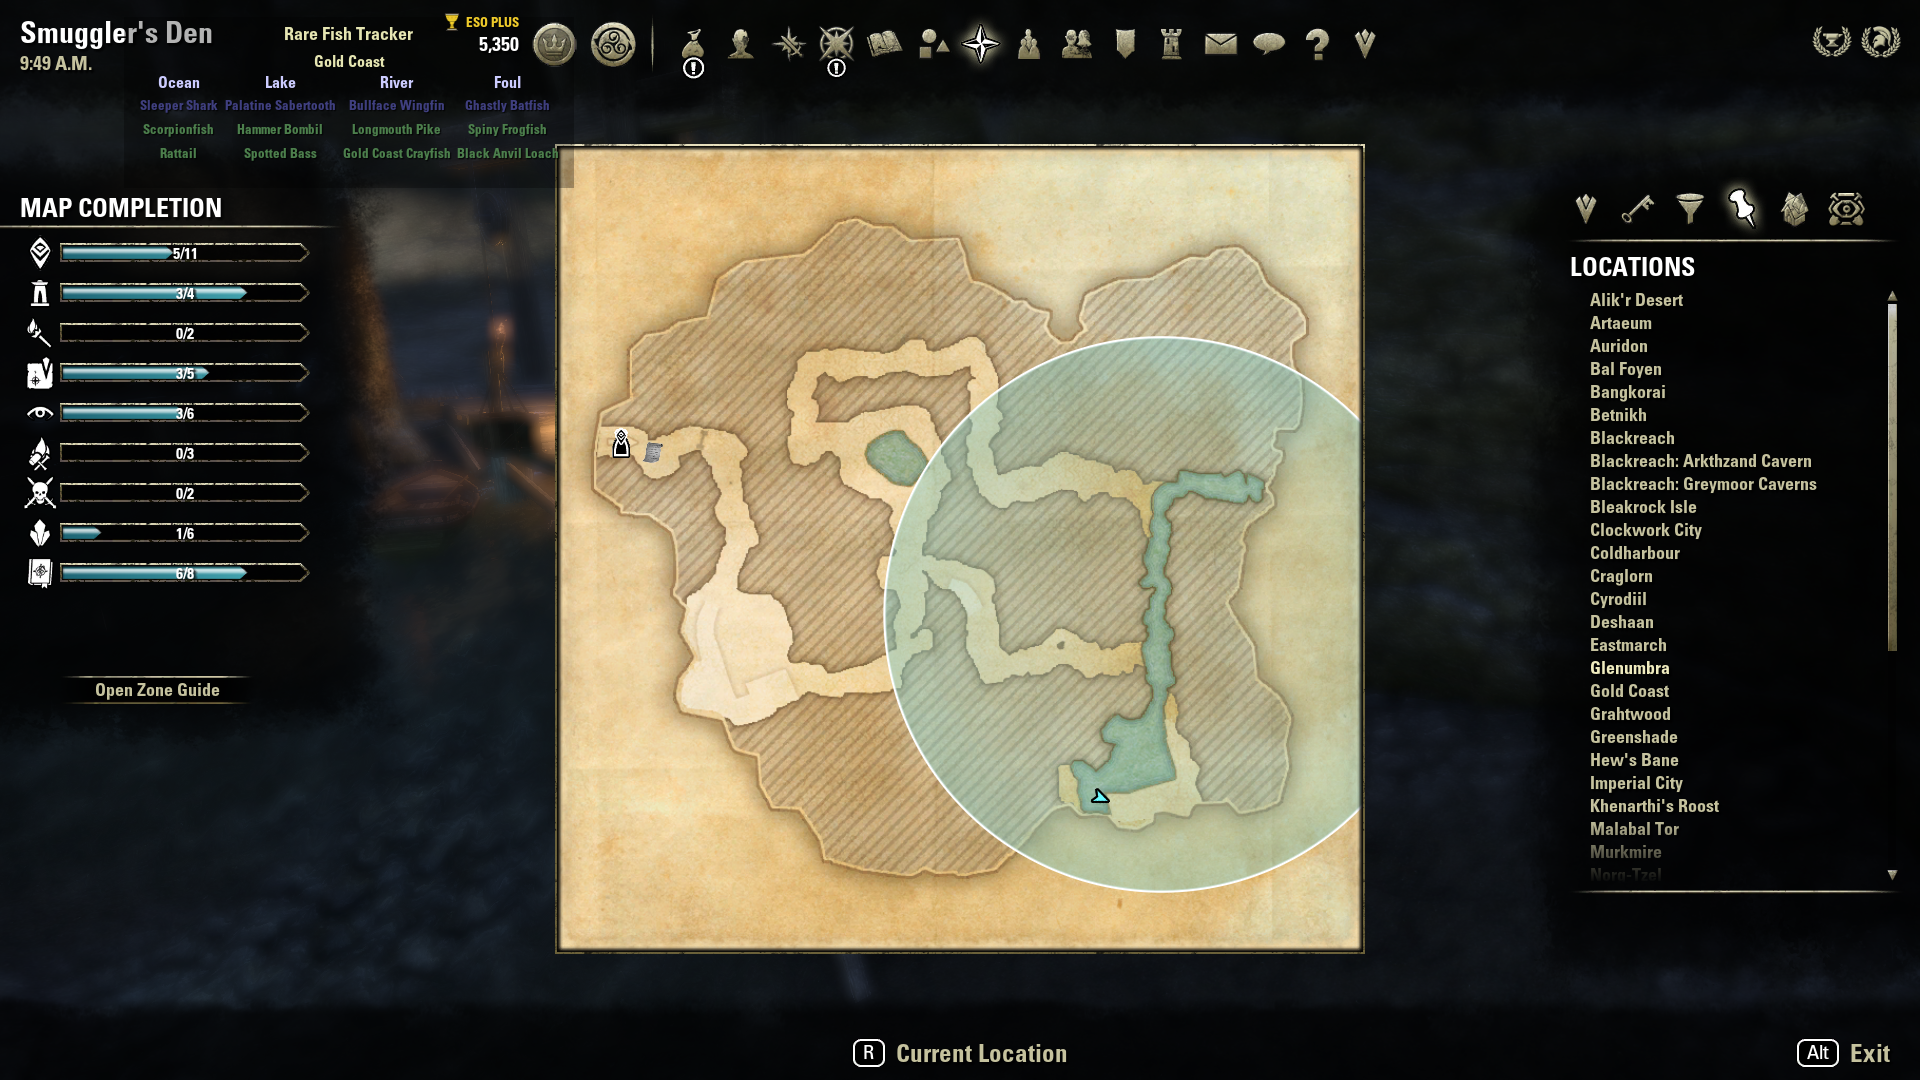
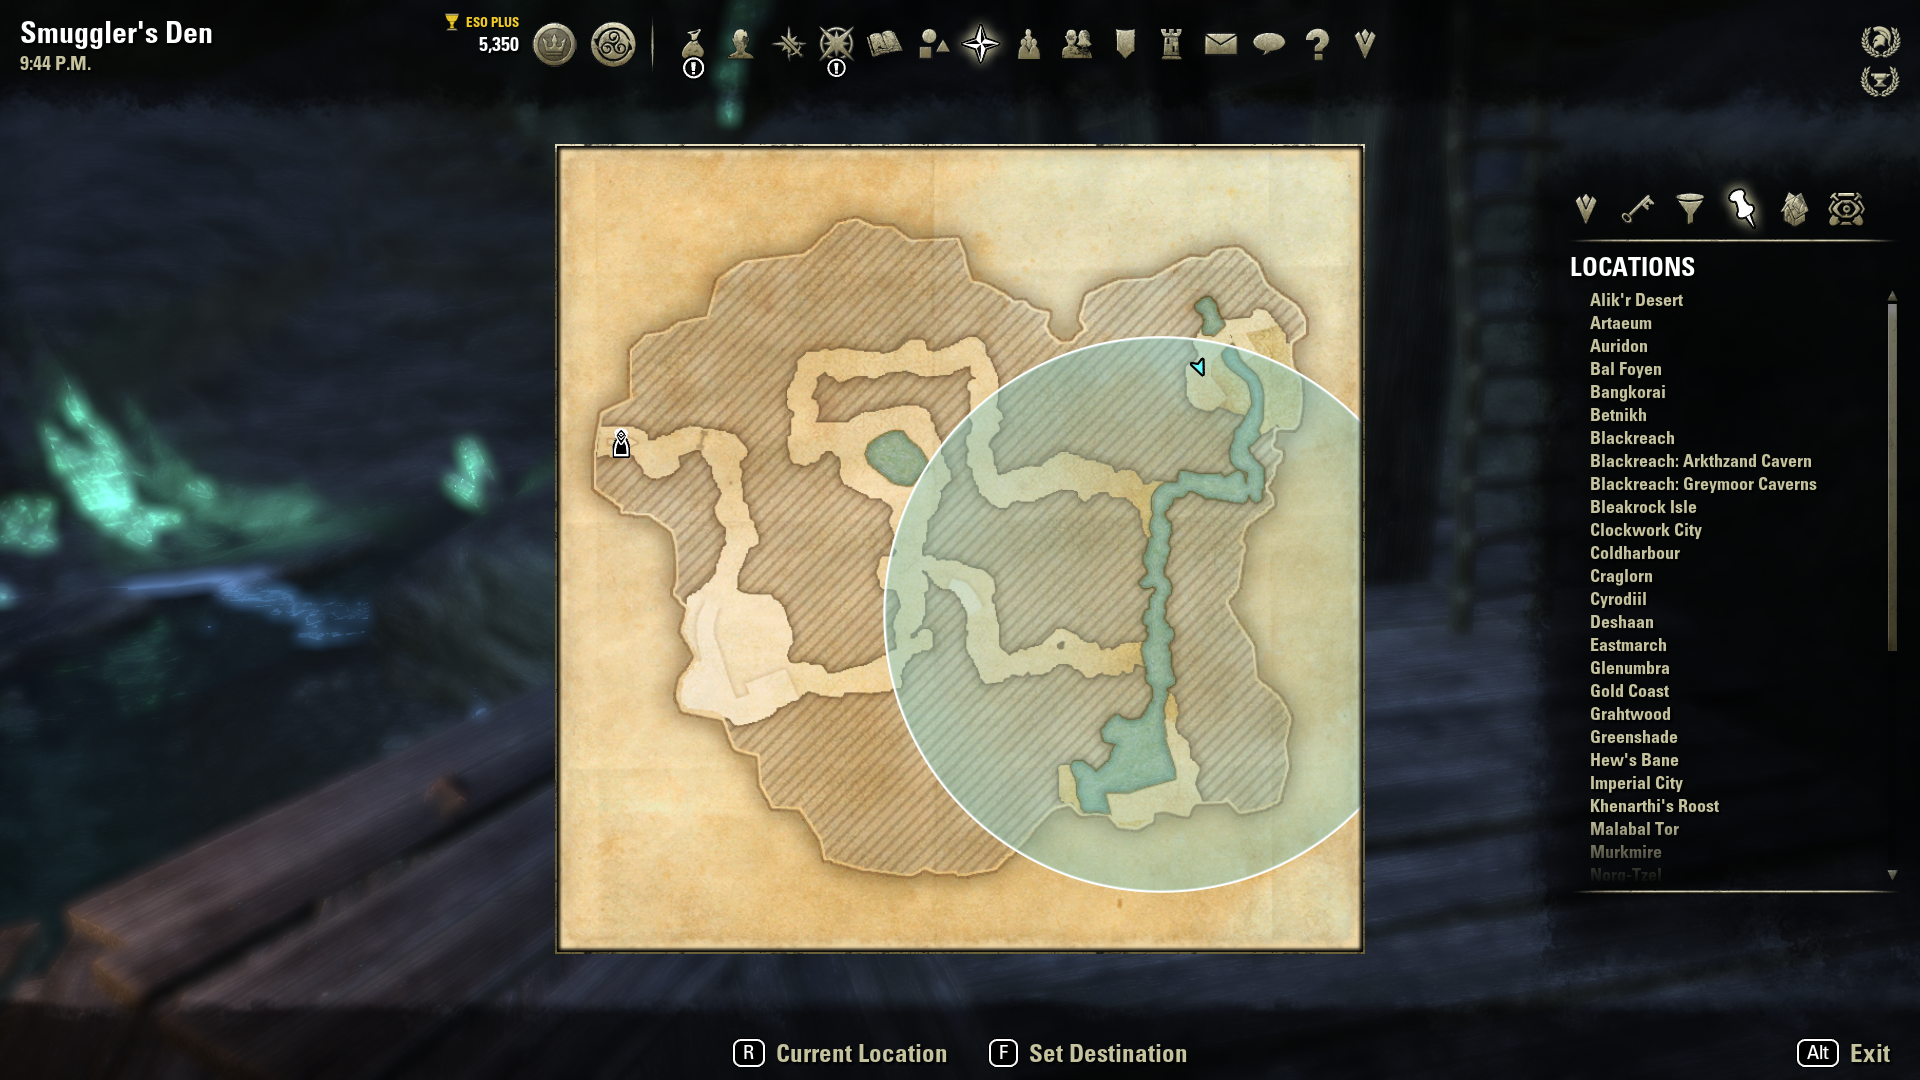
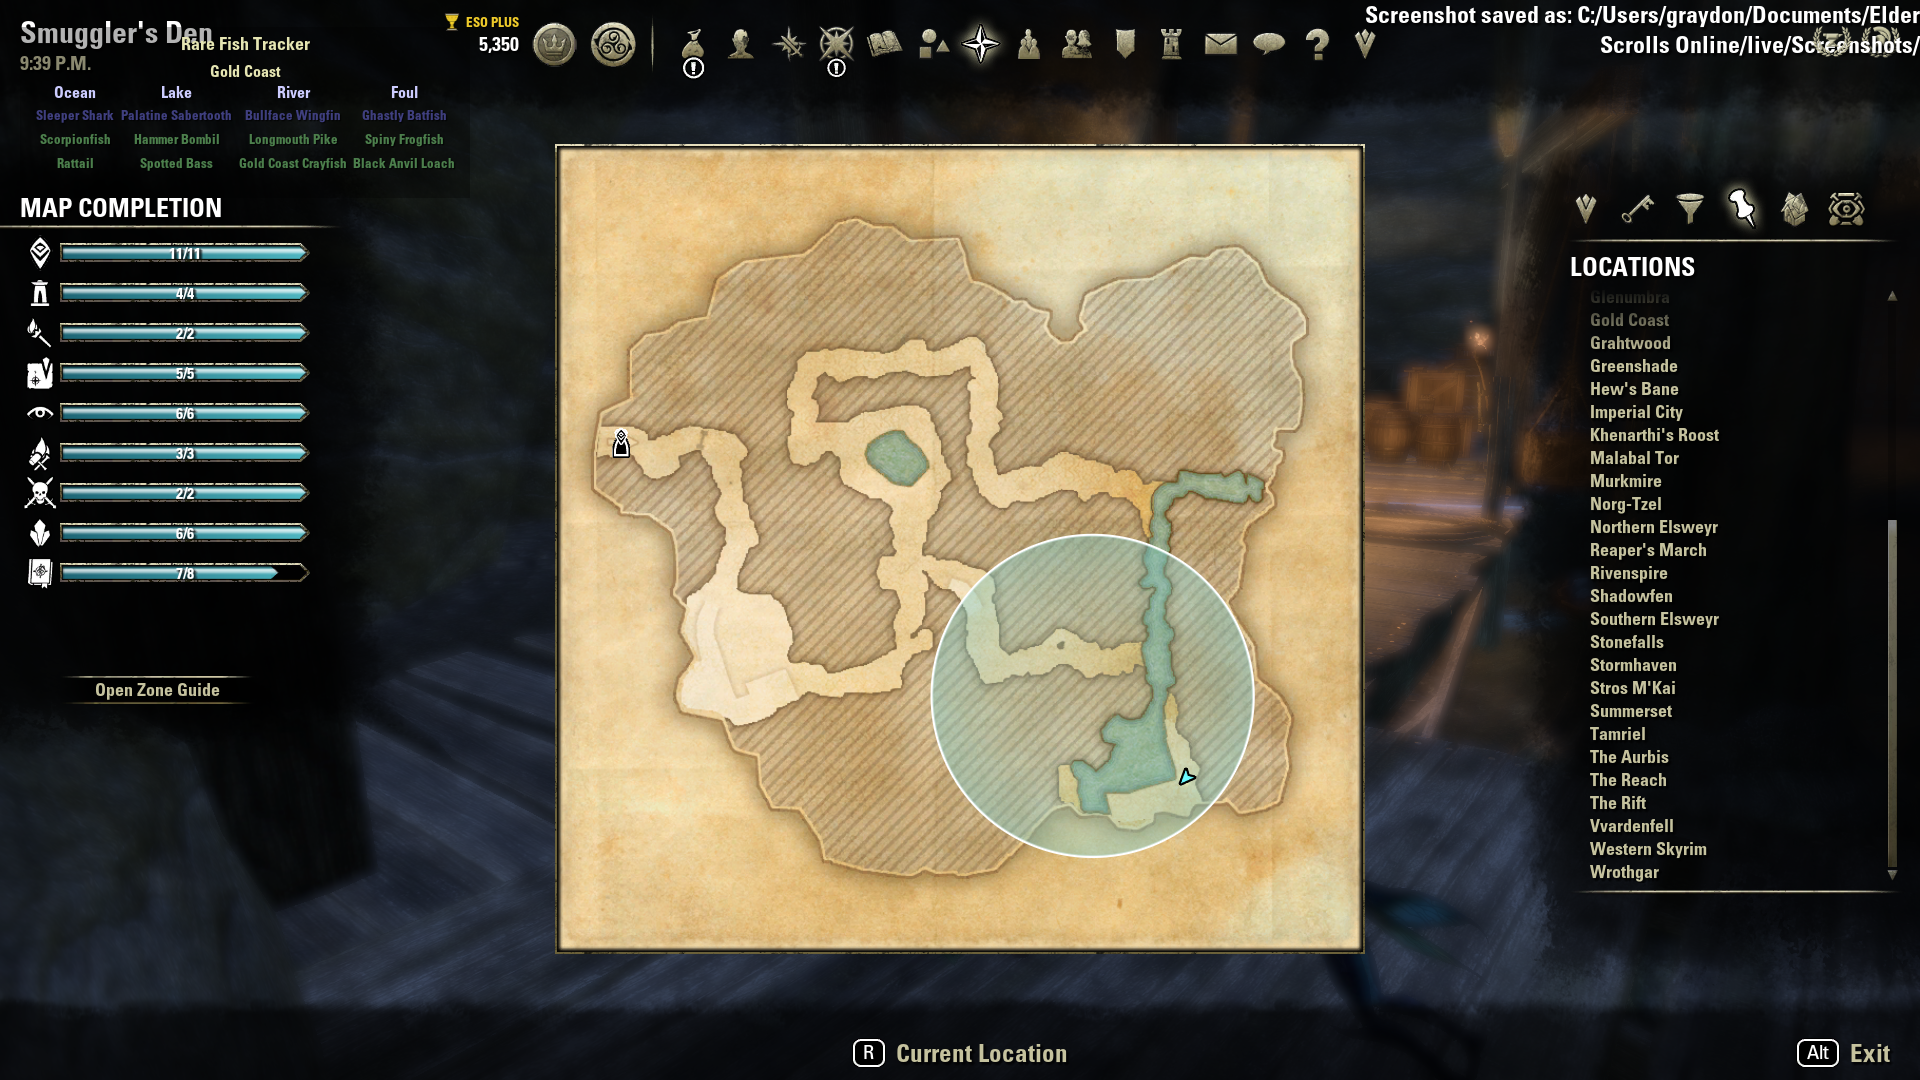
TARGET LOCATIONS
ABIZZAKA (Poison) – Smuggler’s Den
Abizzaka Location #1 
Abizzaka Location #1 Map 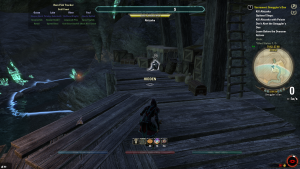
Abizzaka Location #2 
Abizzaka Location #2 Map


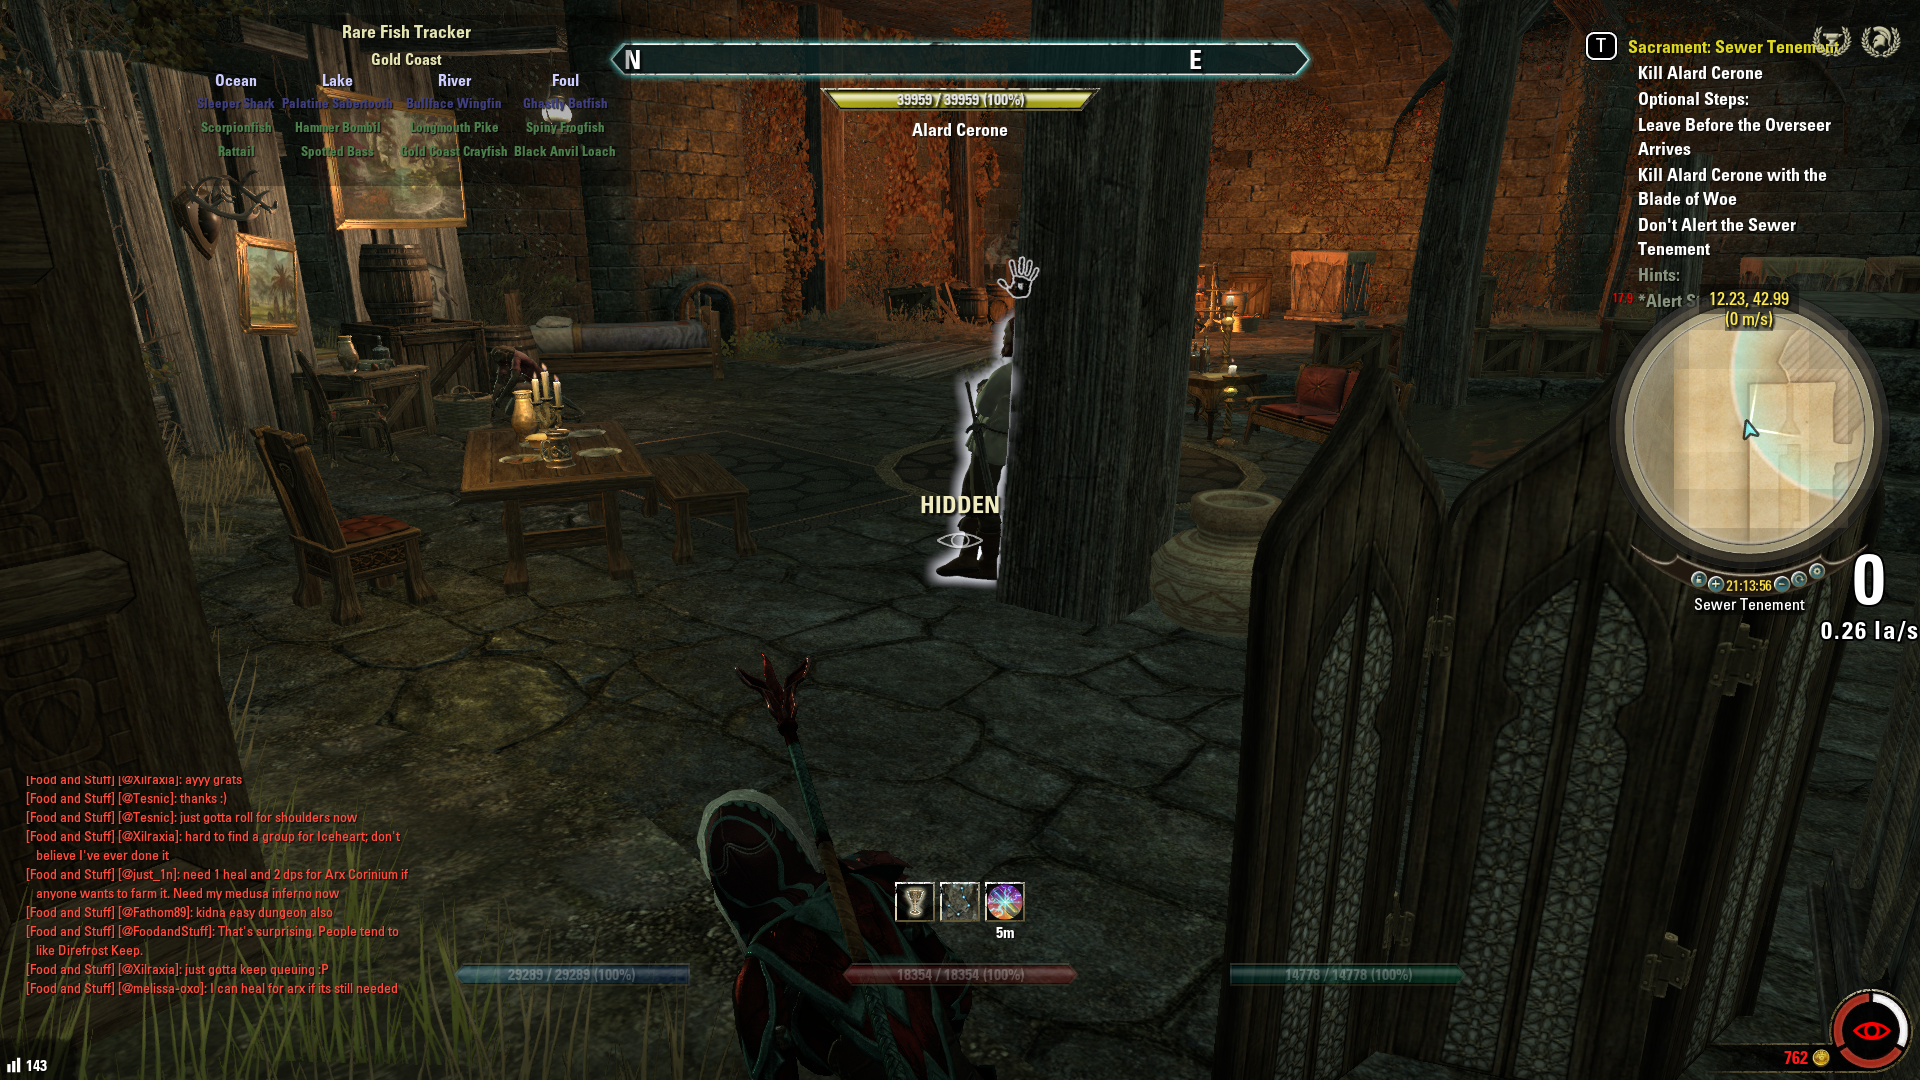
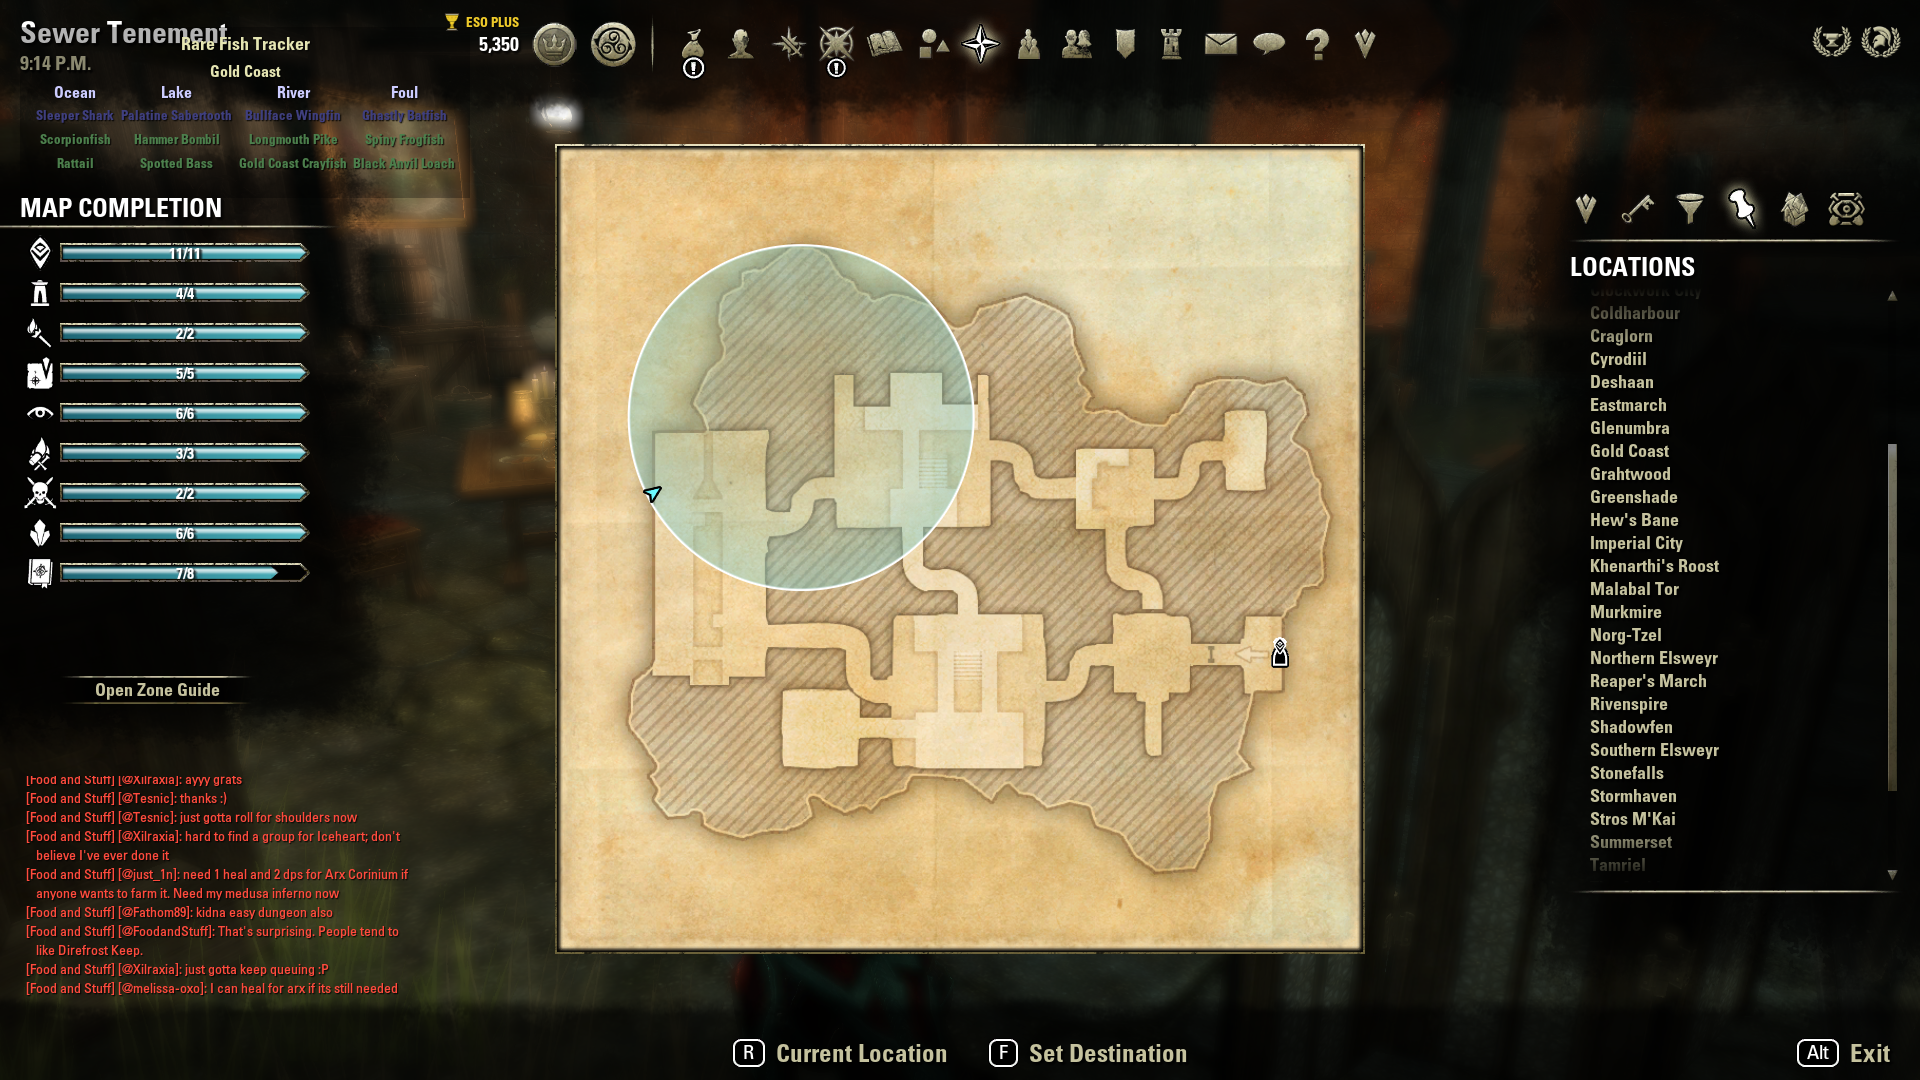
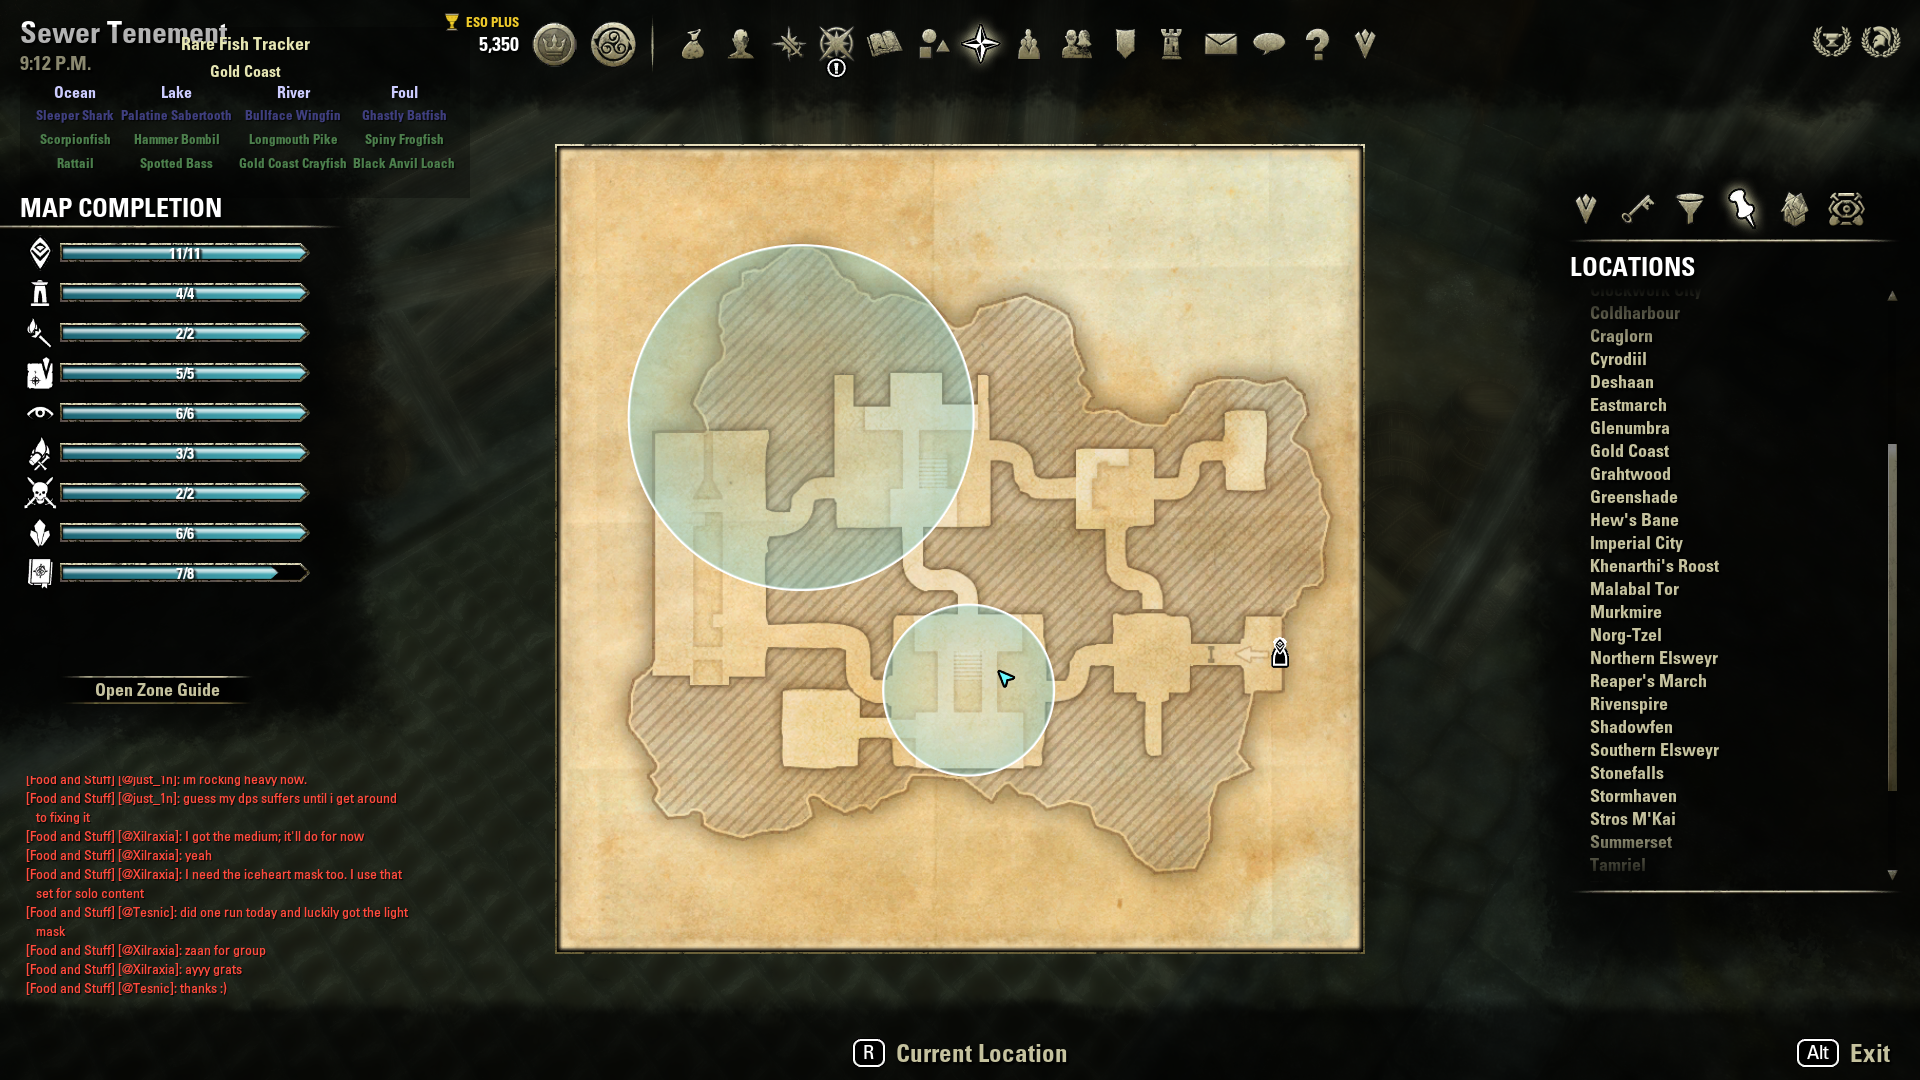
ALARD CERONE (Blade of Woe) – Sewer Tenement

Alard Cerone Location #1 
Alard Cerone Location #1 Map 
Alard Cerone Location #2 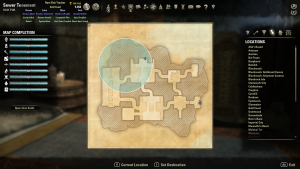
Alard Cerone Location #2 Map

ANDILO ANDRANO (Poison) – Sewer Tenement
Andilo Andrano Location #1 
Andilo Andrano Location #1 Map 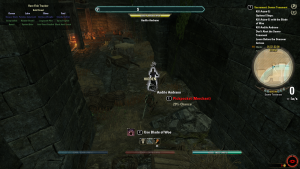
Andilo Andrano Location #2 
Andilo Andrano Location #2 Map


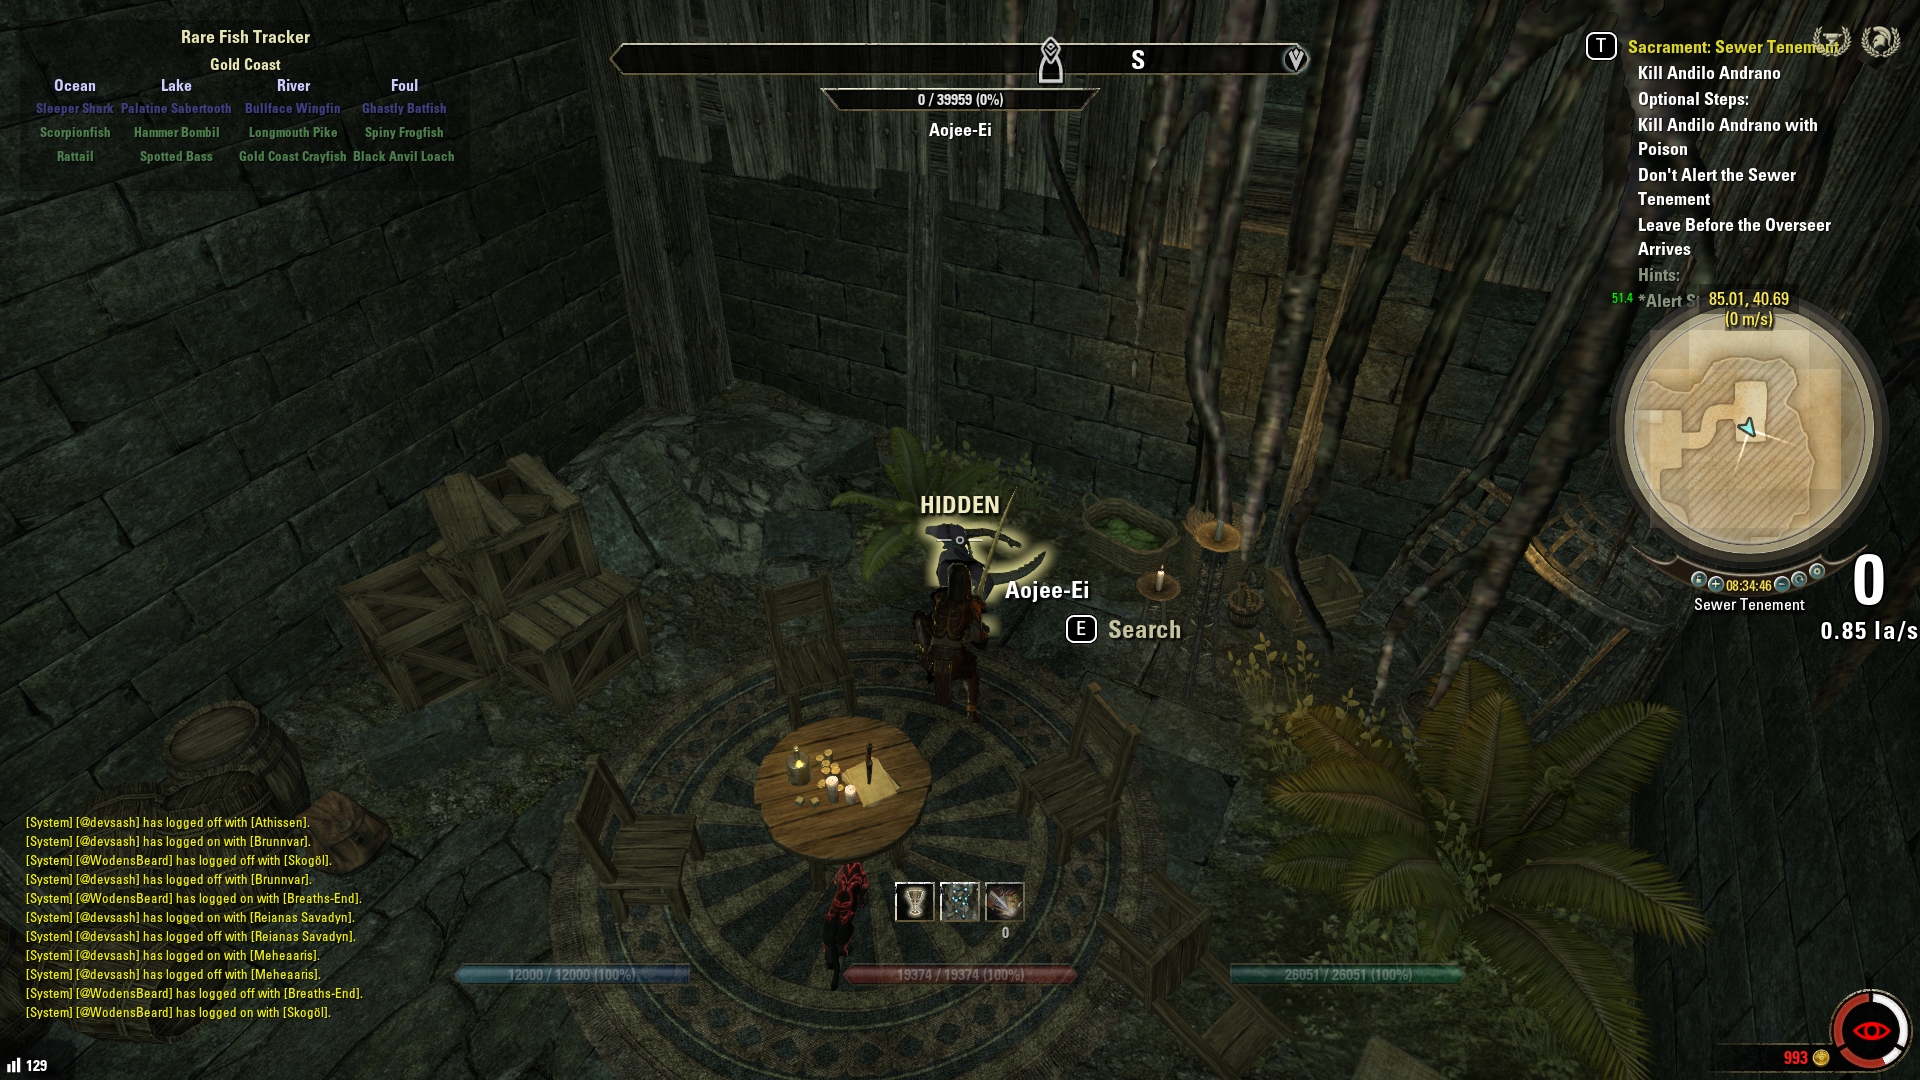
AOJEE-EI (Blade of Woe) – Sewer Tenement
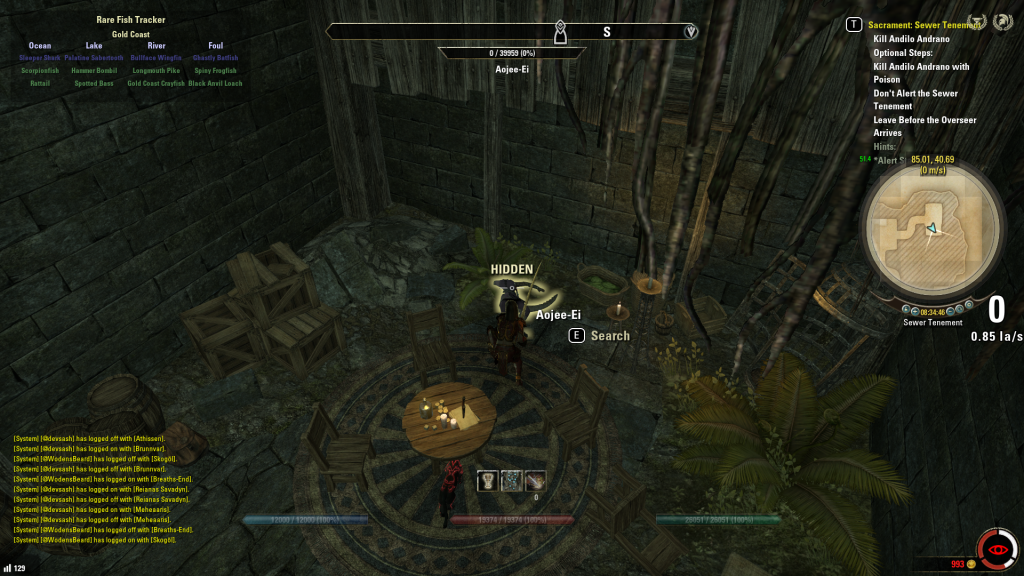
Aojee-Ei Location #1 
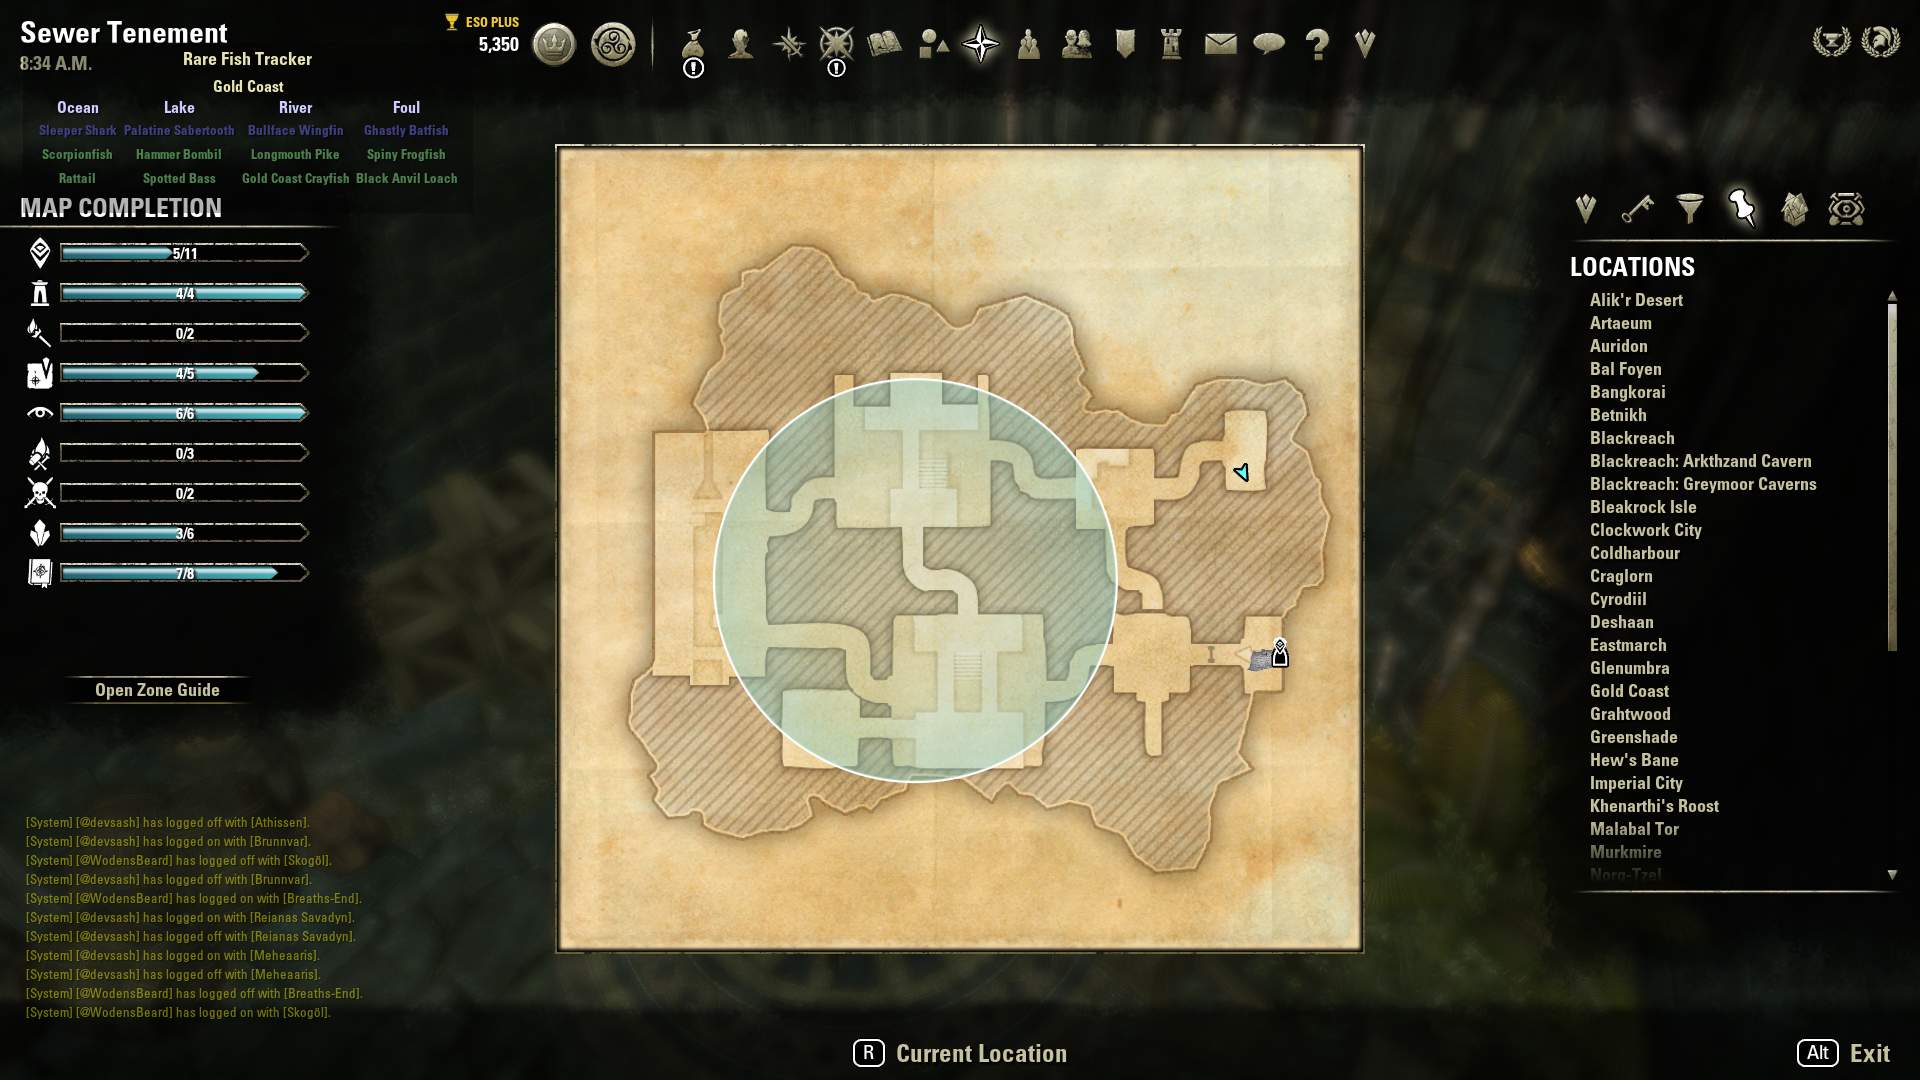
Aojee-Ei Location #1 Map 
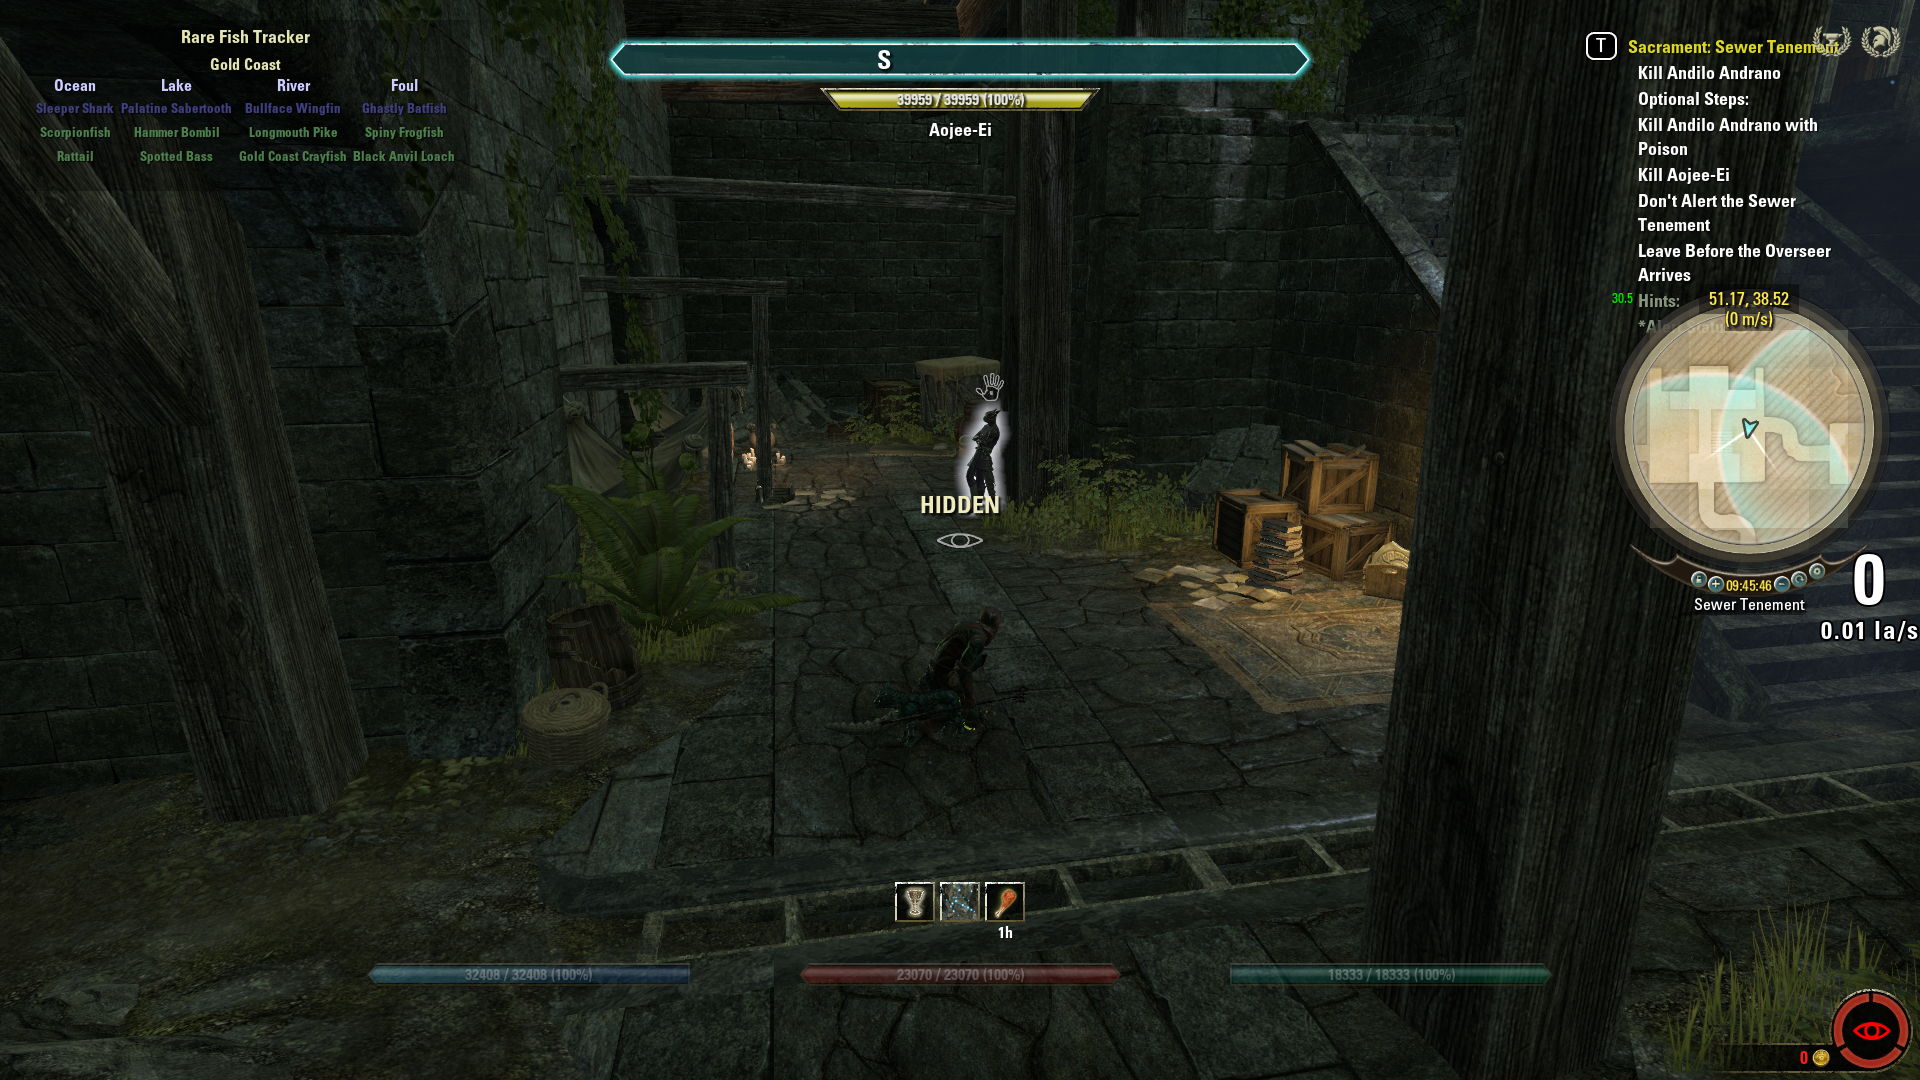
Aojee-Ei Location #2 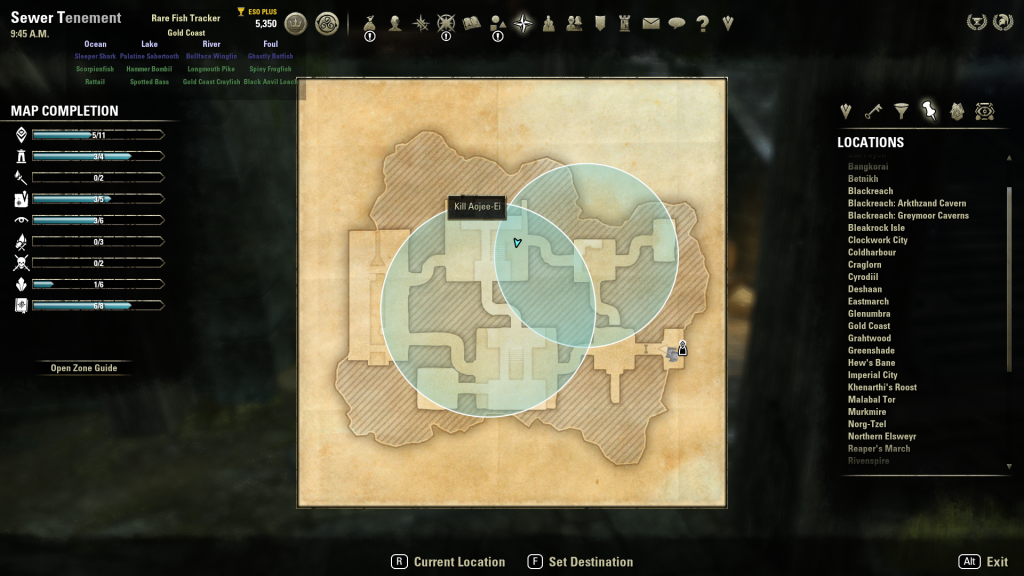
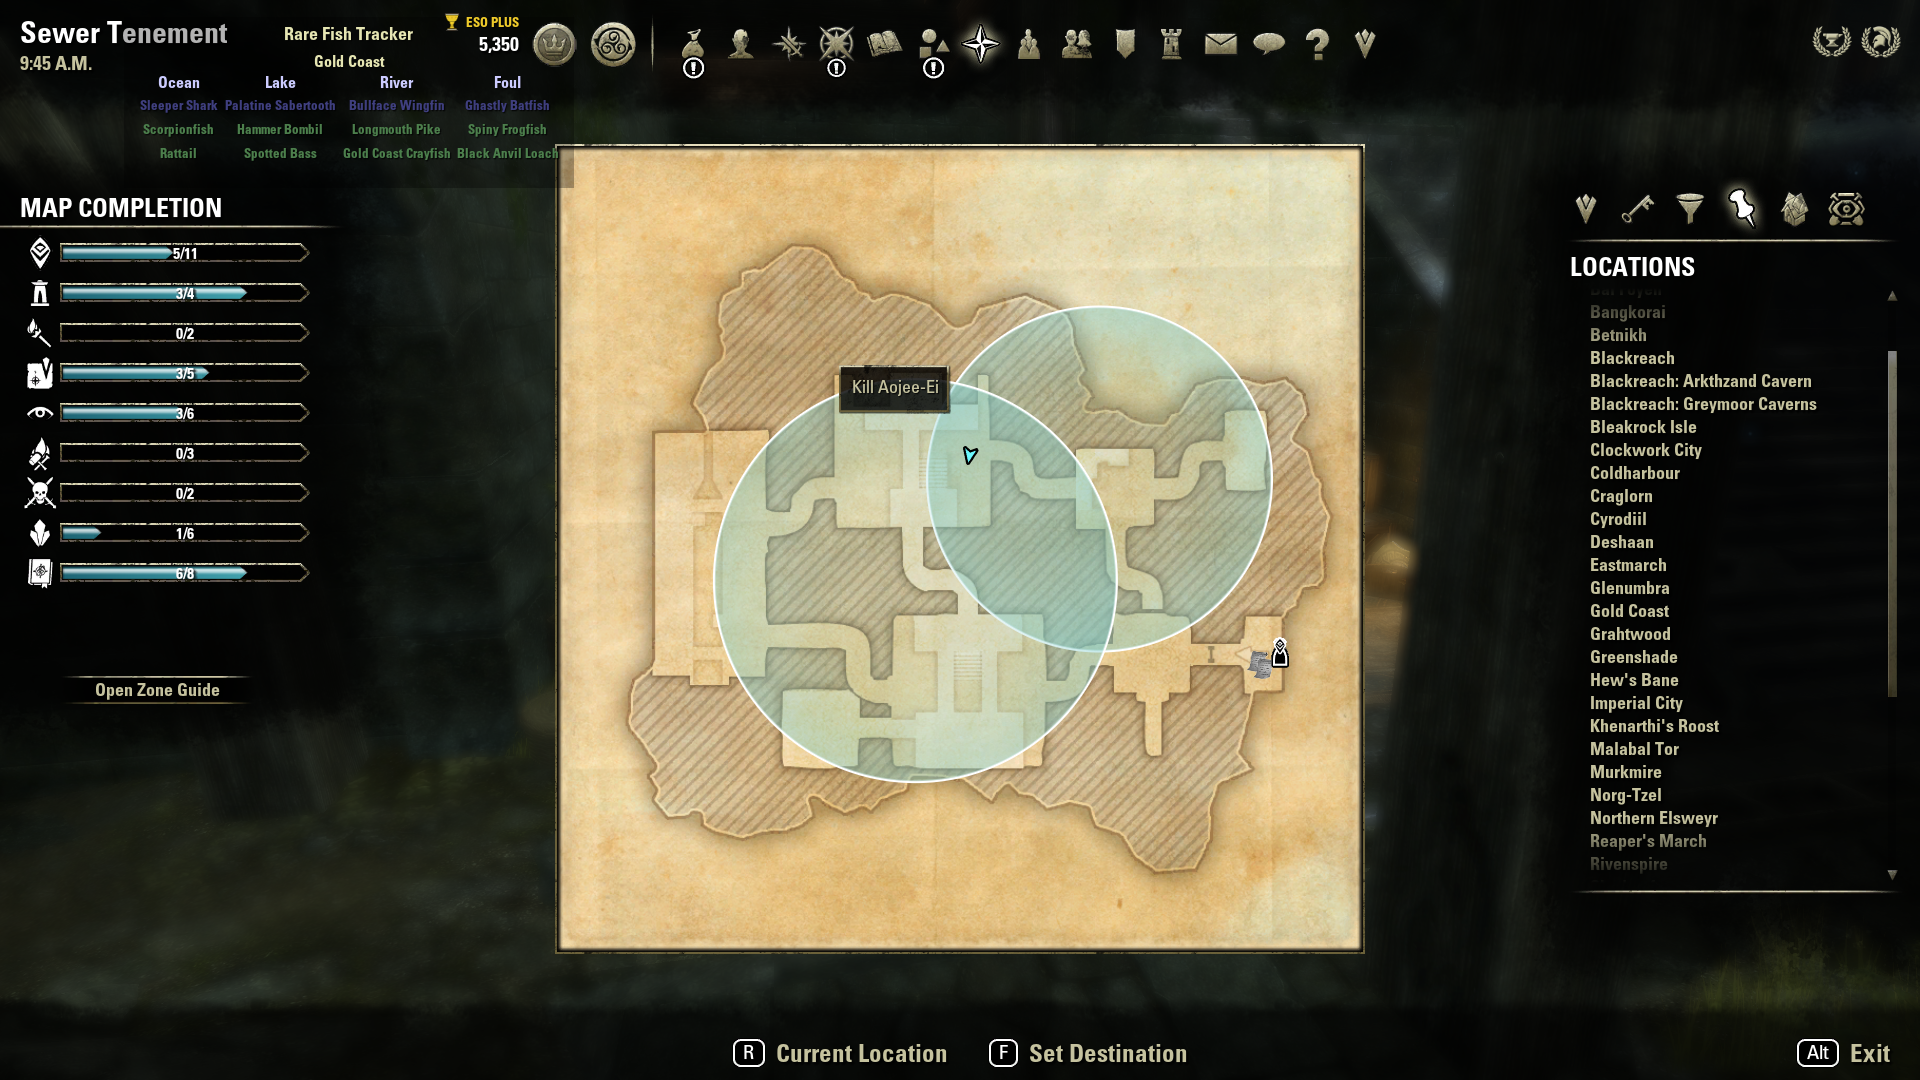
Aojee-Ei Location #2 Map
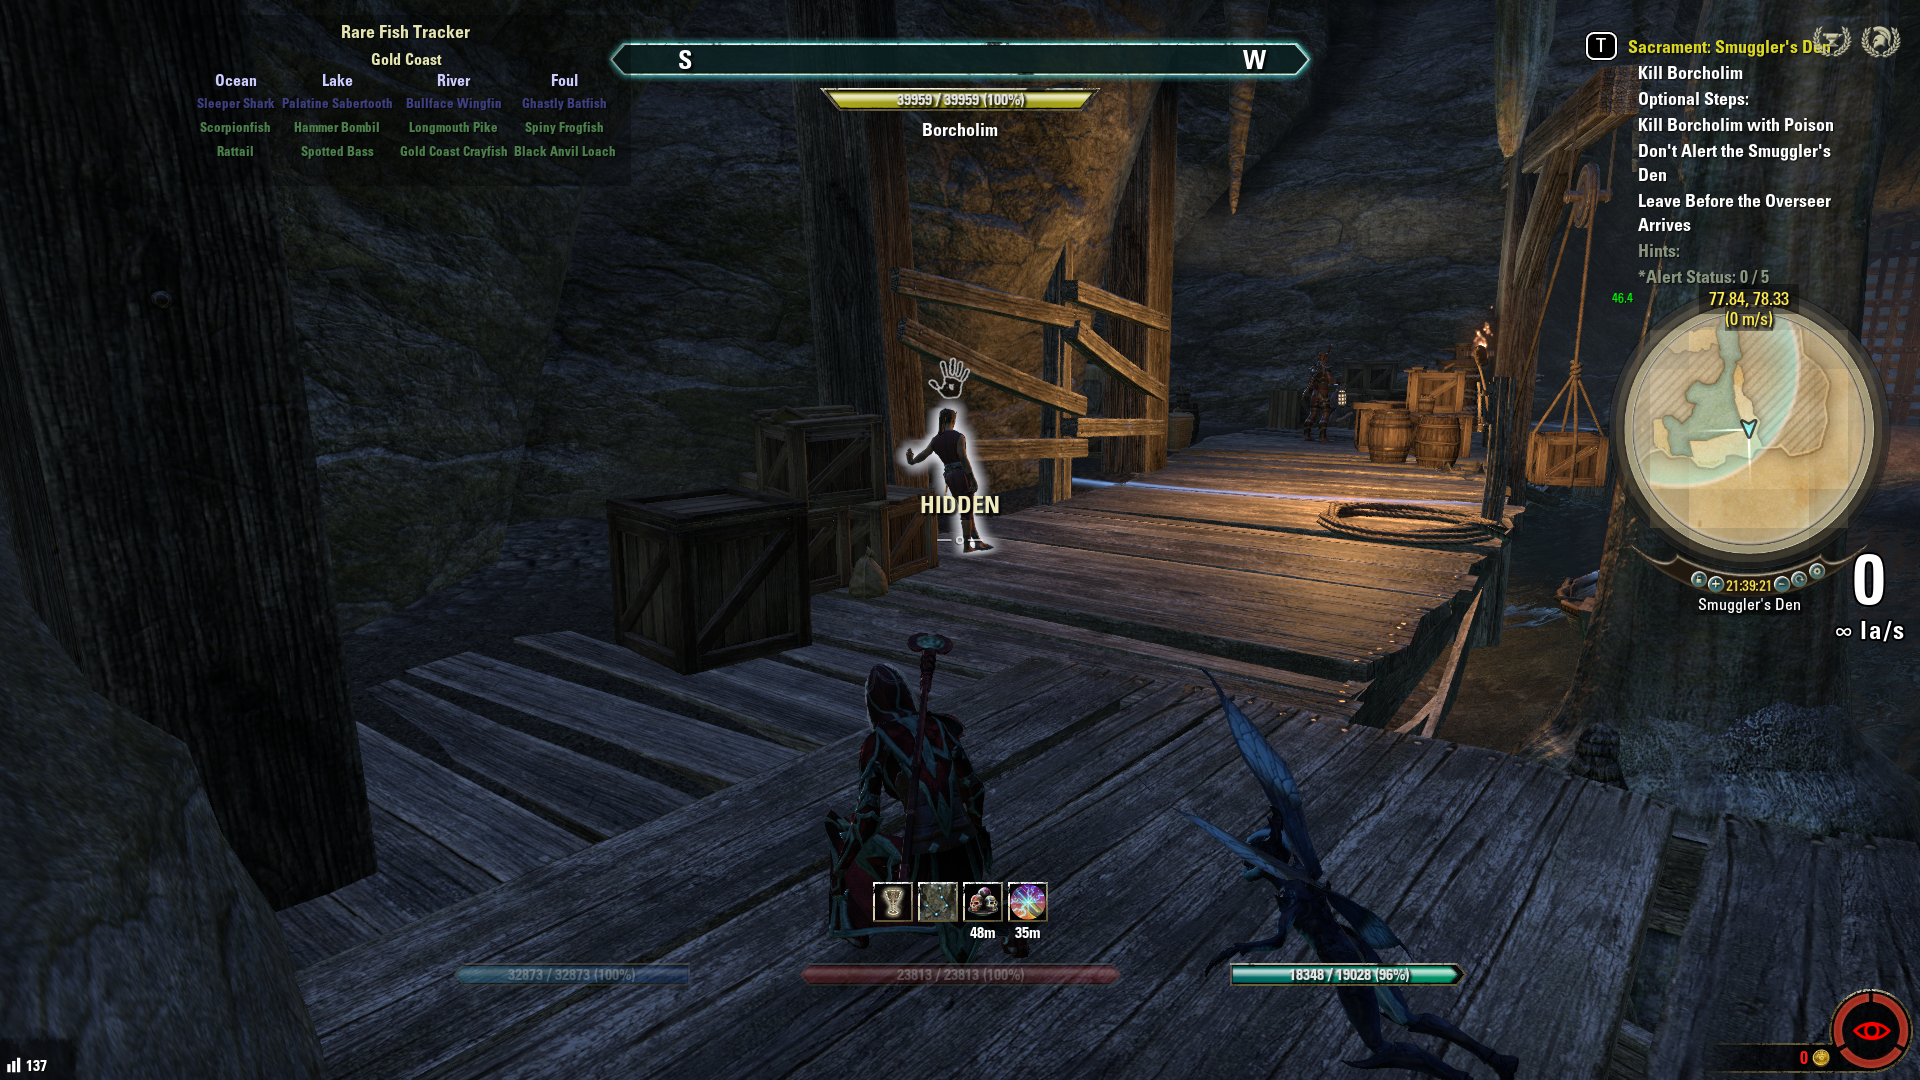
BORCHOLIM (Poison) – Smuggler’s Den
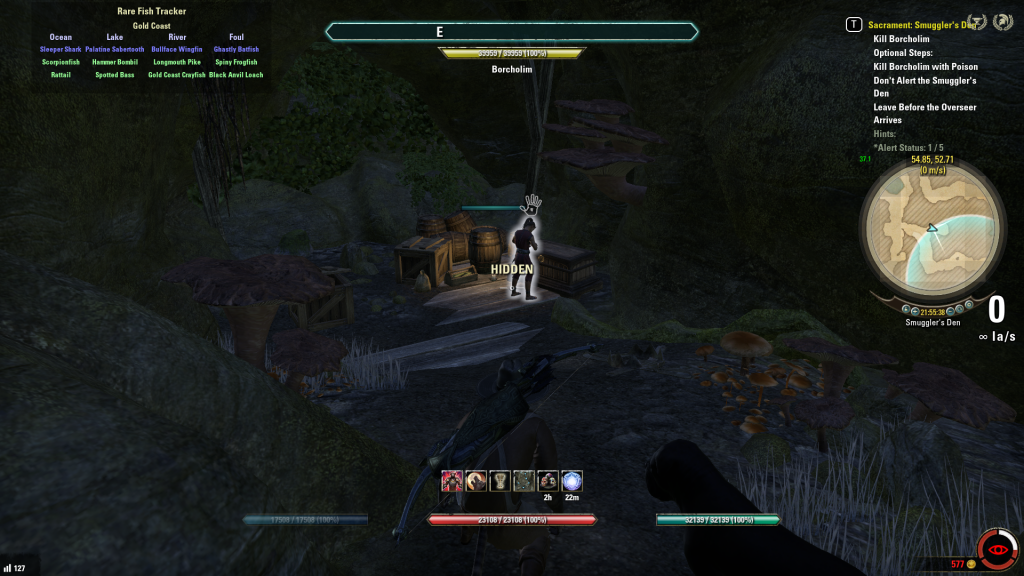
Borcholim Location #1 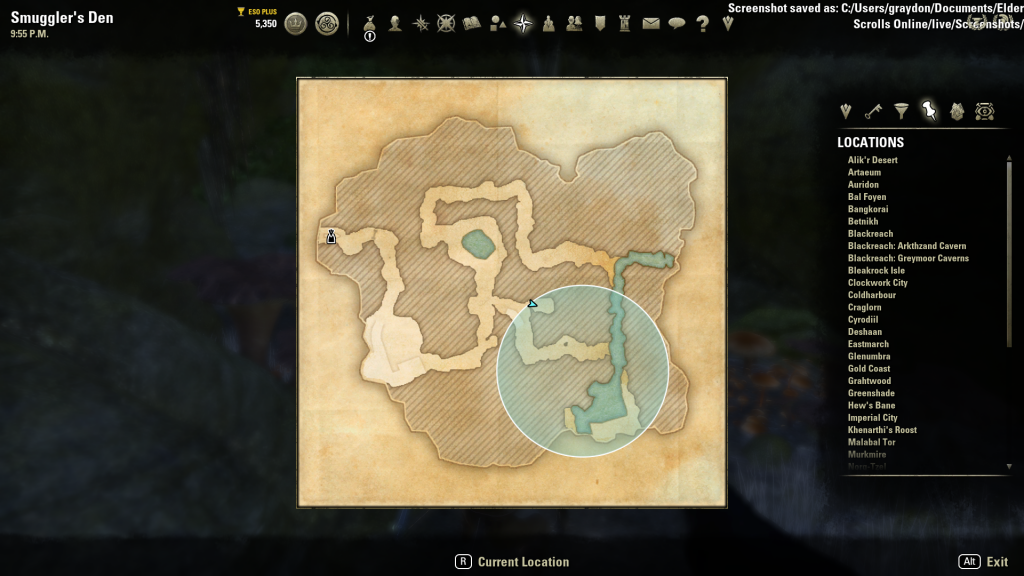
Borcholim Location #1 Map 
Borcholim Location #2 
Borcholim Location #2 Map


BRUNKA (Blade of Woe) – Smuggler’s Den
Brunka Location #1 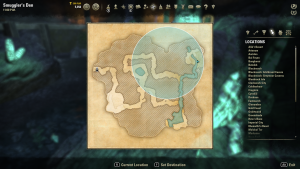
Brunka Location #1 Map 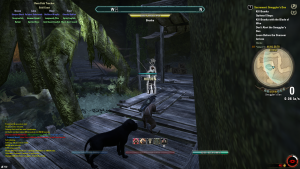
Brunka Location #2 
Brunka Location #2 Map


BUR-WASKA (Blade of Woe) – Smuggler’s Den

Bur-Waska Location #1 
Bur-Waska Location #1 Map 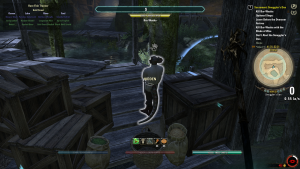
Bur-Waska Location #2 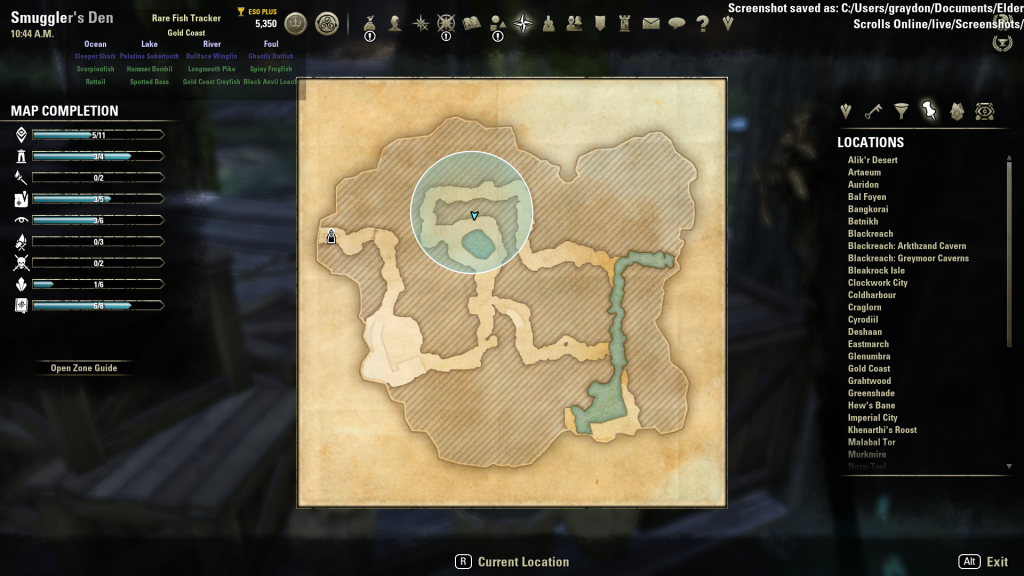
Bur-Waska Location #2 Map


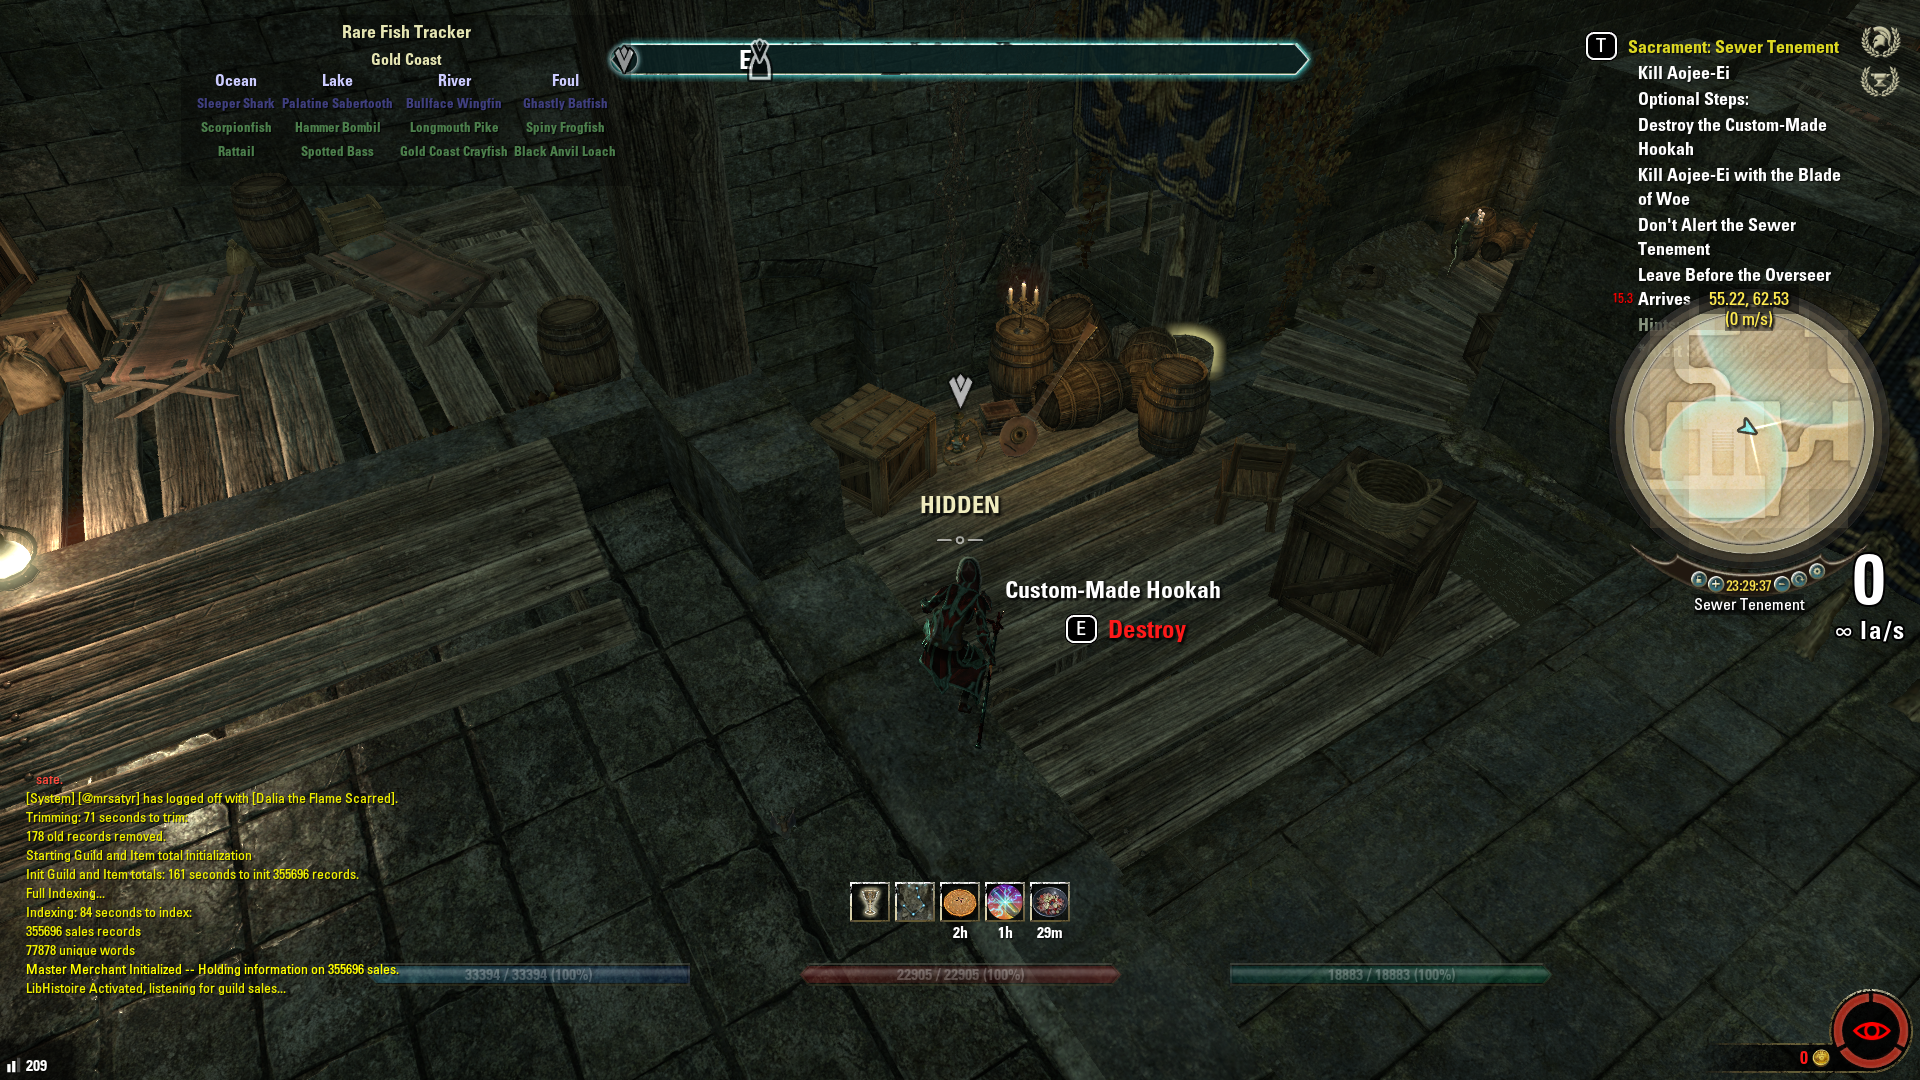
CUSTOM-MADE HOOKAH (Destroy) – Sewer Tenement
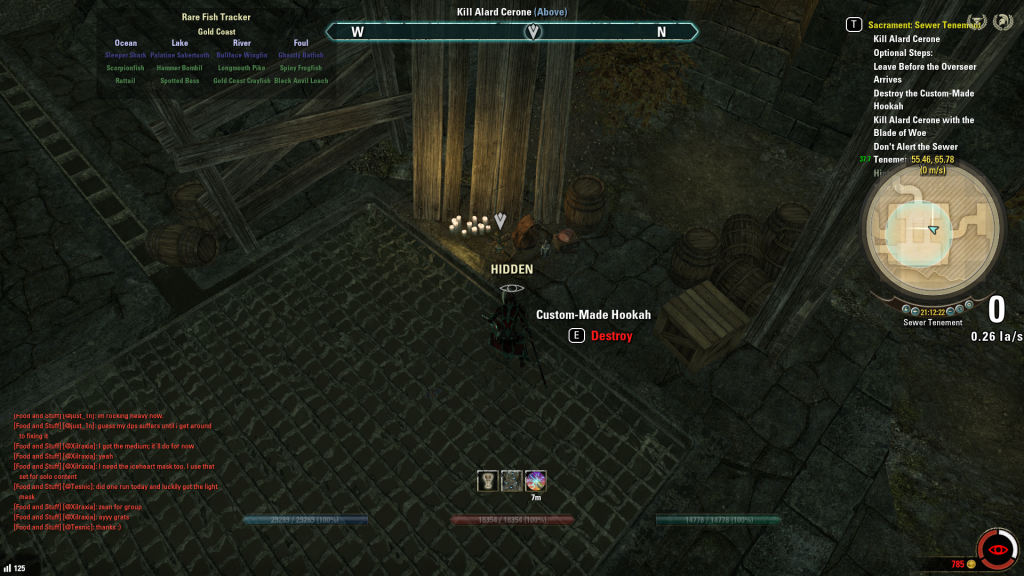
Custom-Made Hookah Location #1 
Custom-Made Hookah Location #1 Map 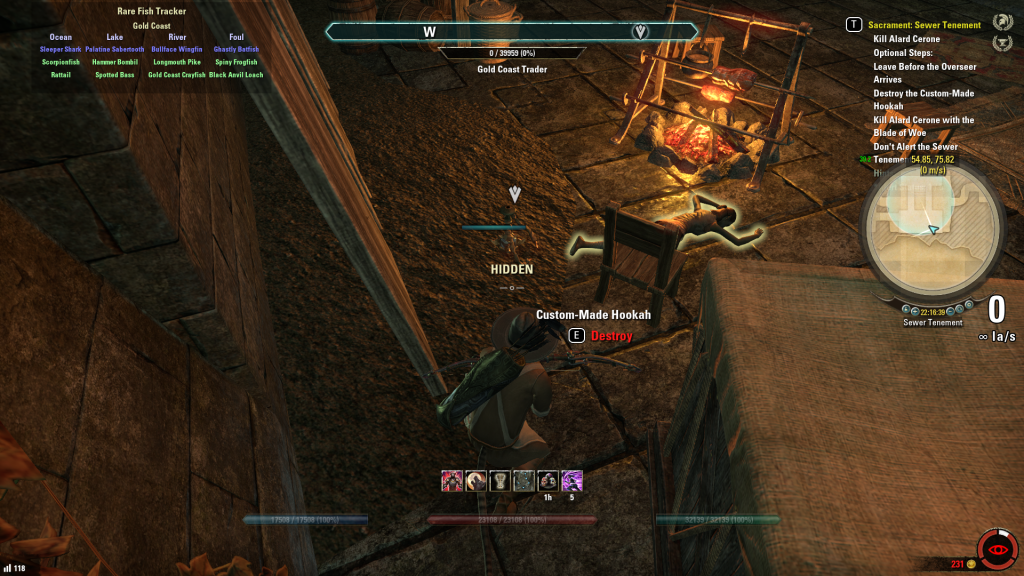
Custom-Made Hookah Location #2 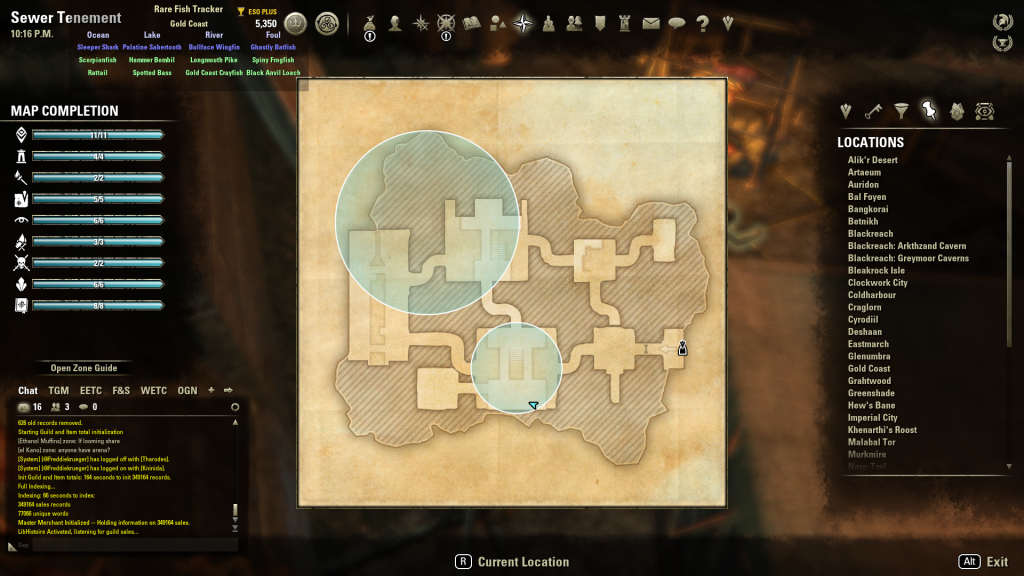
Custom-Made Hookah Location #2 Map 
Custom-Made Hookah Location #3 
Custom-Made Hookah Location #3 Map


DAYNIL UVELETH (Poison) – Smuggler’s Den
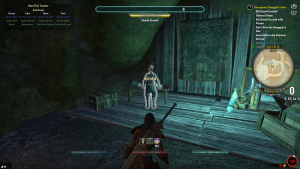
Daynil Uveleth Location #1 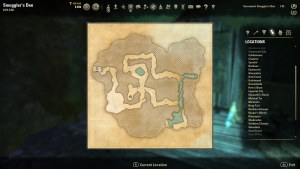
Daynil Uveleth Location #1 Map 
Daynil Uveleth Location #2 
Daynil Uveleth Location #2 Map
DOLWINORA (Poison) – Sewer Tenement
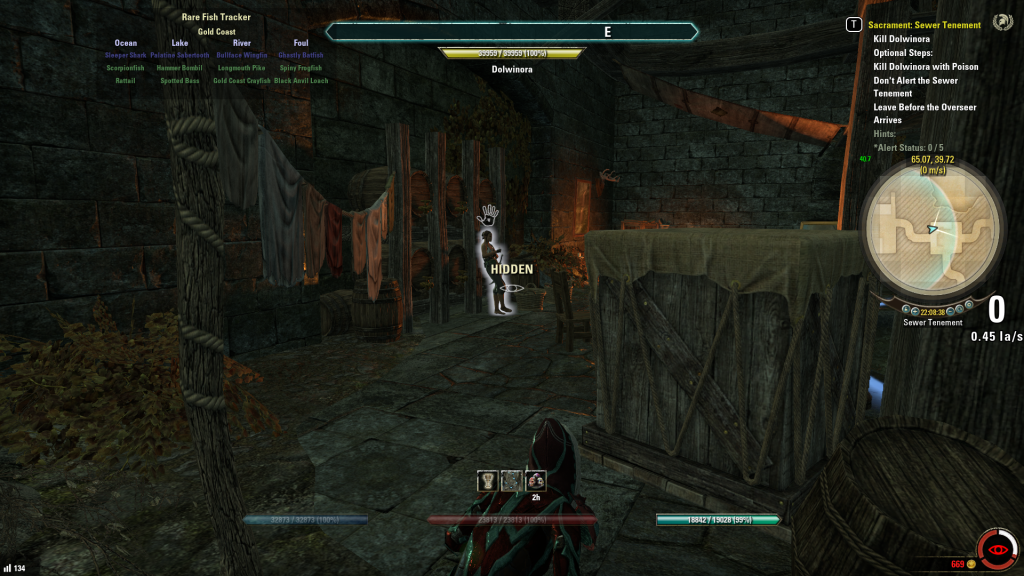
Dolwinora Location #1 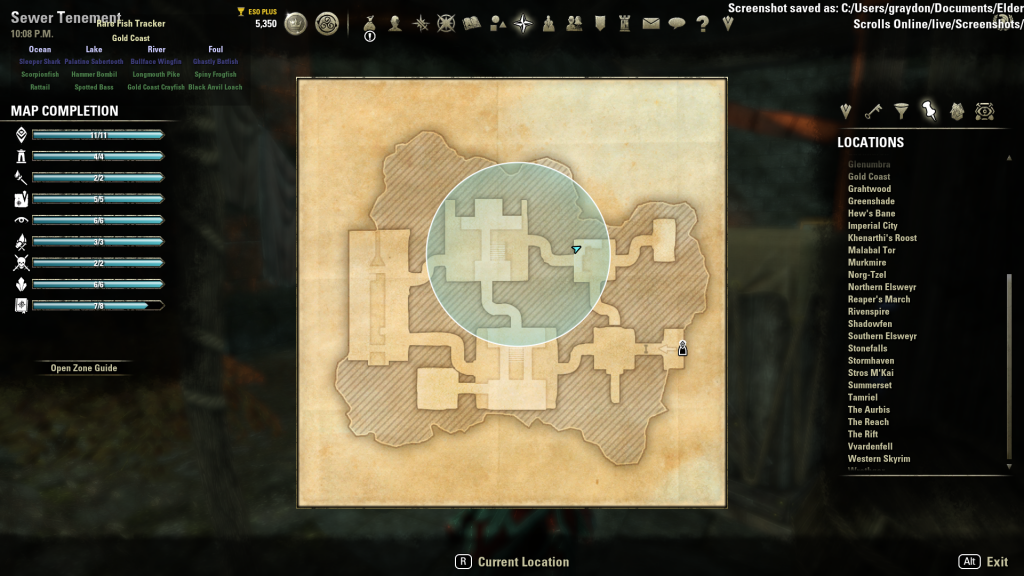
Dolwinora Location #1 Map 
Dolwinora Location #2 
Dolwinora Location #2 Map


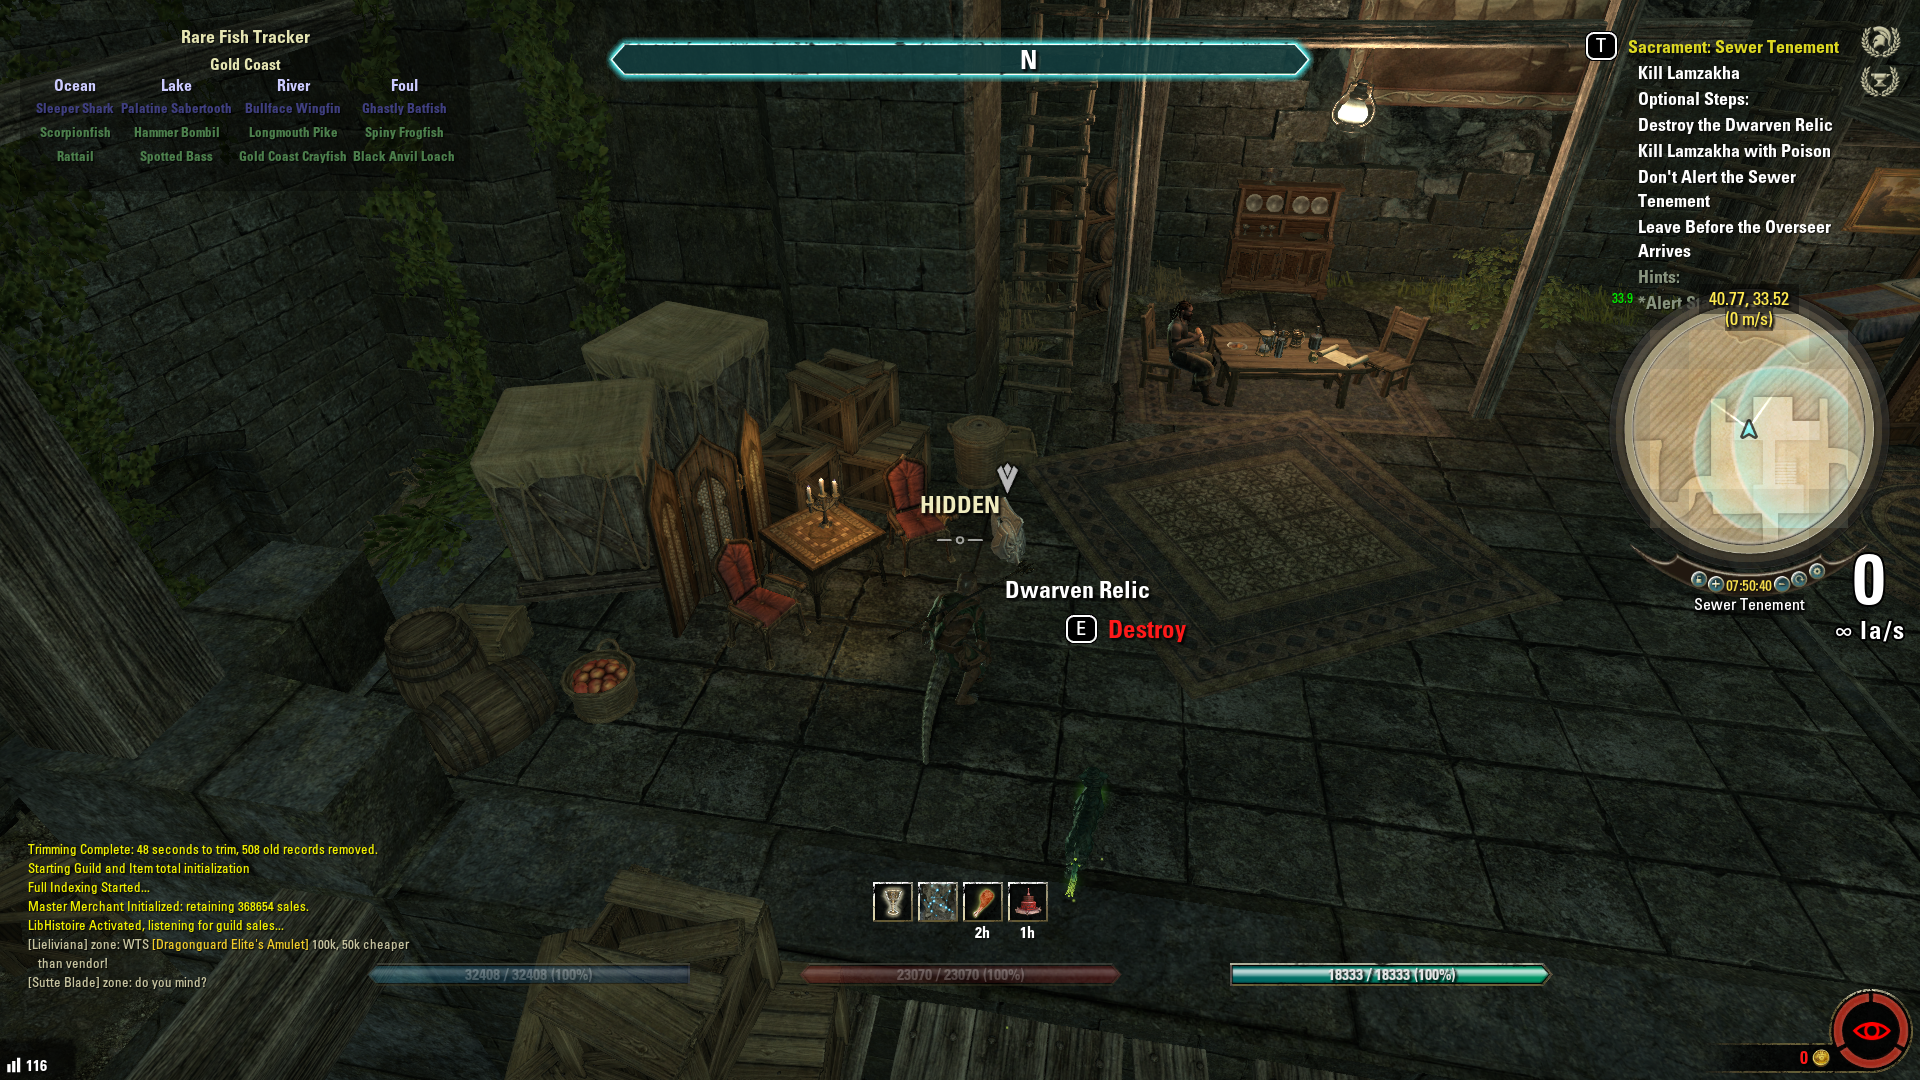
DWARVEN RELIC (Destroy) – Sewer Tenement
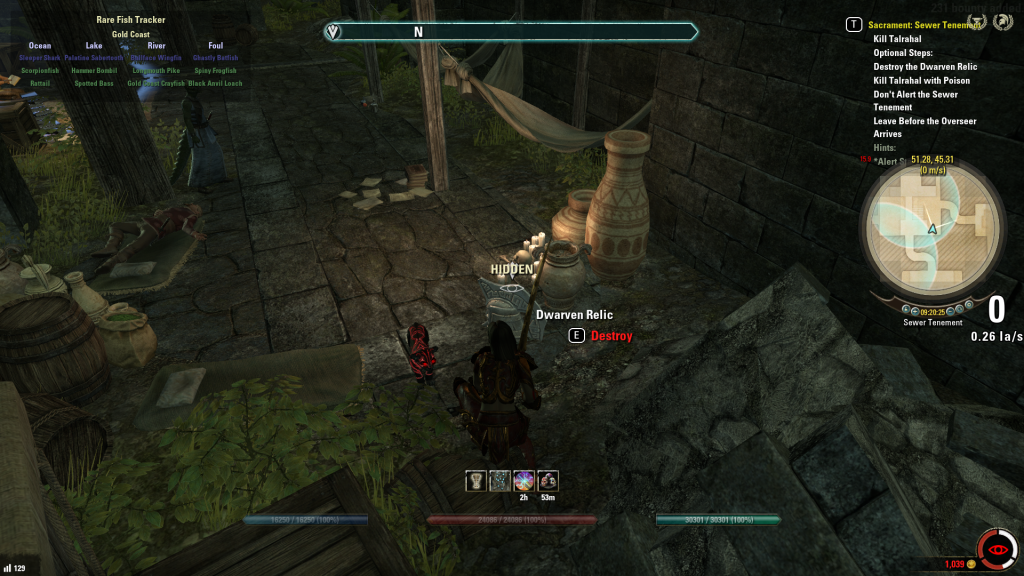
Dwarven Relic Location #1 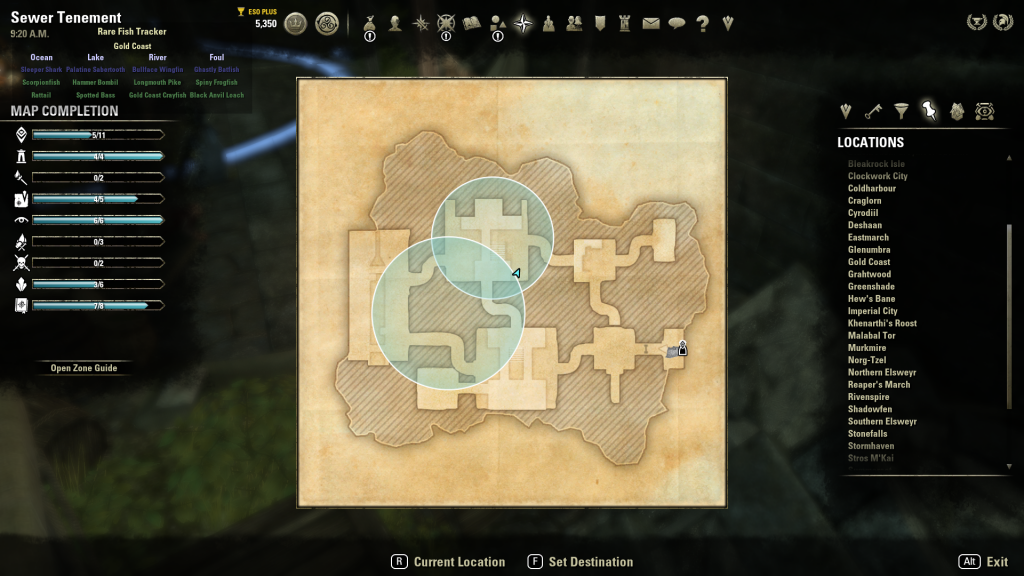
Dwarven Relic Location #1 Map 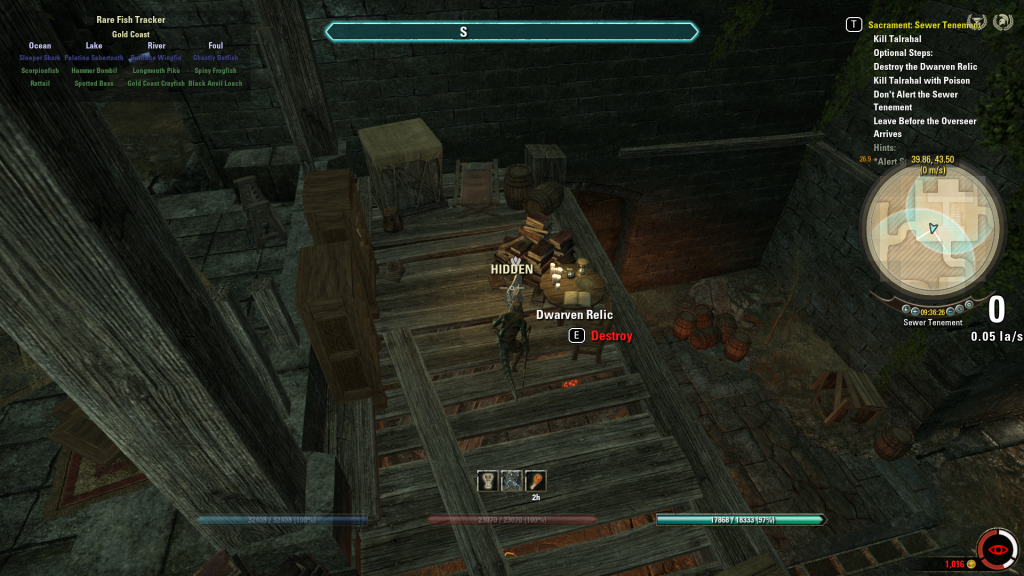
Dwarven Relic Location #2 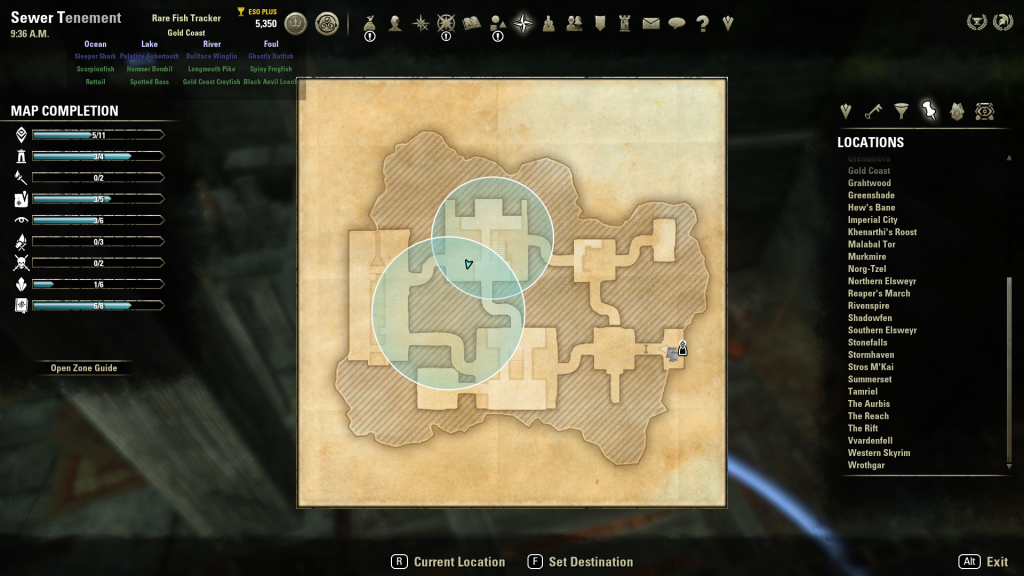
Dwarven Relic Location #2 Map 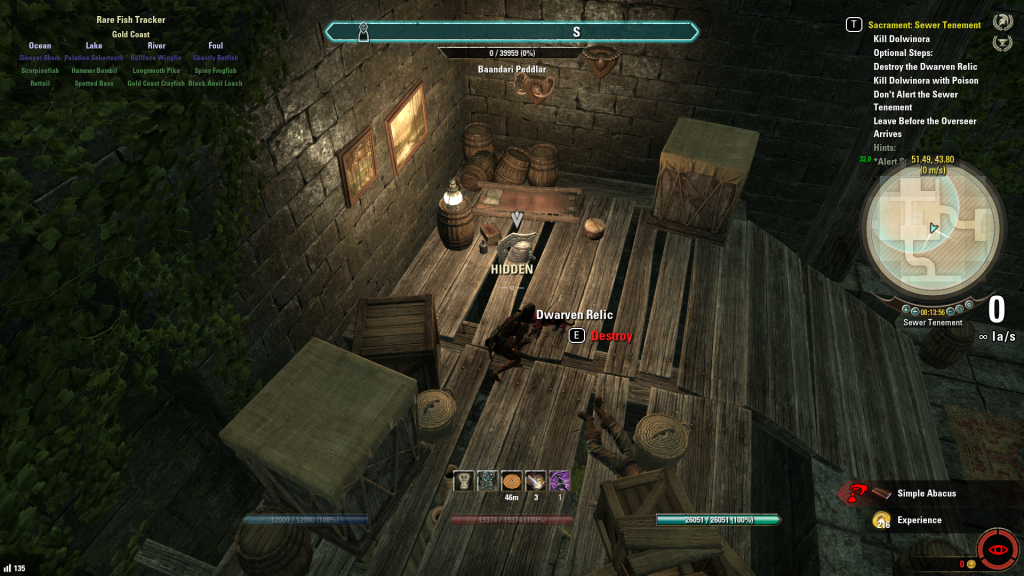
Dwarven Relic Location #3 
Dwarven Relic Location #3 Map 
Dwarven Relic Location #4 
Dwarven Relic Location #4 Map
ENGRAVED FLUTE (Destroy) – Trader’s Cove
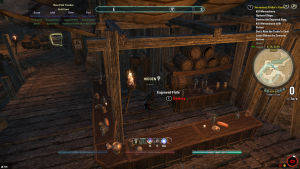
Engraved Flute Location #1 
Engraved Flute Location #1 Map 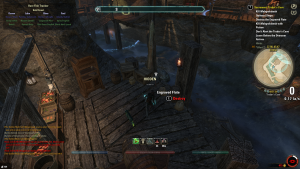
Engraved Flute Location #2 
Engraved Flute Location #2 Map

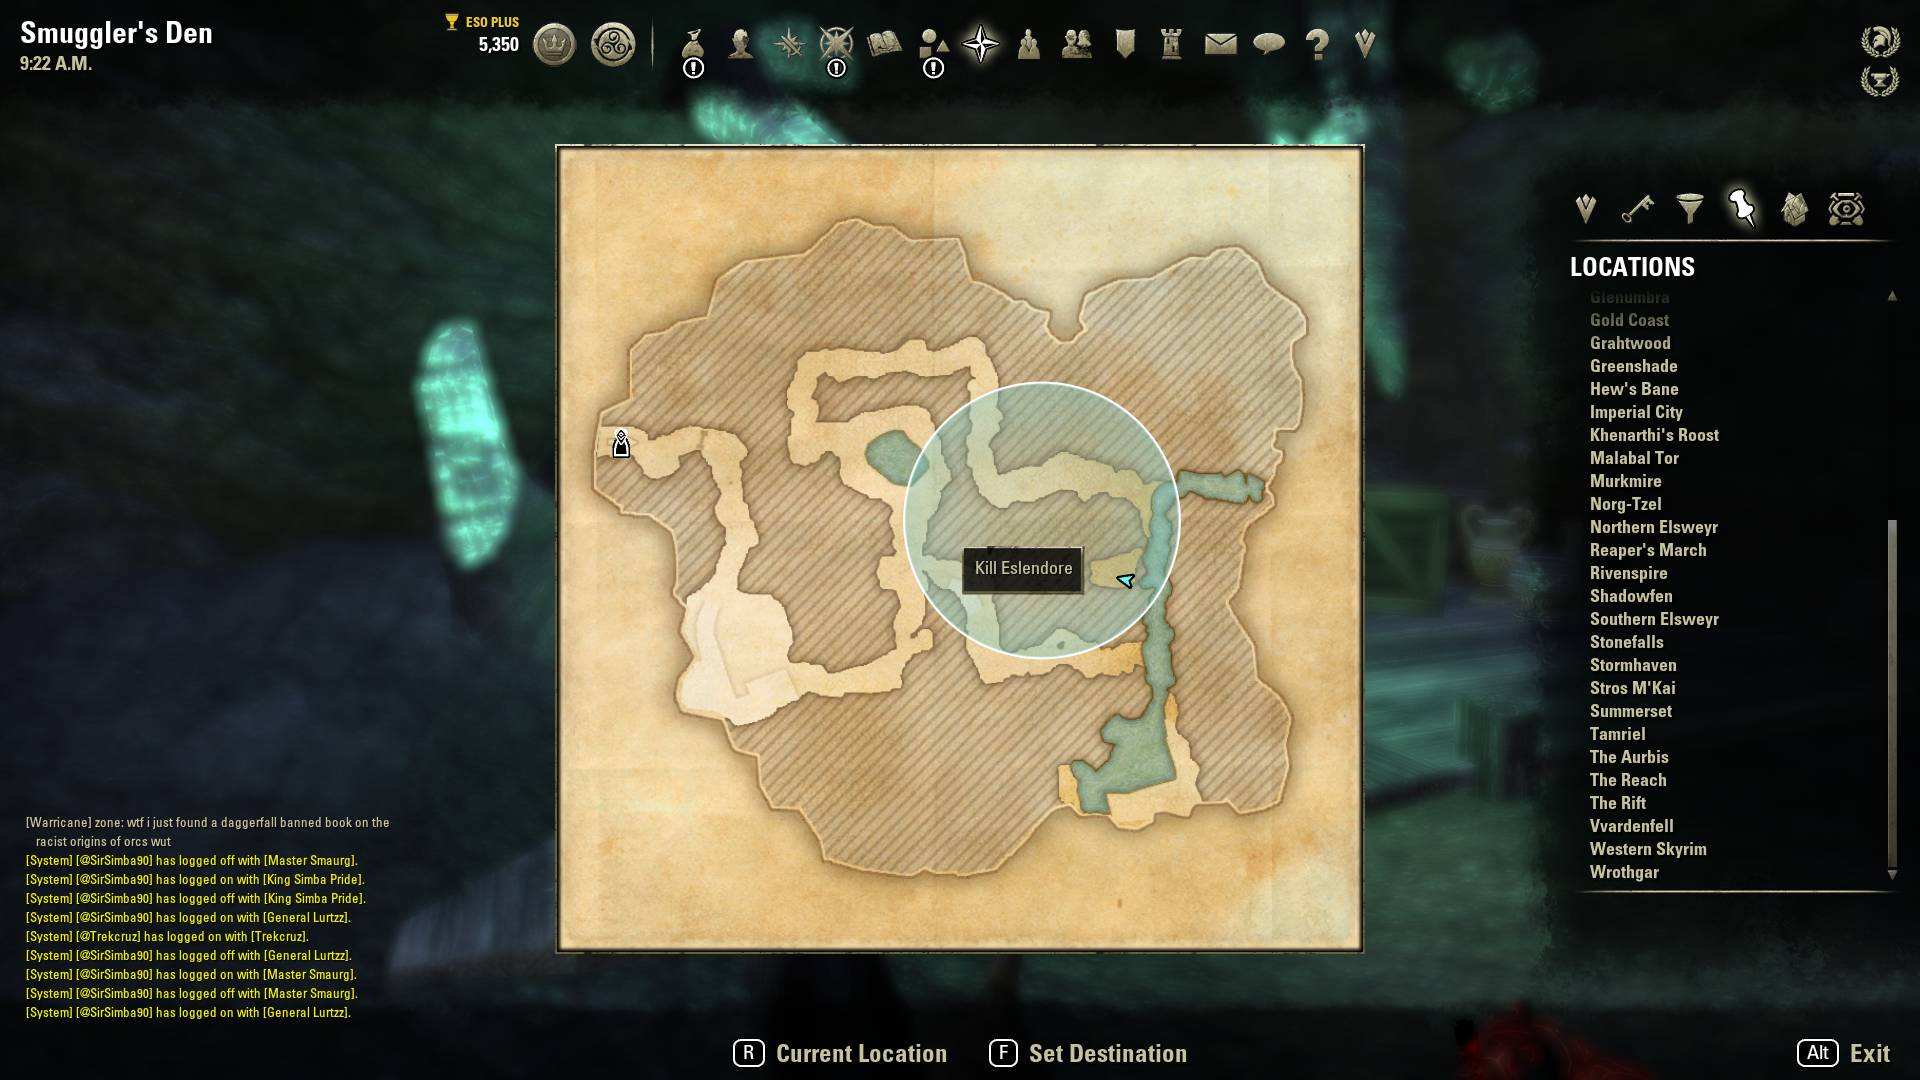
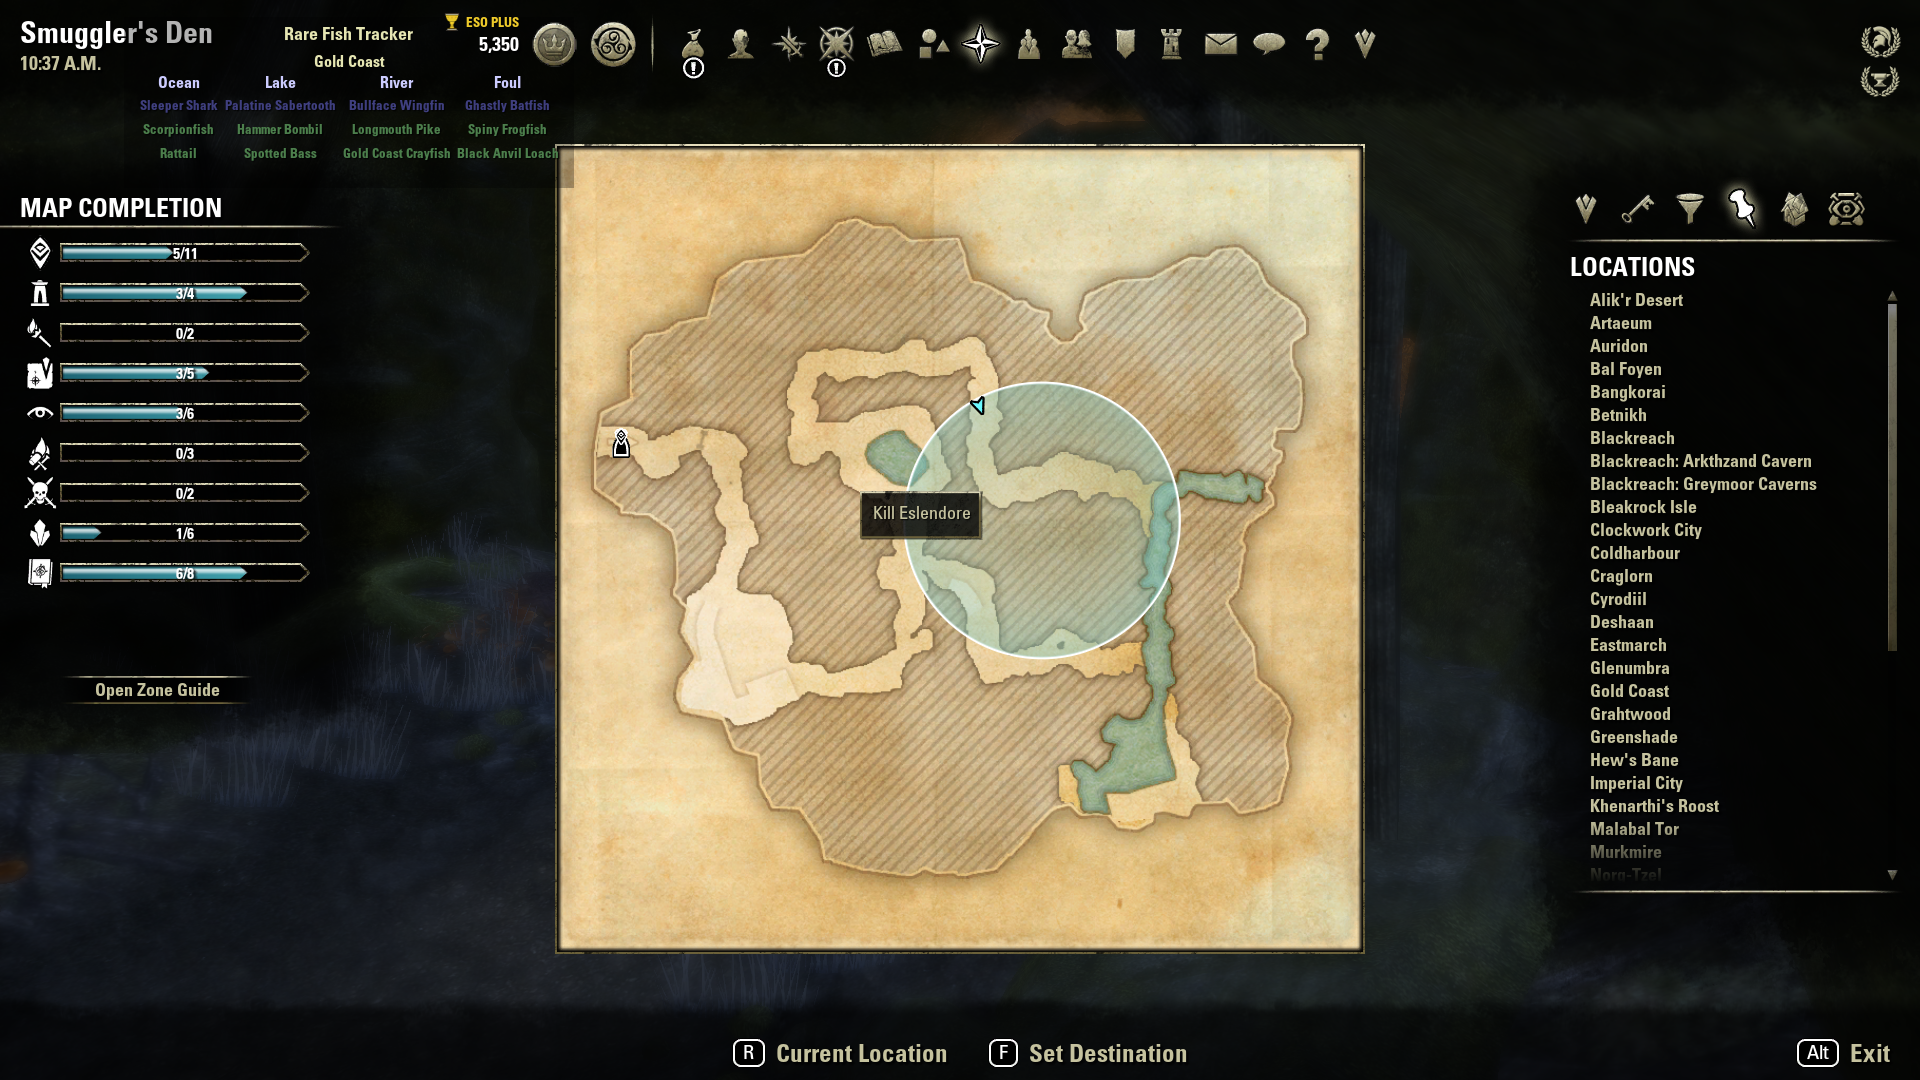
ESLENDORE (Blade of Woe) – Smuggler’s Den

Eslendore Location #1 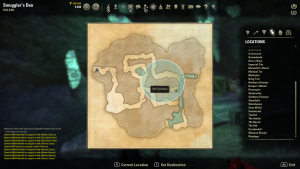
Eslendore Location #1 Map 
Eslendore Location #2 
Eslendore Location #2 Map


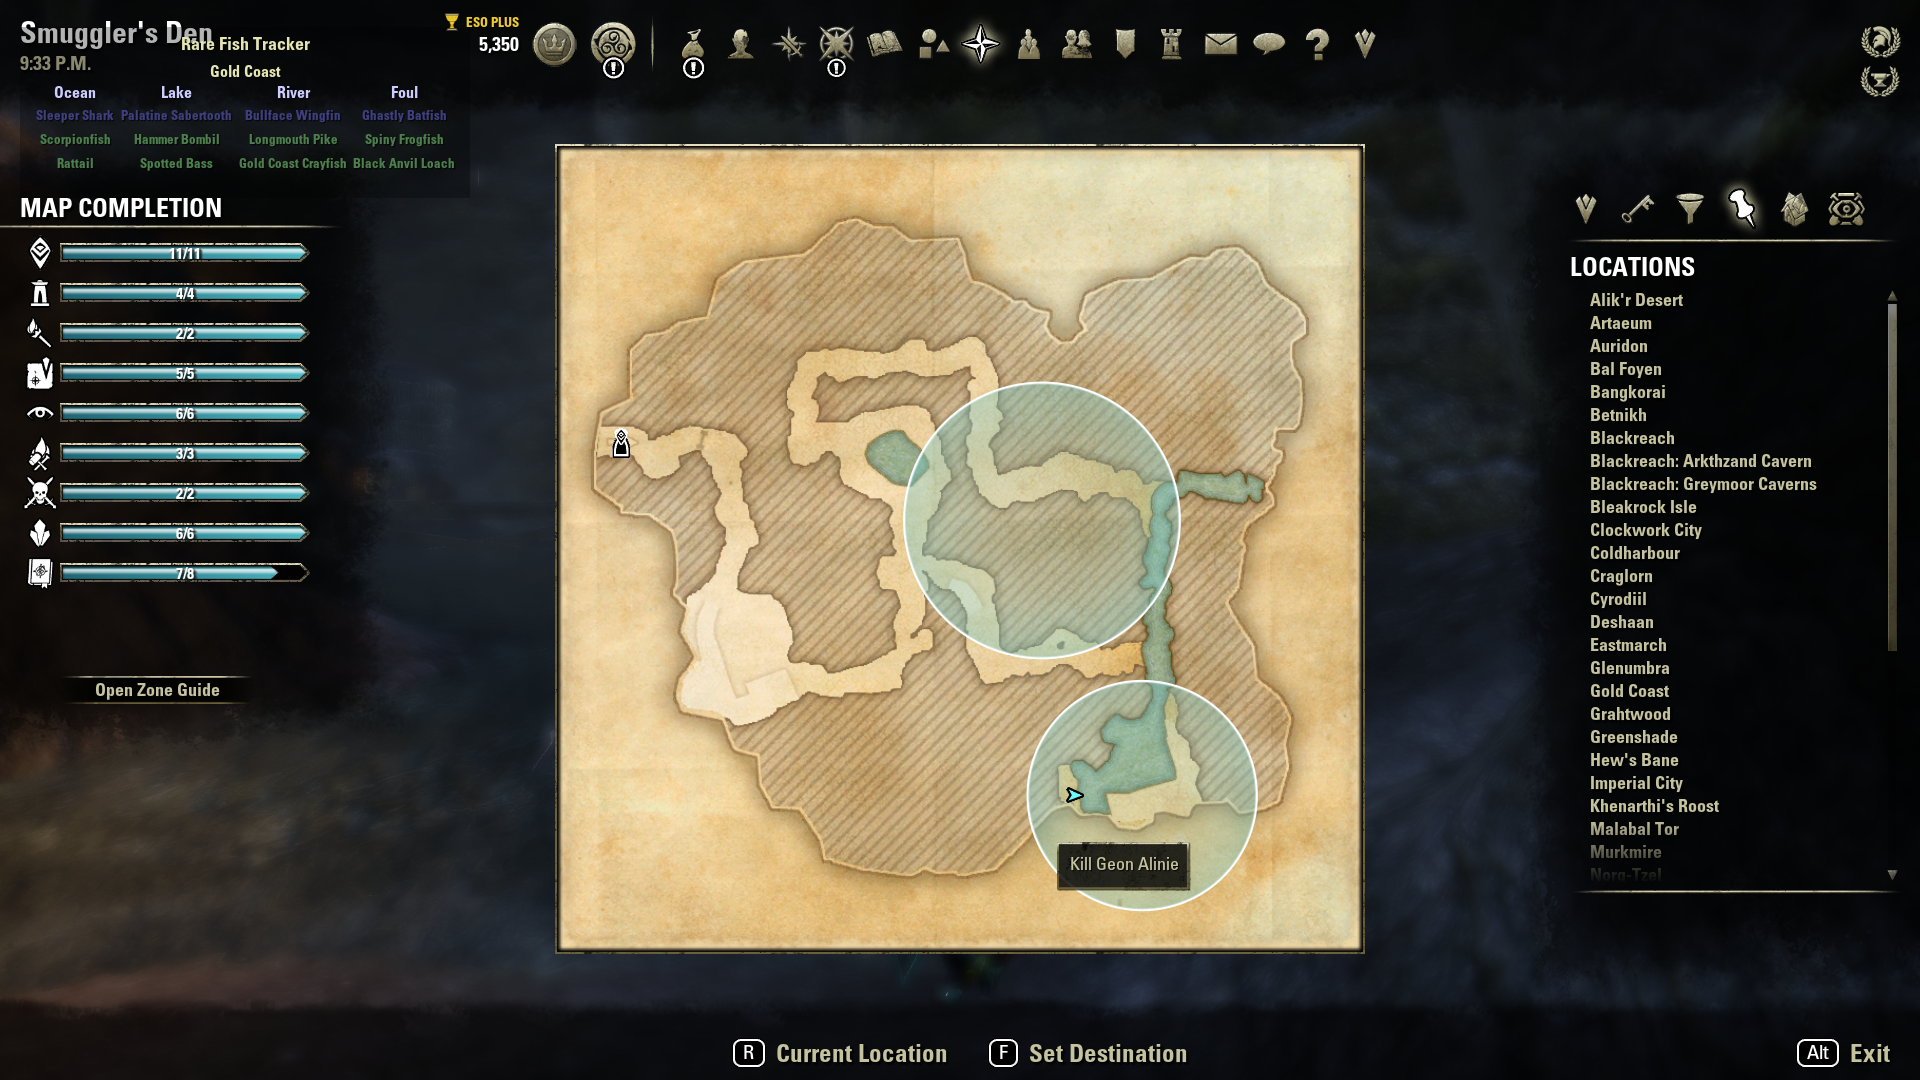
GEON ALINIE (Blade of Woe) – Smuggler’s Den

Geon Alinie Location 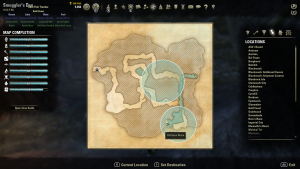
Geon Alinie Location Map
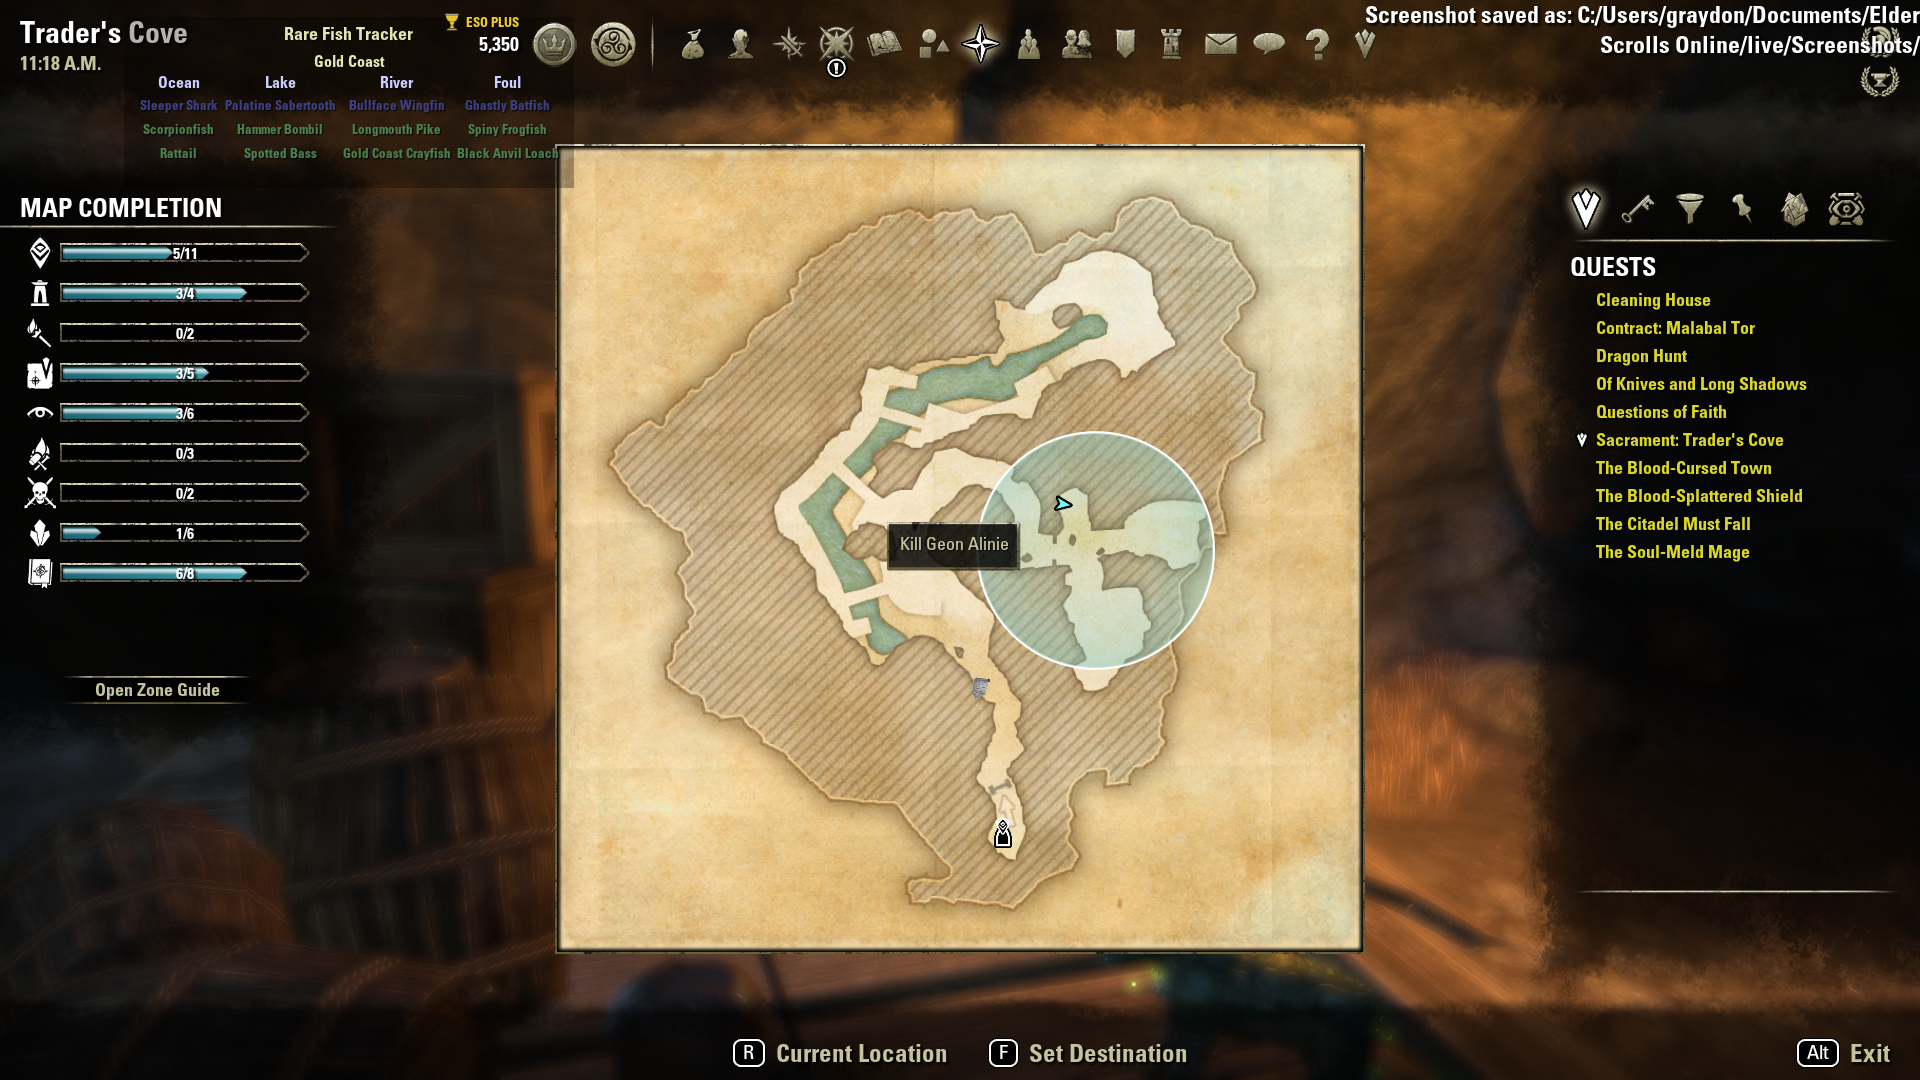
GEON ALINIE (Blade of Woe) – Trader’s Cove
Geon Alinie Location #1 
Geon Alinie Location #1 Map 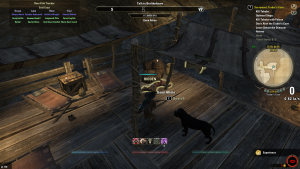
Geon Alinie Location #2 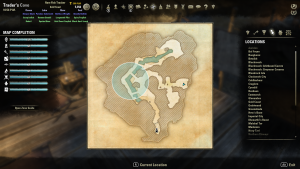
Geon Alinie Location #2 Map


HERMINIUS ANDUS (Blade of Woe) – Sewer Tenement

Herminius Andus Location #1 
Herminius Andus Location #1 Map 
Herminius Andus Location #2 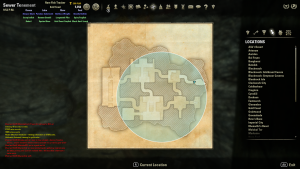
Herminius Andus Location #2 Map


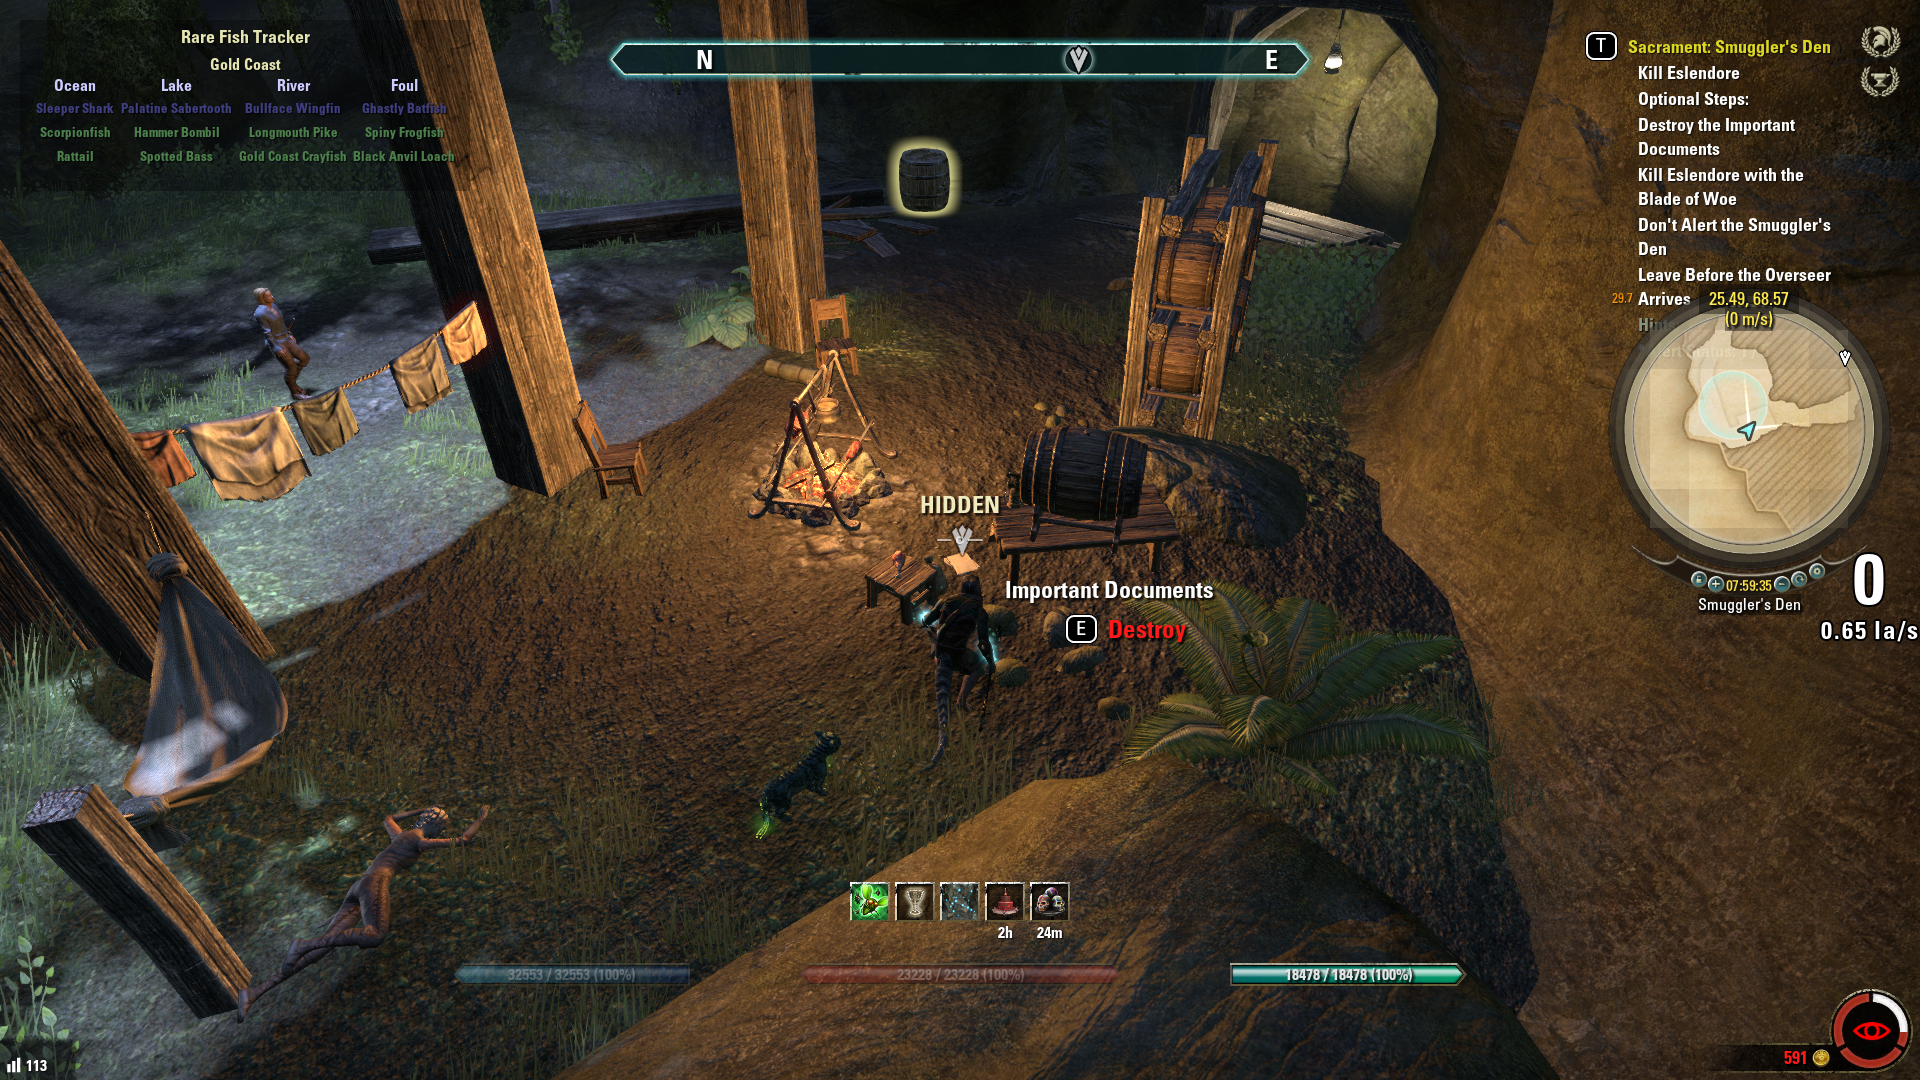
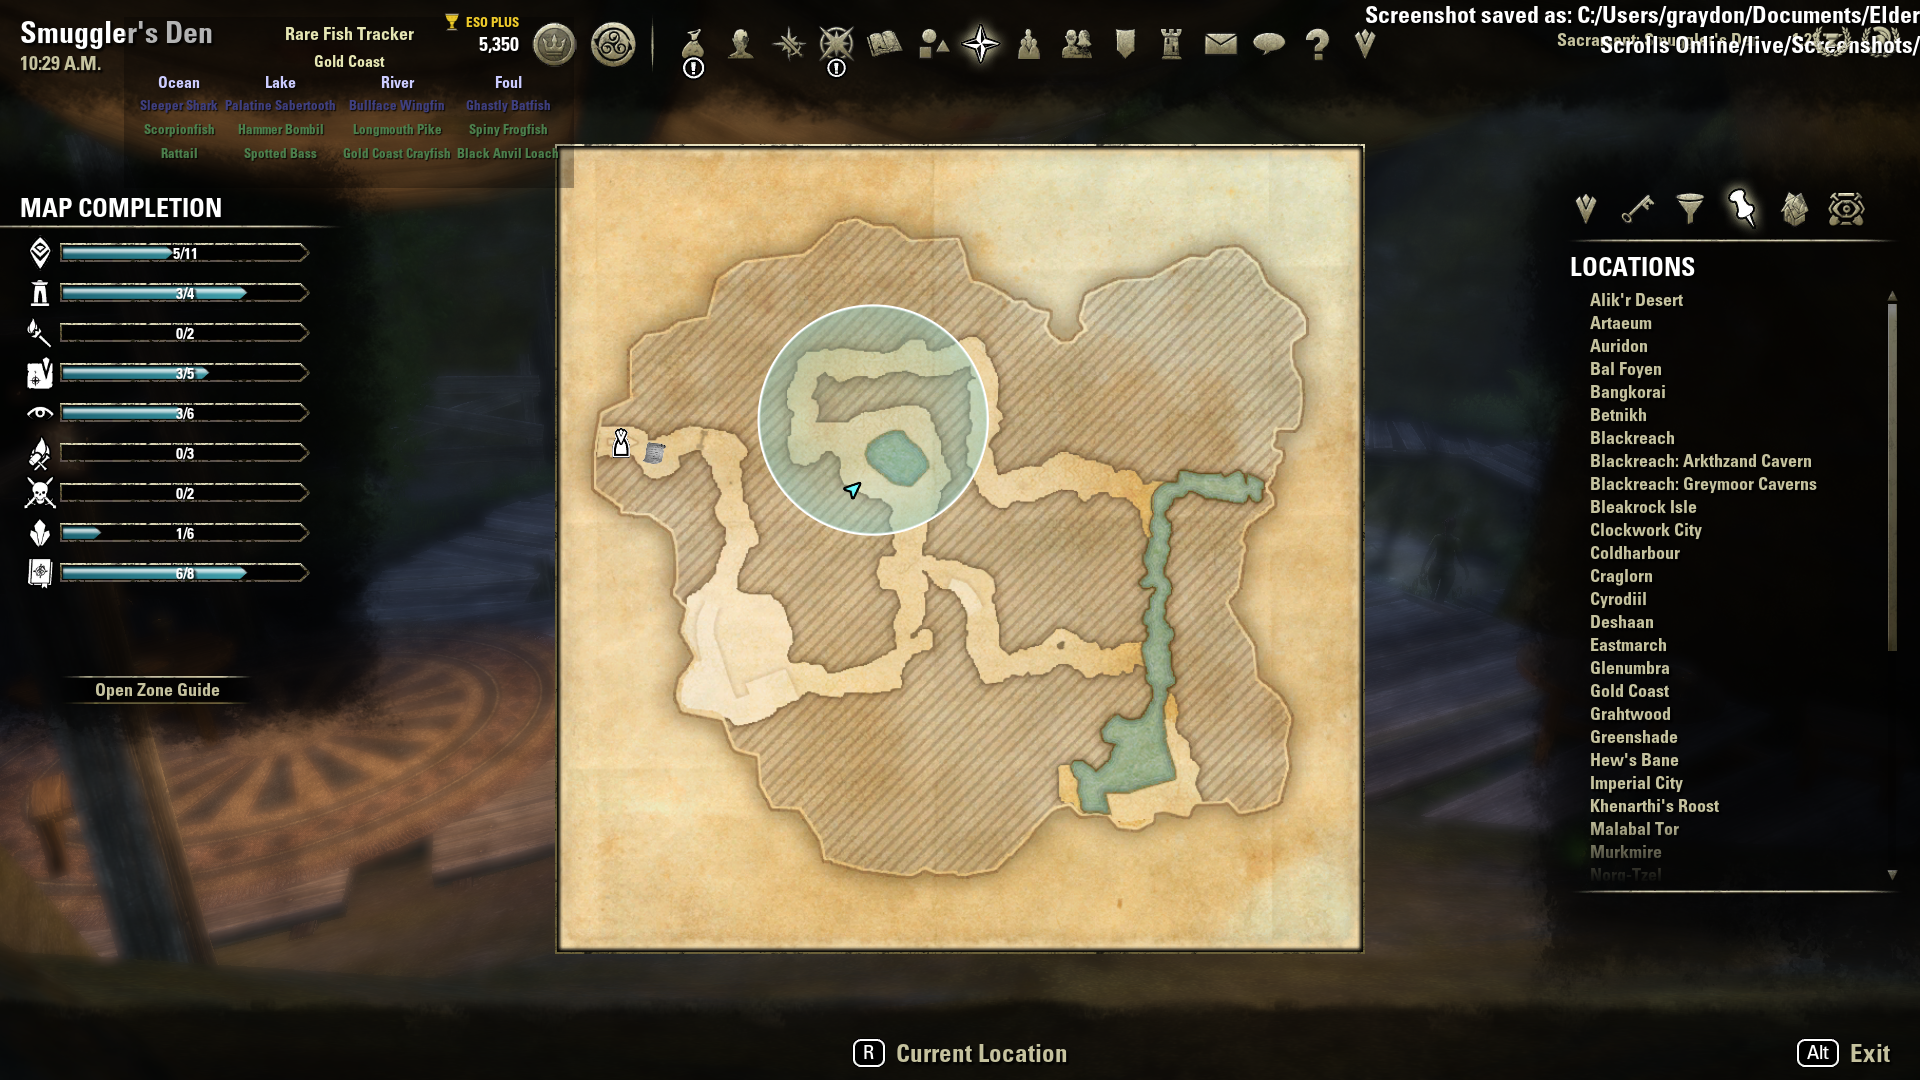
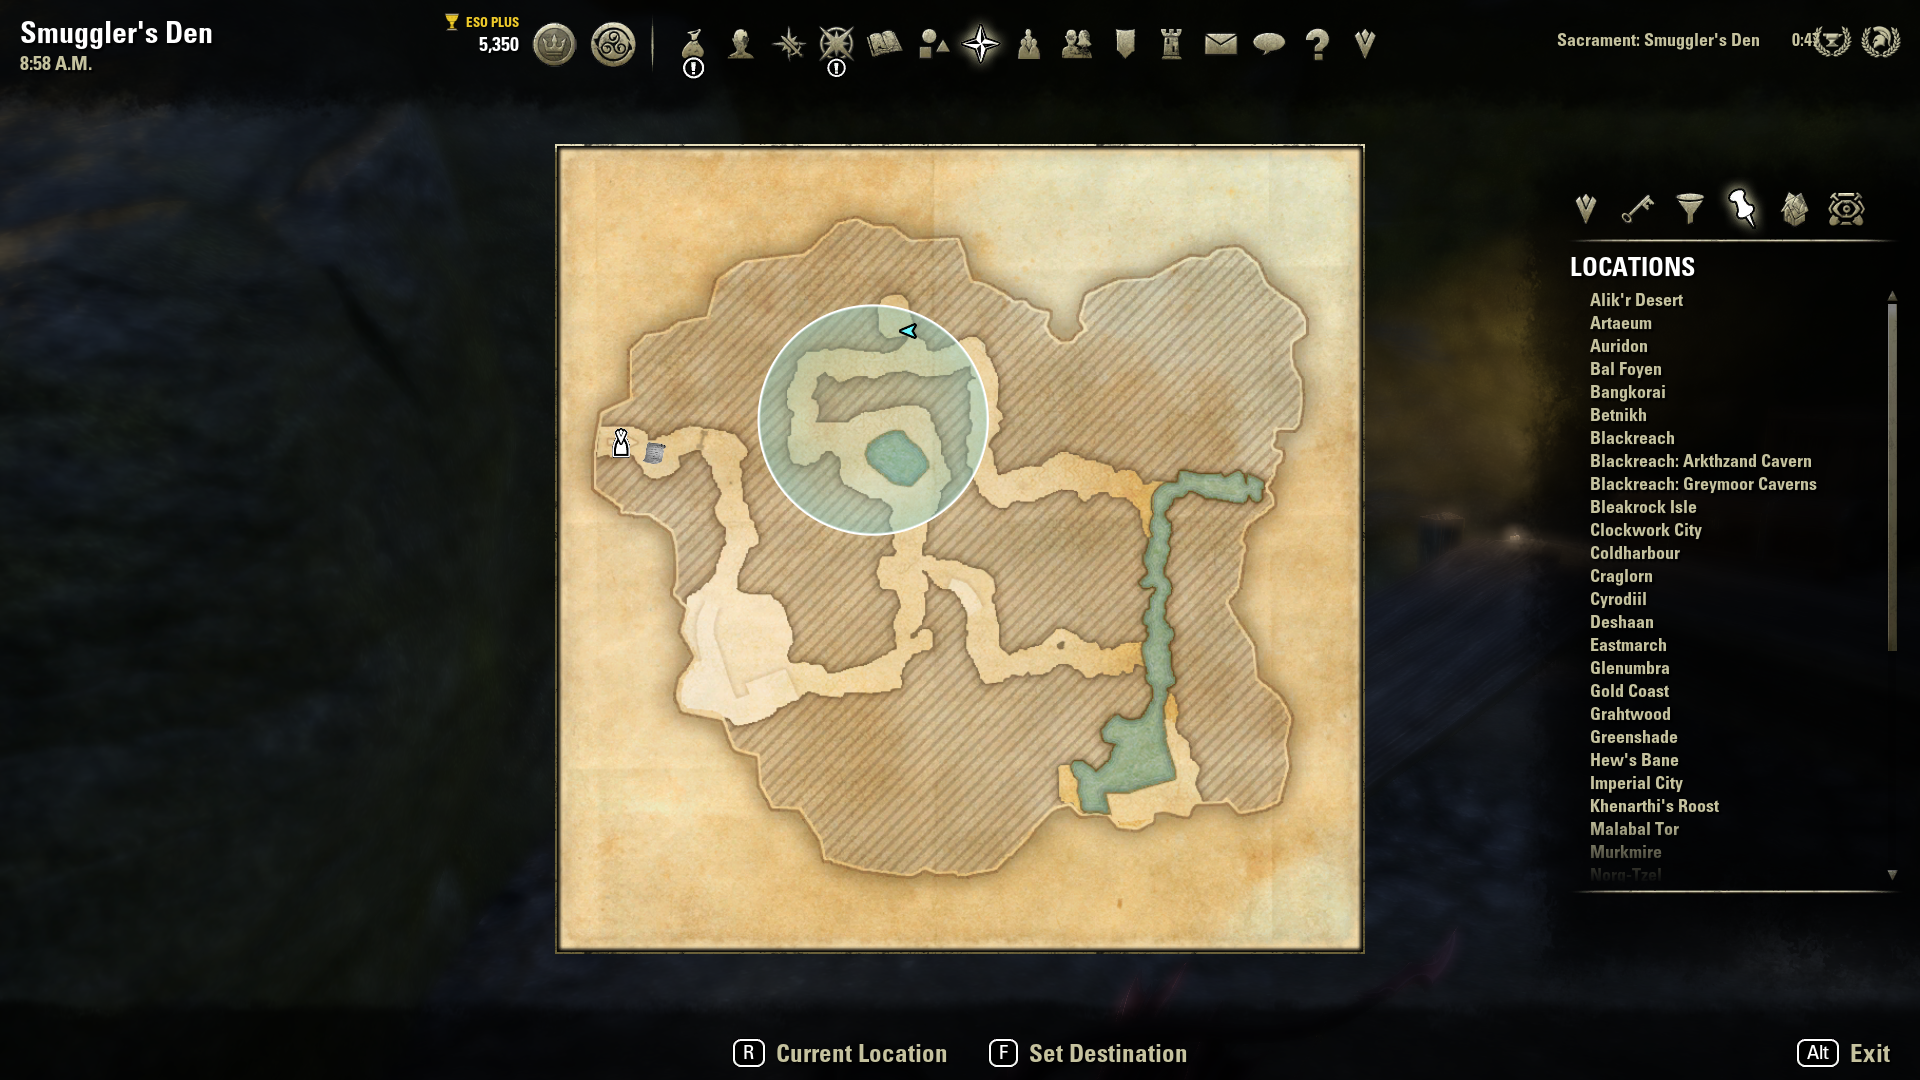
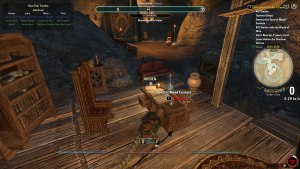
IMPORTANT DOCUMENTS (Destroy) – Smuggler’s Den

Important Documents Location #1 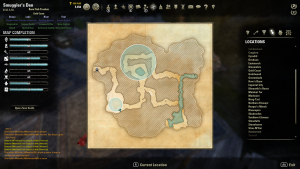
Important Documents Location #1 Map 
Important Documents Location #2 
Important Documents Location #2 Map 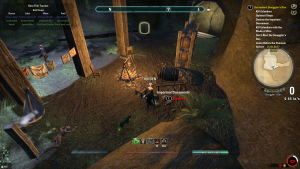
Important Documents Location #3 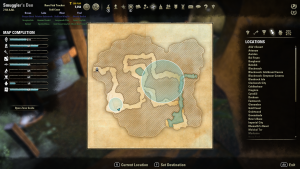
Important Documents Location #3 Map

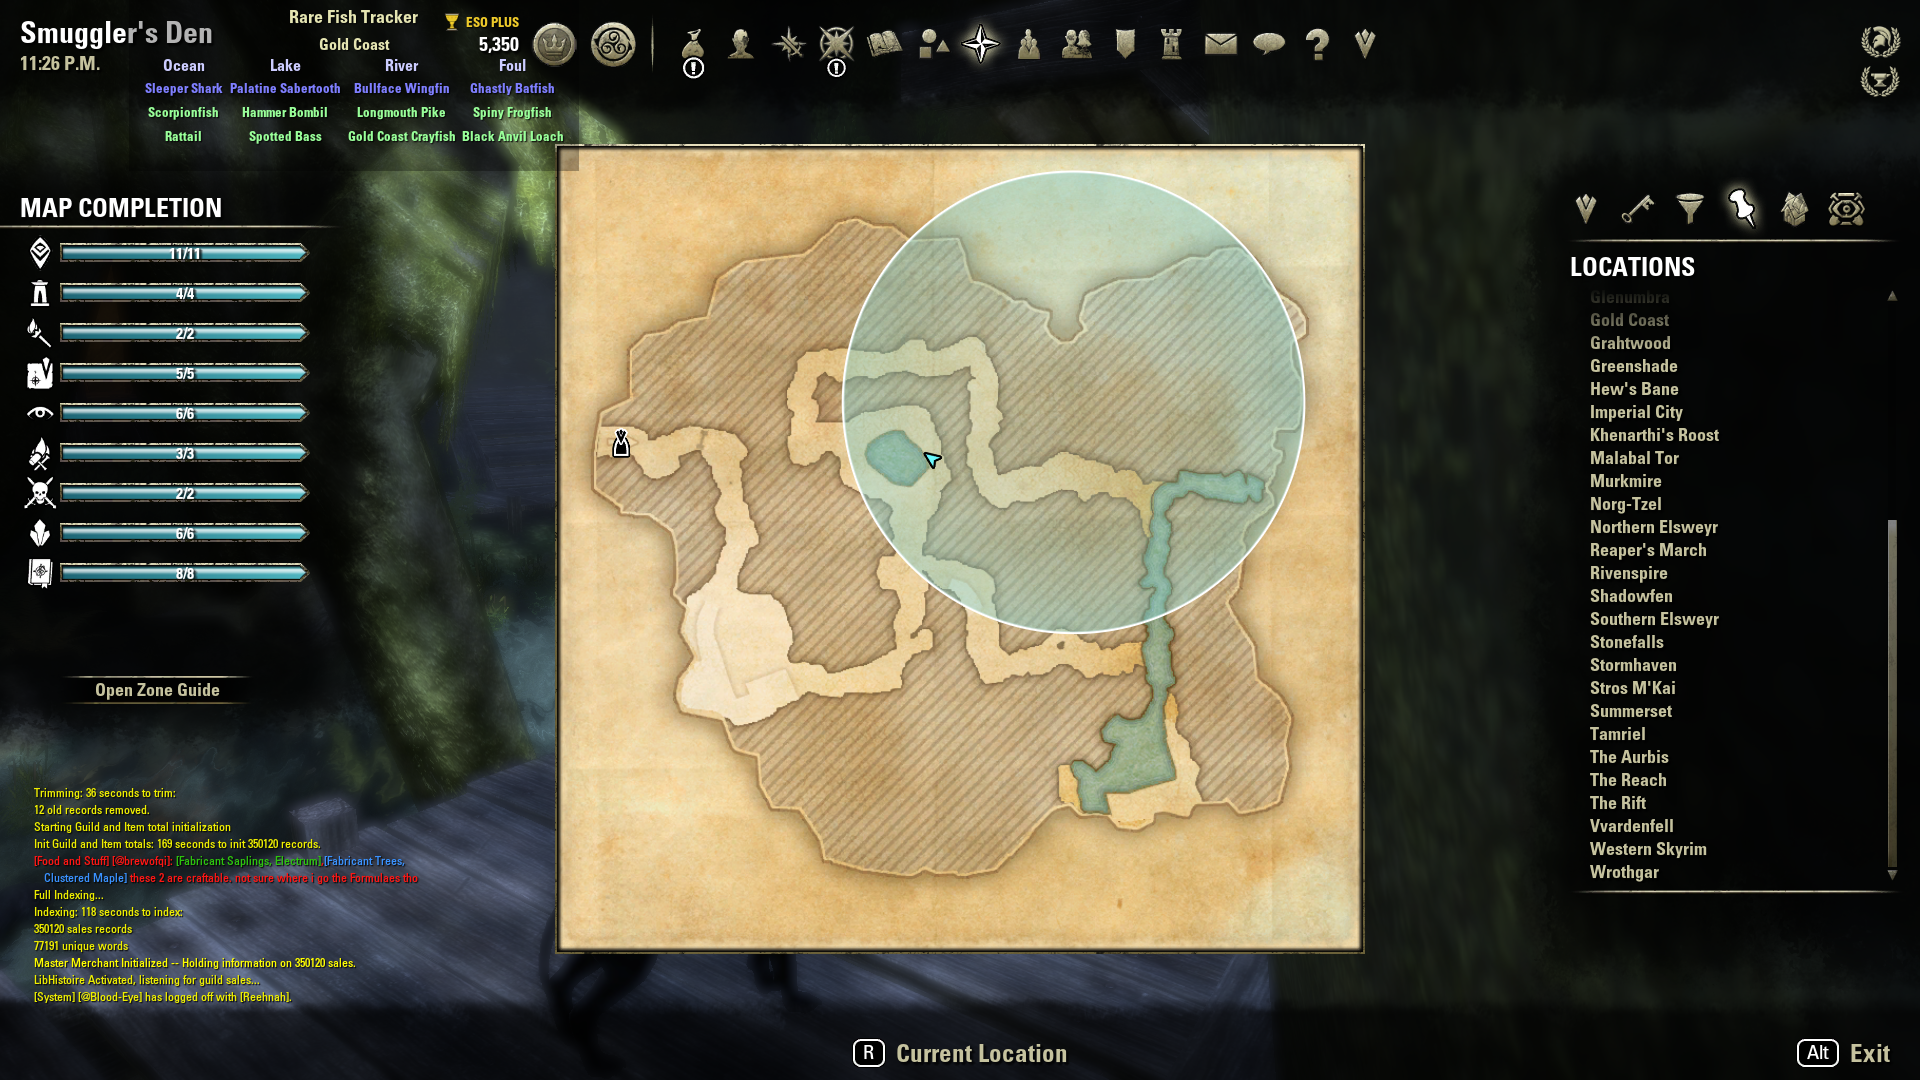
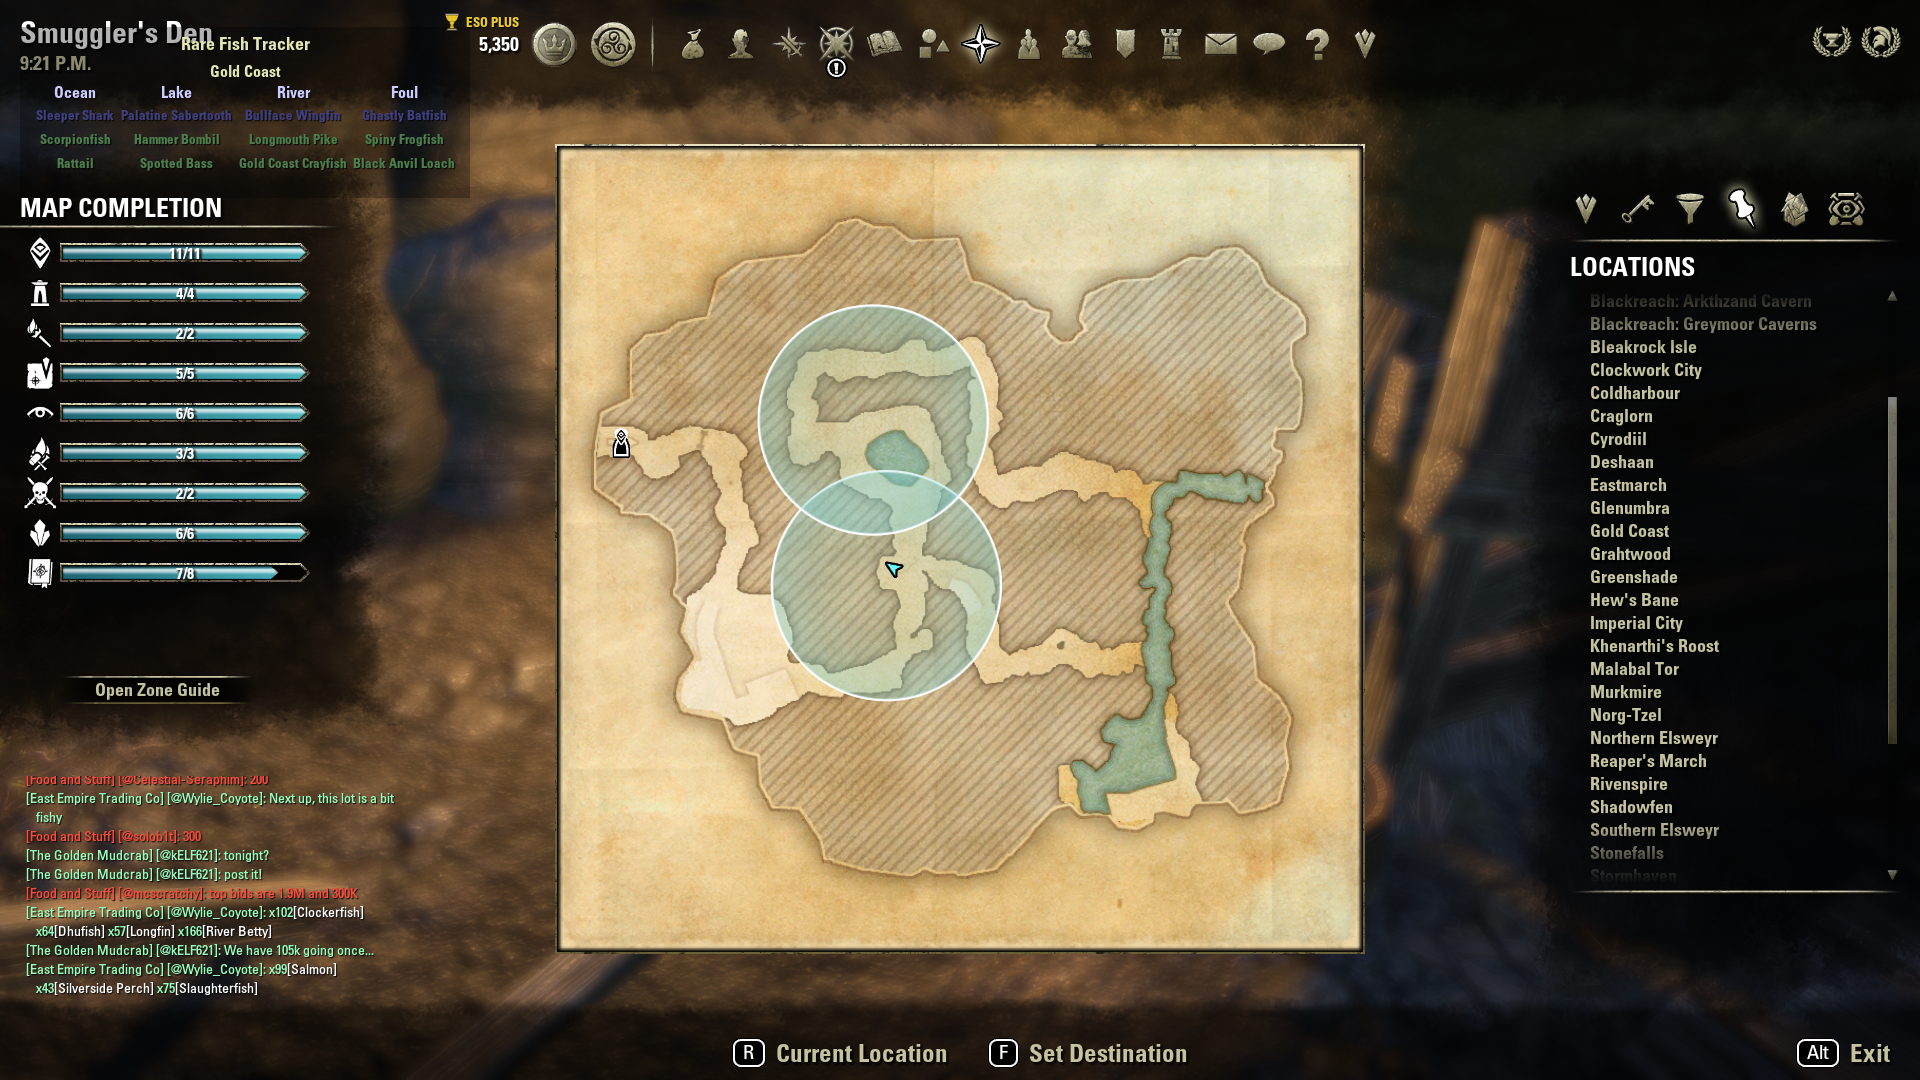
KWAMA QUEEN EGG (Destroy) – Smuggler’s Den

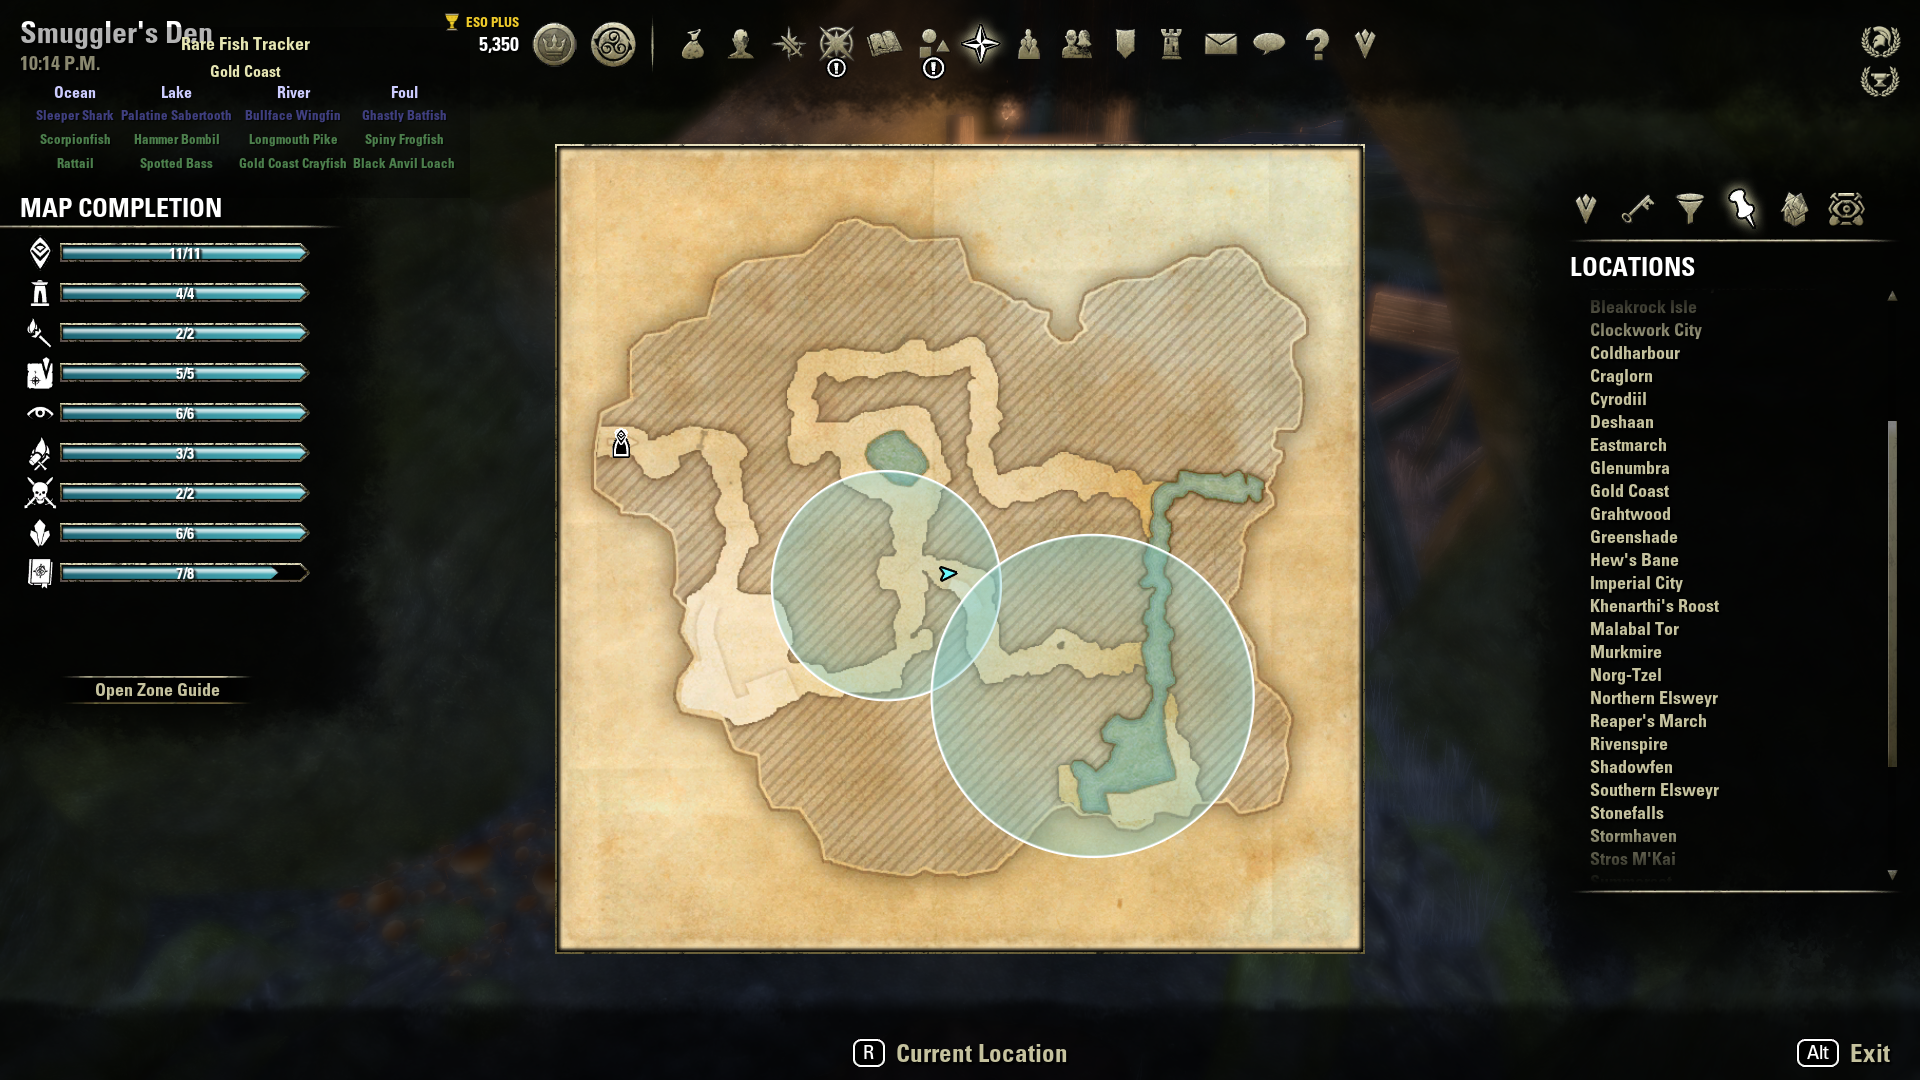
Kwama Queen Egg Location #1 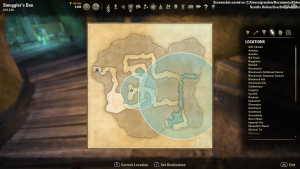
Kwama Queen Egg
Location #1 Map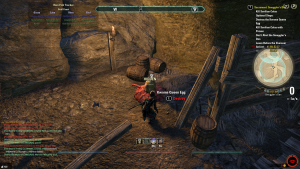
Kwama Queen Egg Location #2 
Kwama Queen Egg
Location #2 Map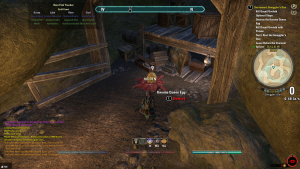
Kwama Queen Egg Location #3 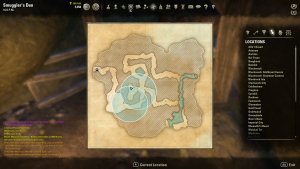
Kwama Queen Egg
Location #3 Map
Kwama Queen Egg Location #4 
Kwama Queen Egg
Location #4 Map


LAMZAKHA (Poison) – Sewer Tenement
Lamzakha Location #1 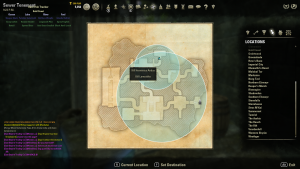
Lamzakha Location #1 Map 
Lamzakha Location #2 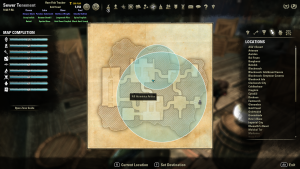
Lamzakha Location #2 Map 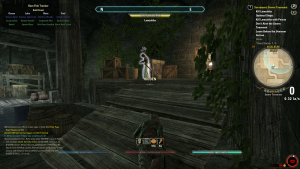
Lamzakha Location #3 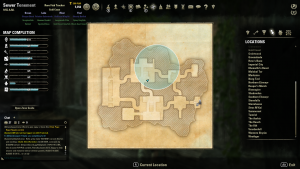
Lamzakha Location #3 Map


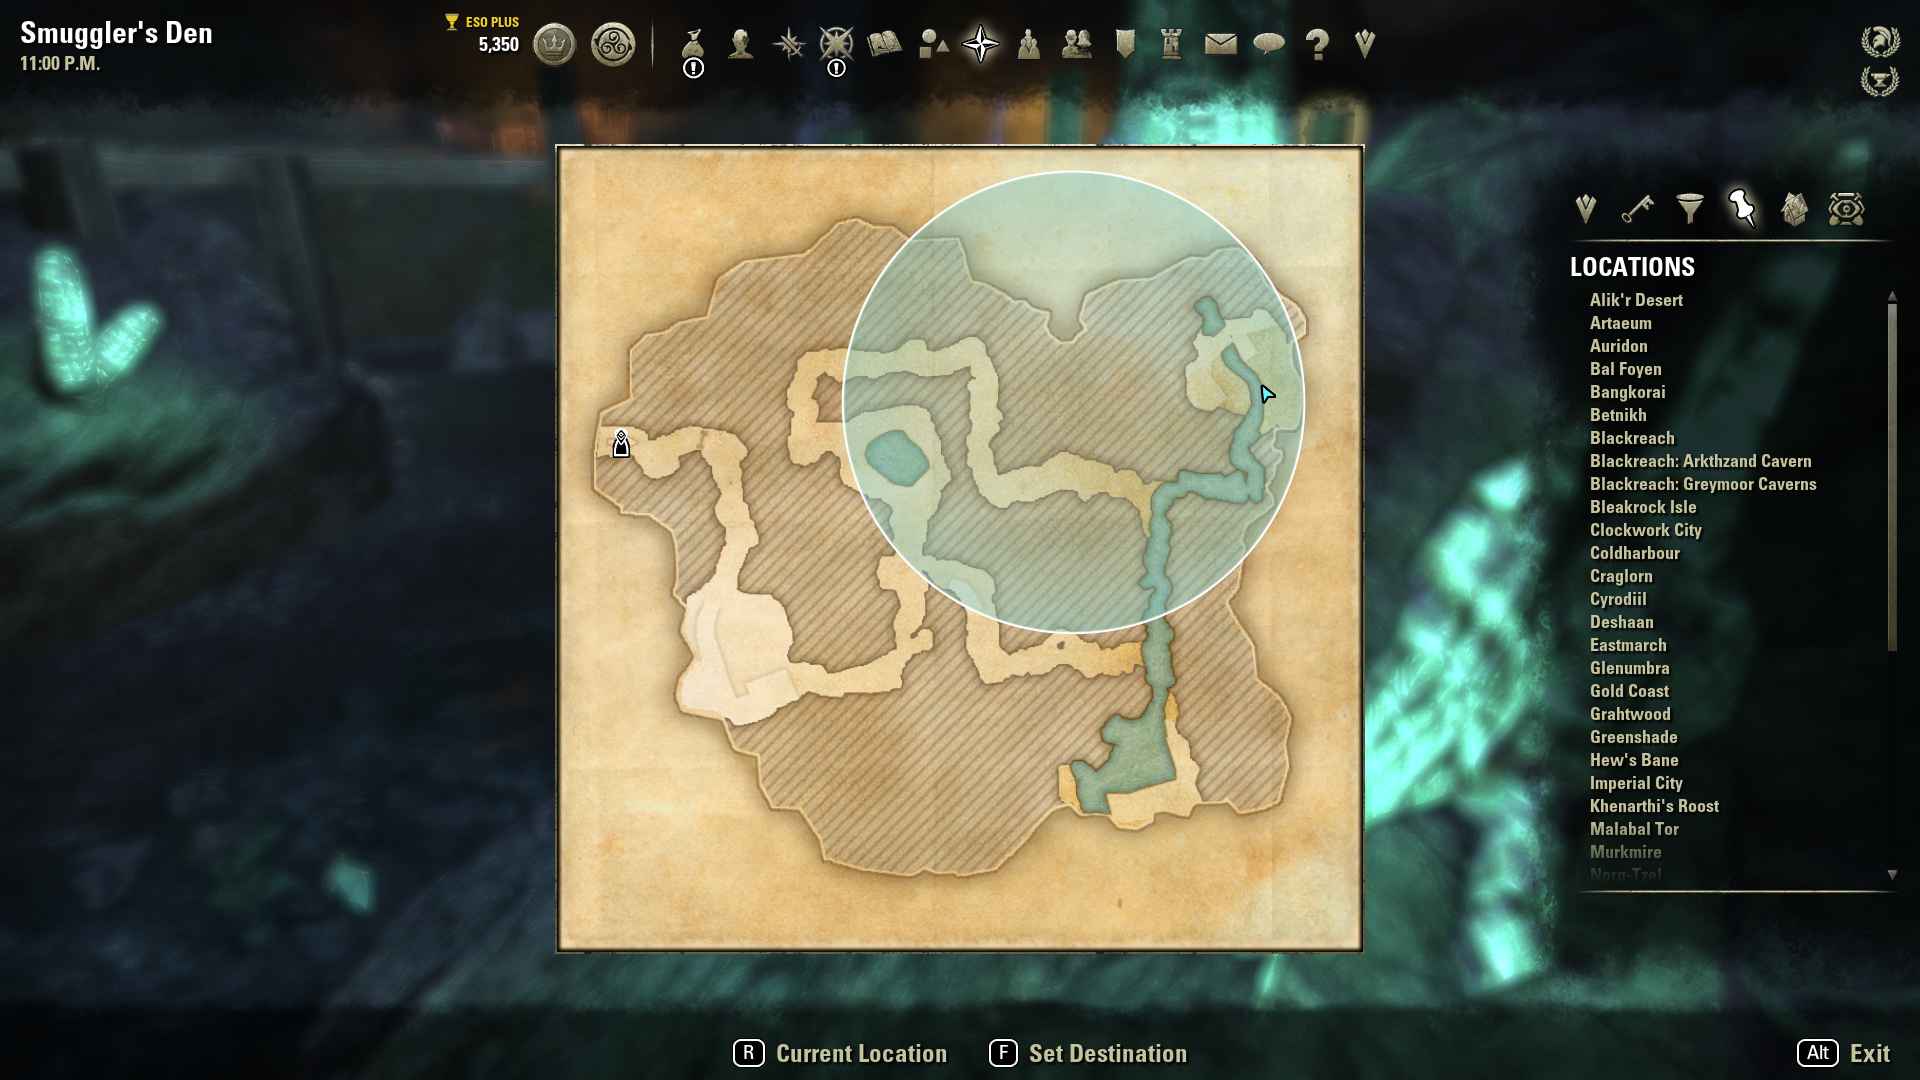
LUCKY (Kill) – Smuggler’s Den – NOTE: To kill Lucky without incurring any Bounty, you must first stealthily kill all the people in the central chamber. Then you can attack Lucky without being detected.
Lucky Location 
Lucky Location Map
MABGROLABESH (Poison) – Trader’s Cove

Mabgrolabesh Location #1 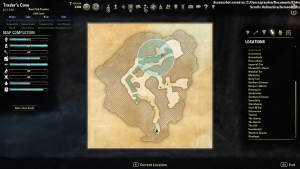
Mabgrolabesh Location #1 Map 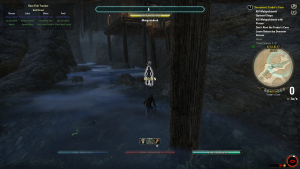
Mabgrolabesh Location #2 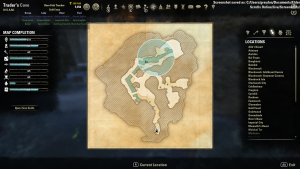
Mabgrolabesh Location #2 Map


MONSASHANA (Poison) – Trader’s Cove
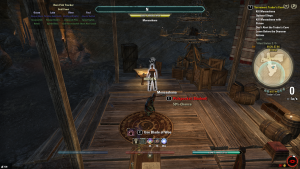
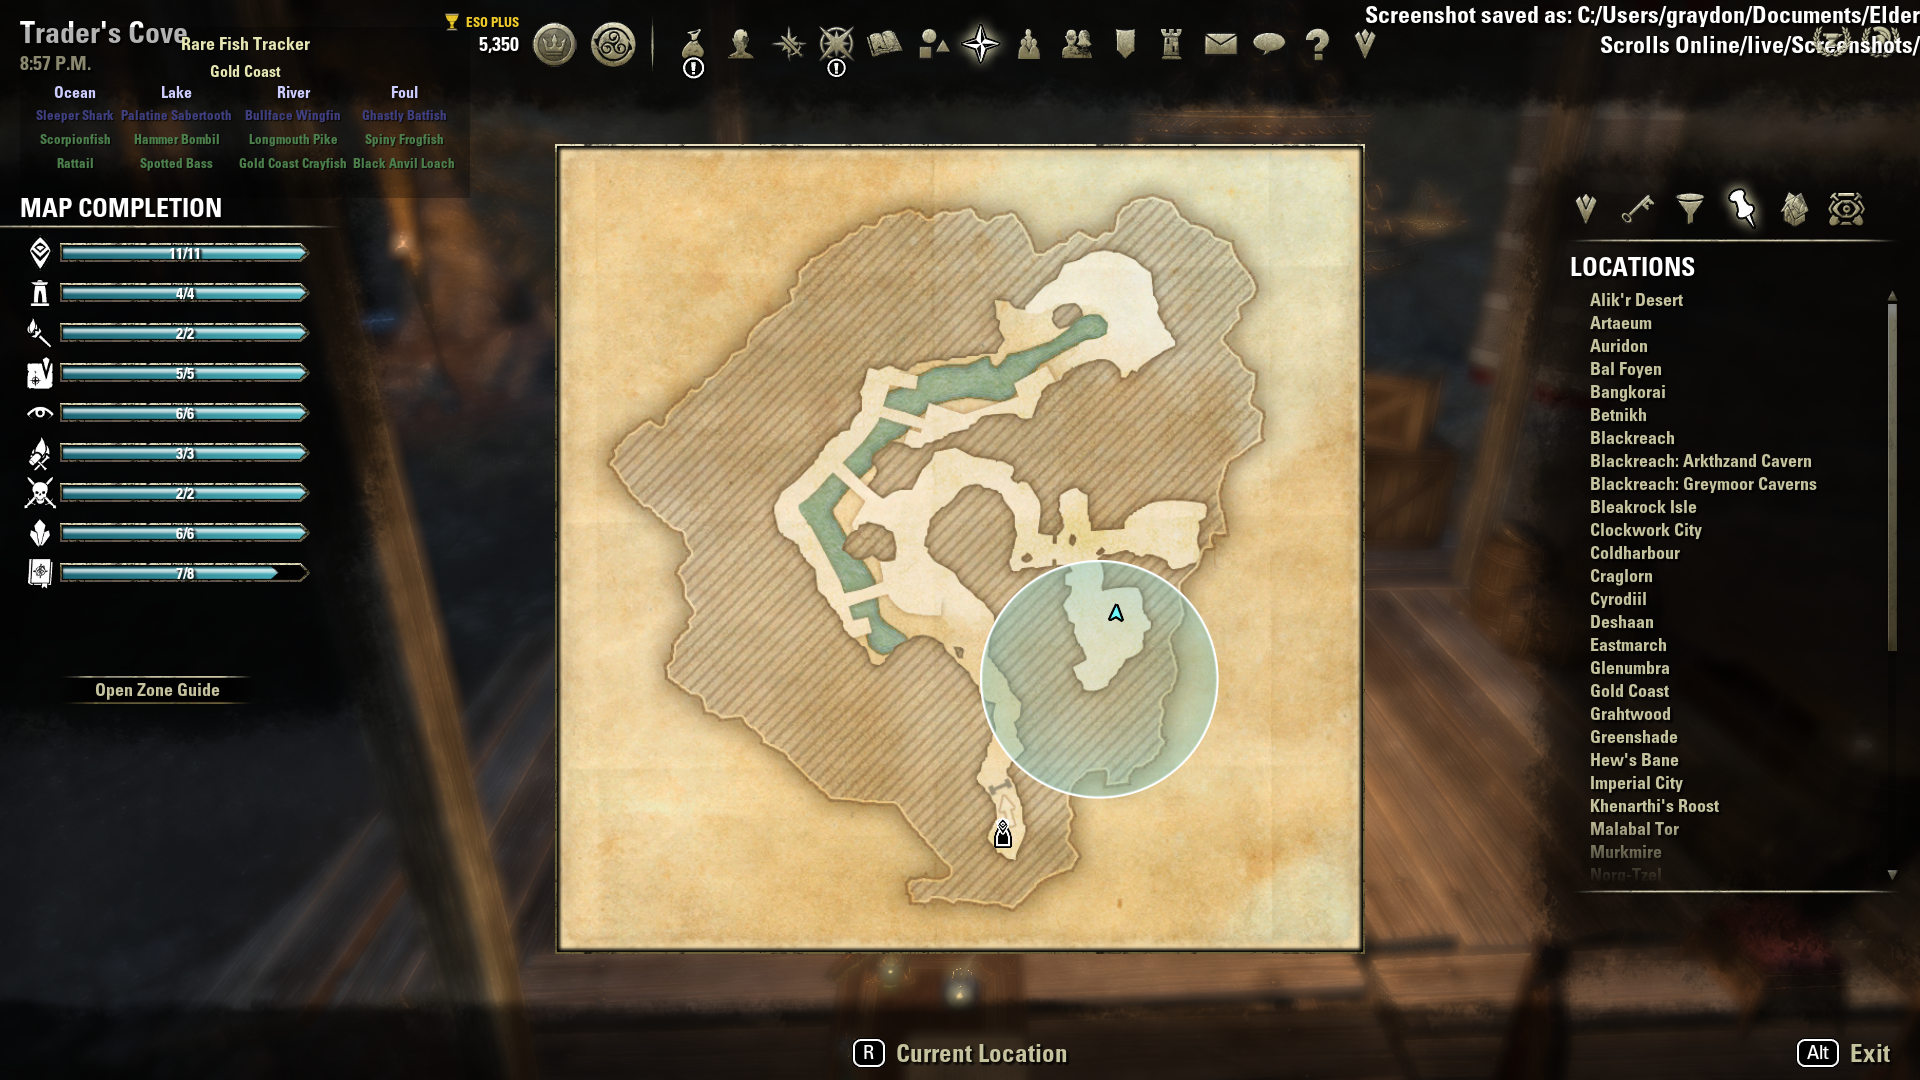
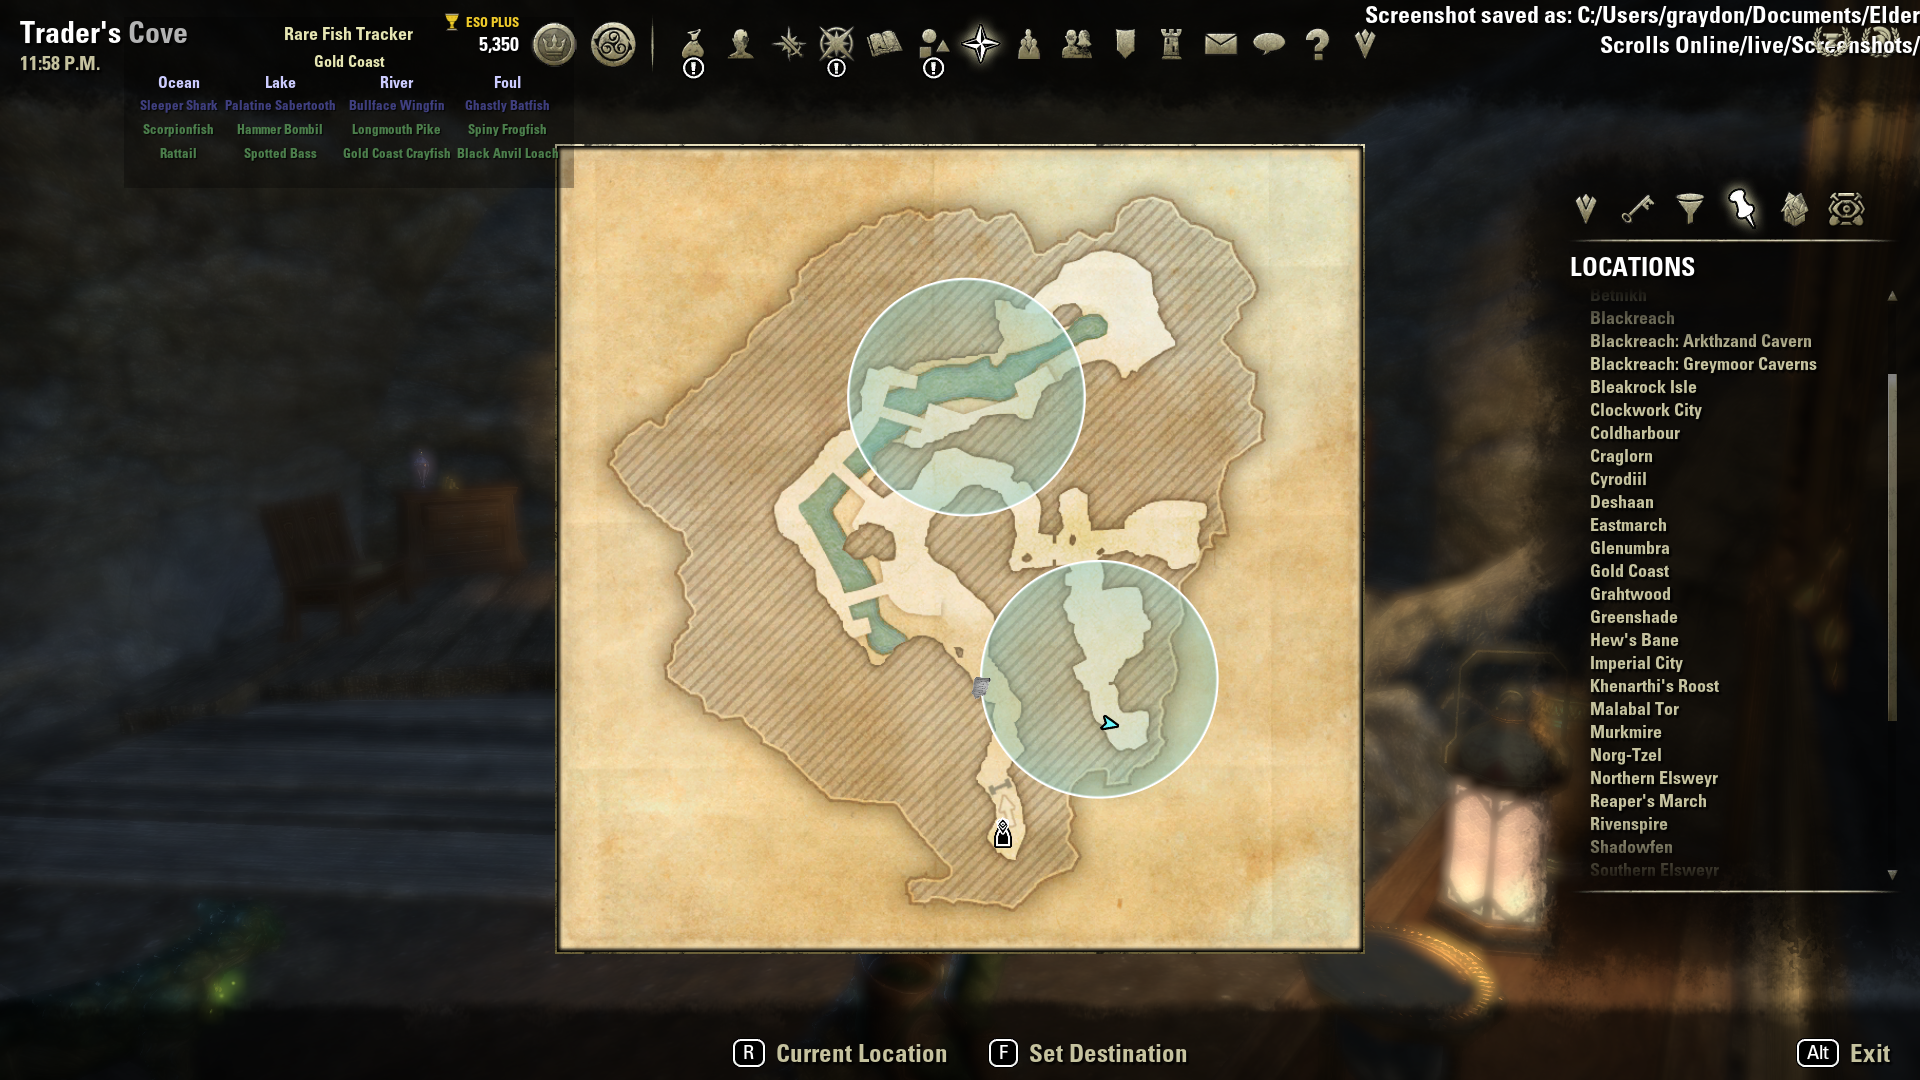
Monsashana Location #1 
Monsashana Location #1 Map 
Monsashana Location #2 
Monsashana Location #2 Map

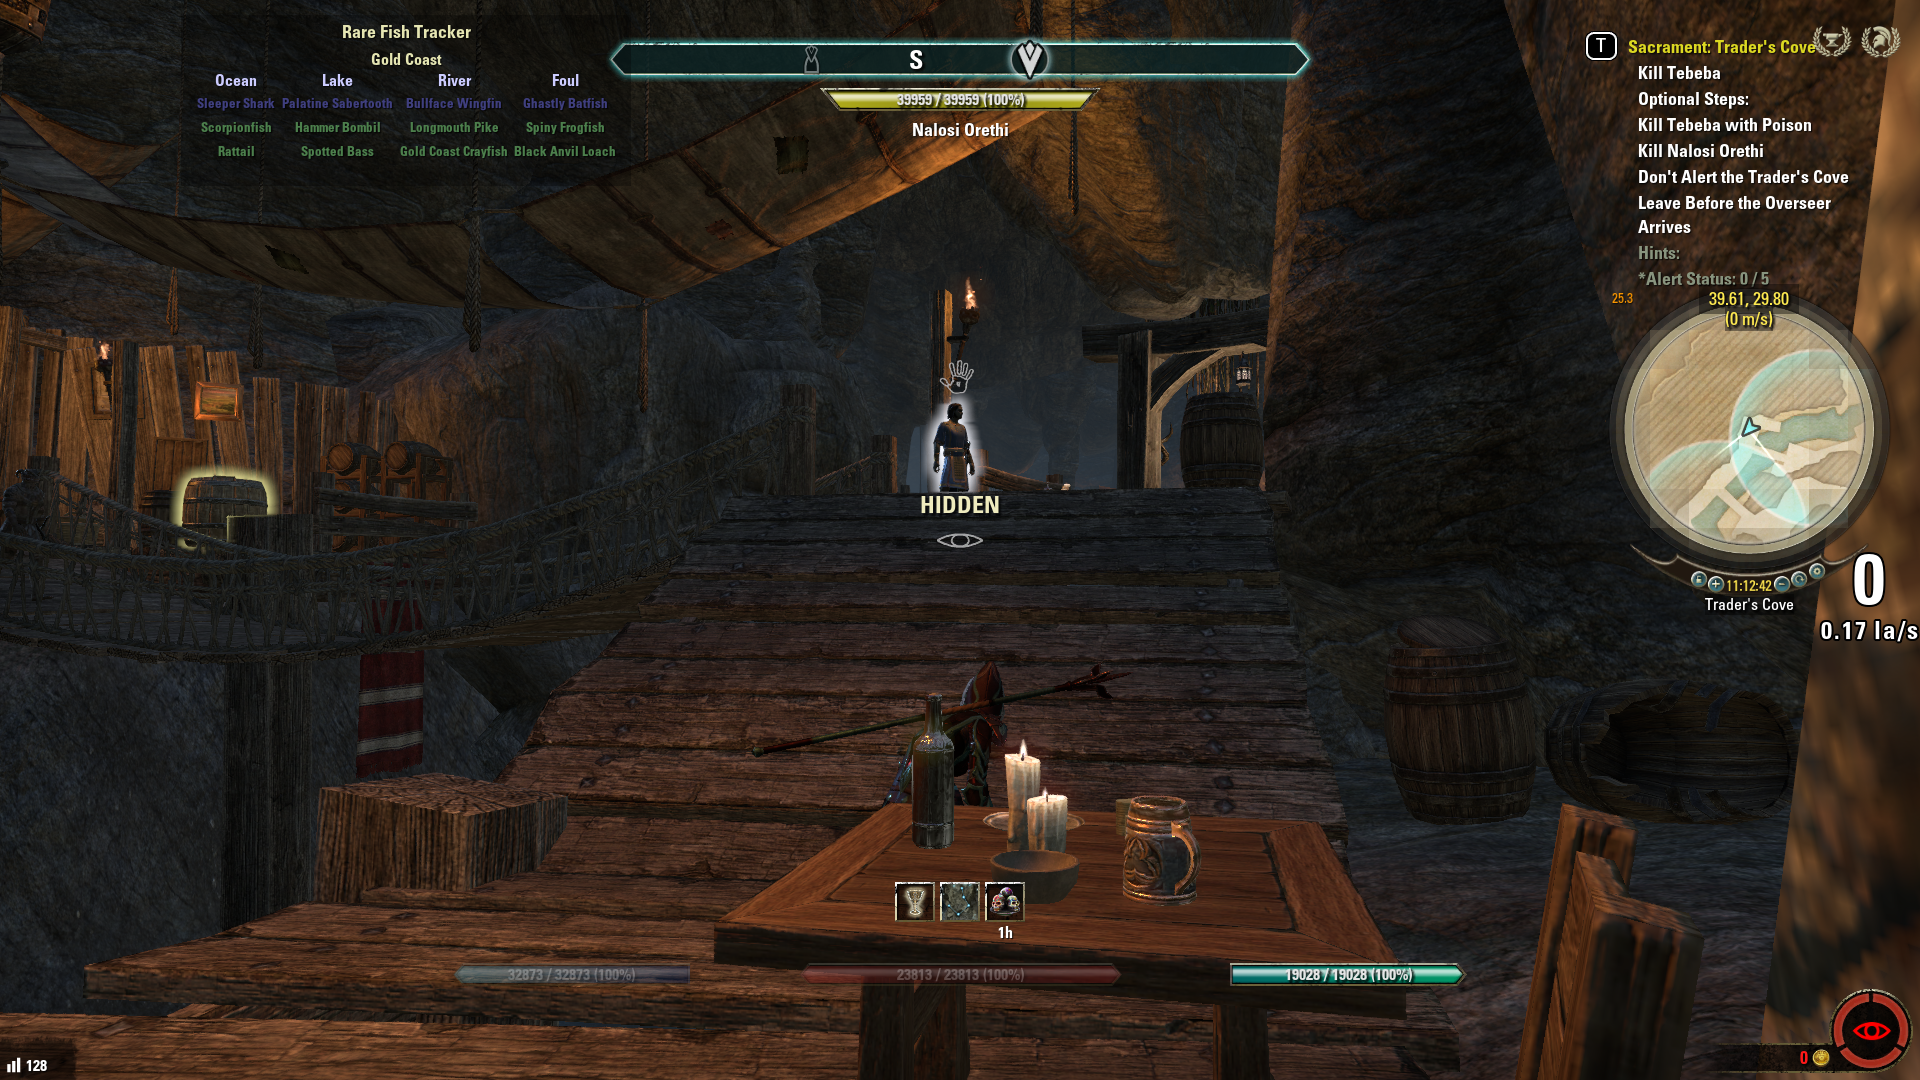
NALOSI ORETHI (Blade of Woe) – Trader’s Cove
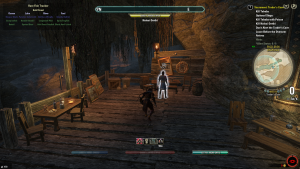
Nalosi Orethi Location #1 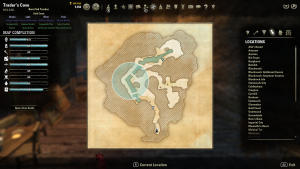
Nalosi Orethi Location #1 Map 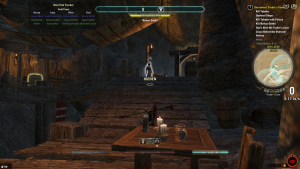
Nalosi Orethi Location #2 
Nalosi Orethi Location #2 Map

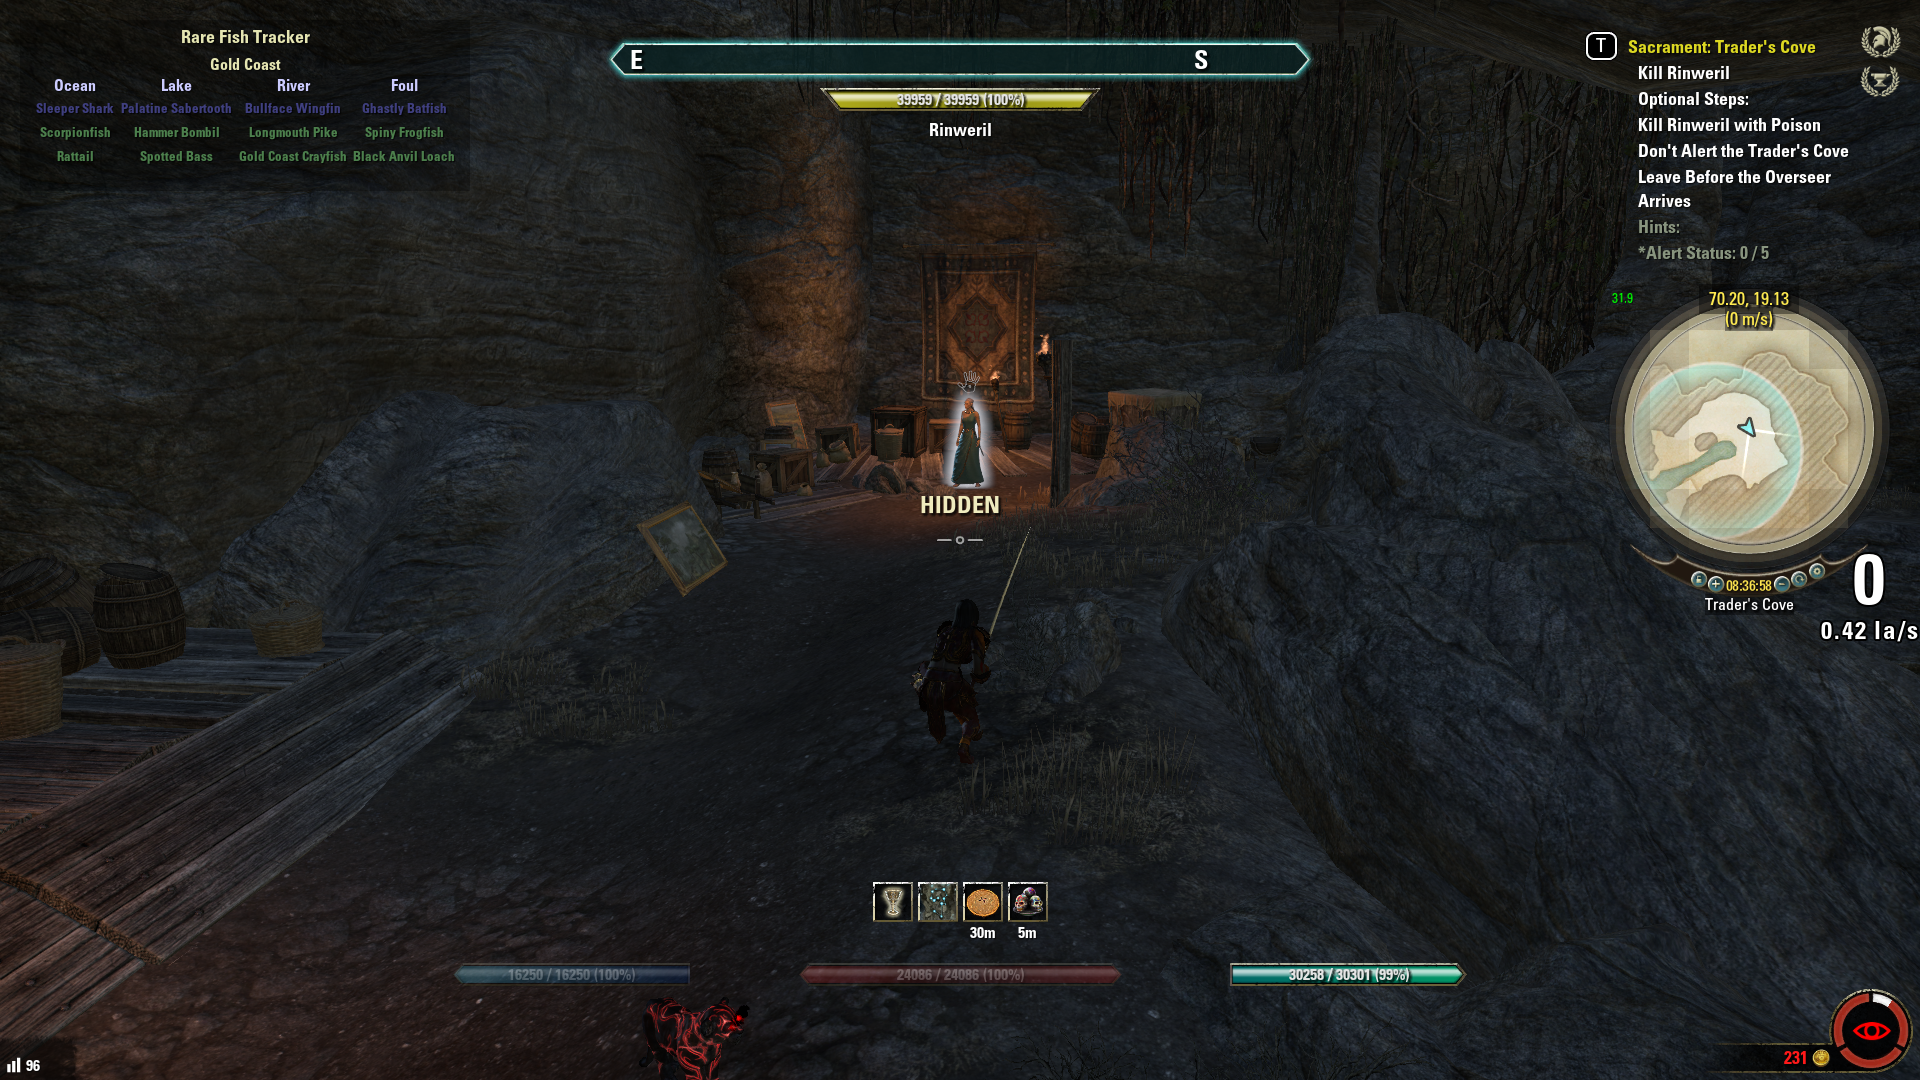
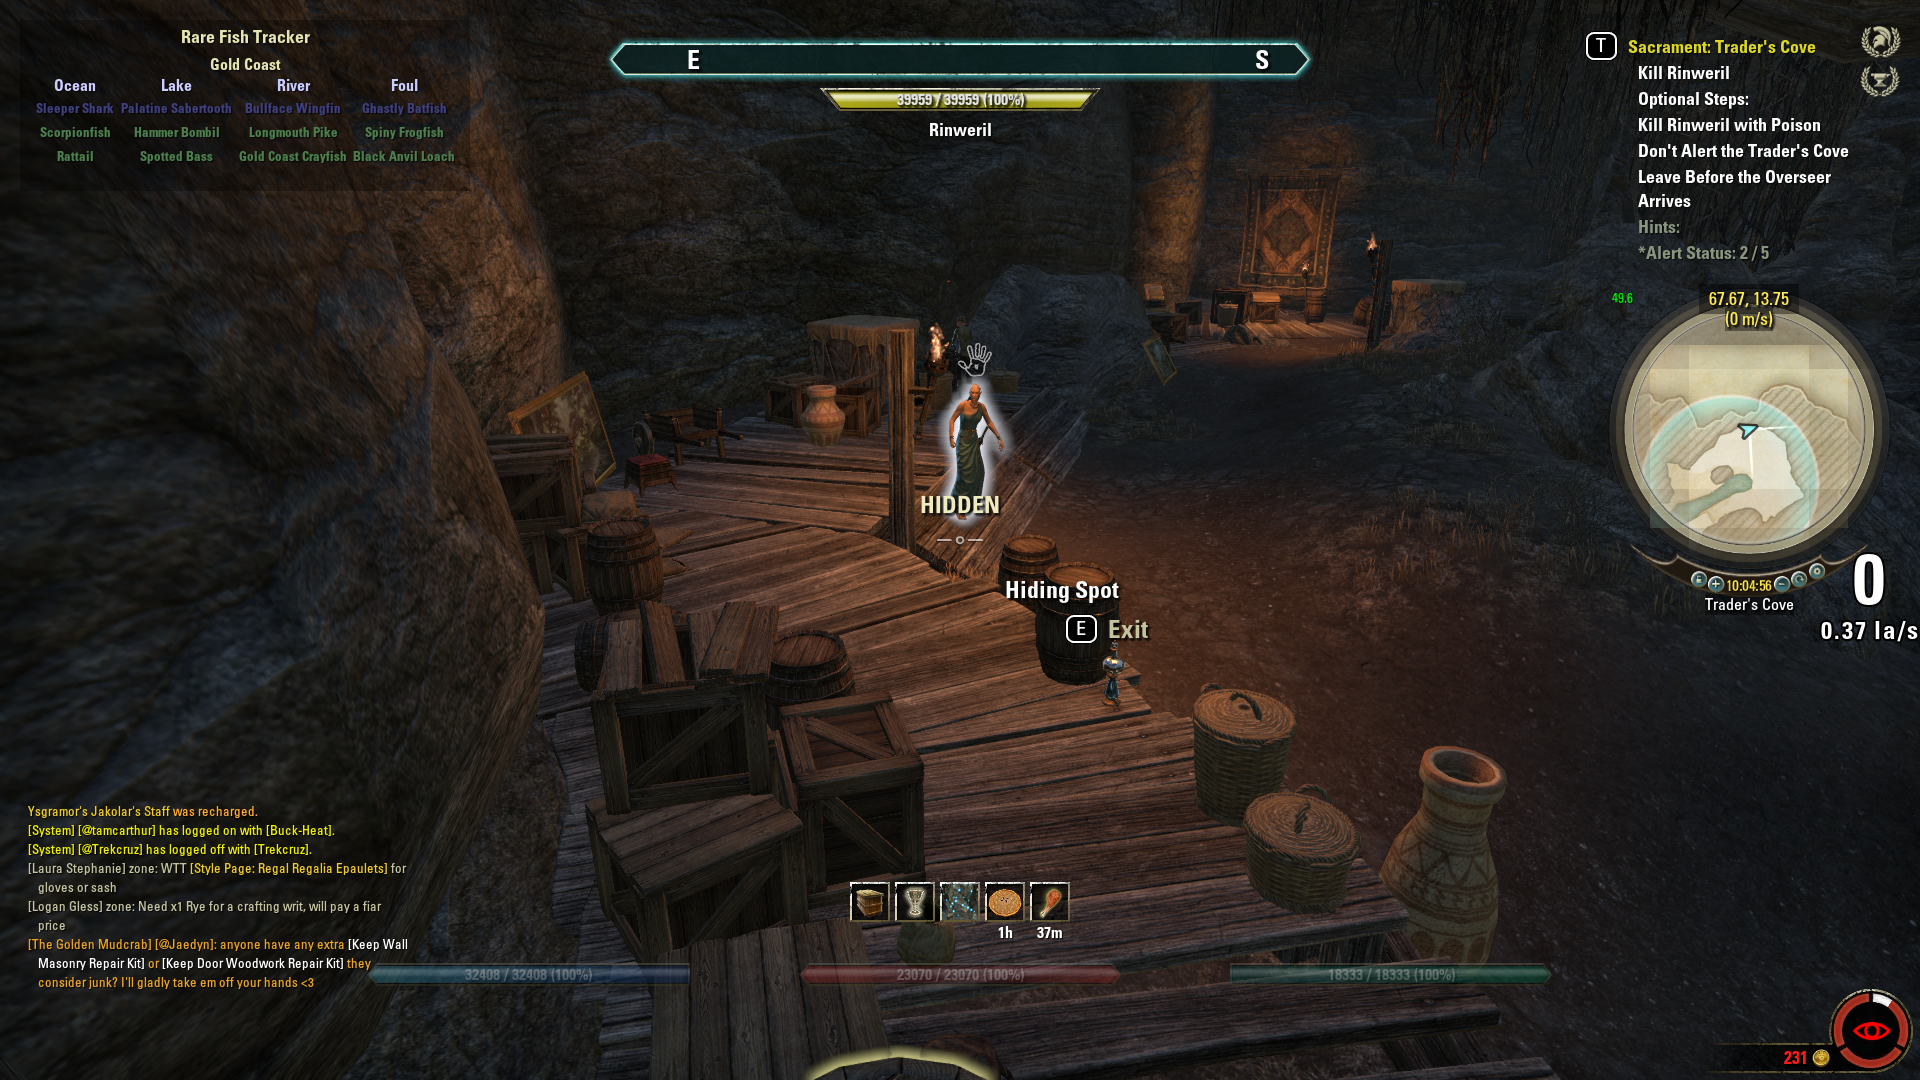
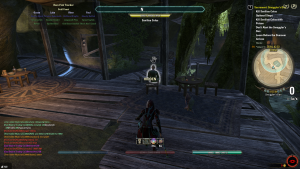
RINWERIL (Poison) – Trader’s Cove

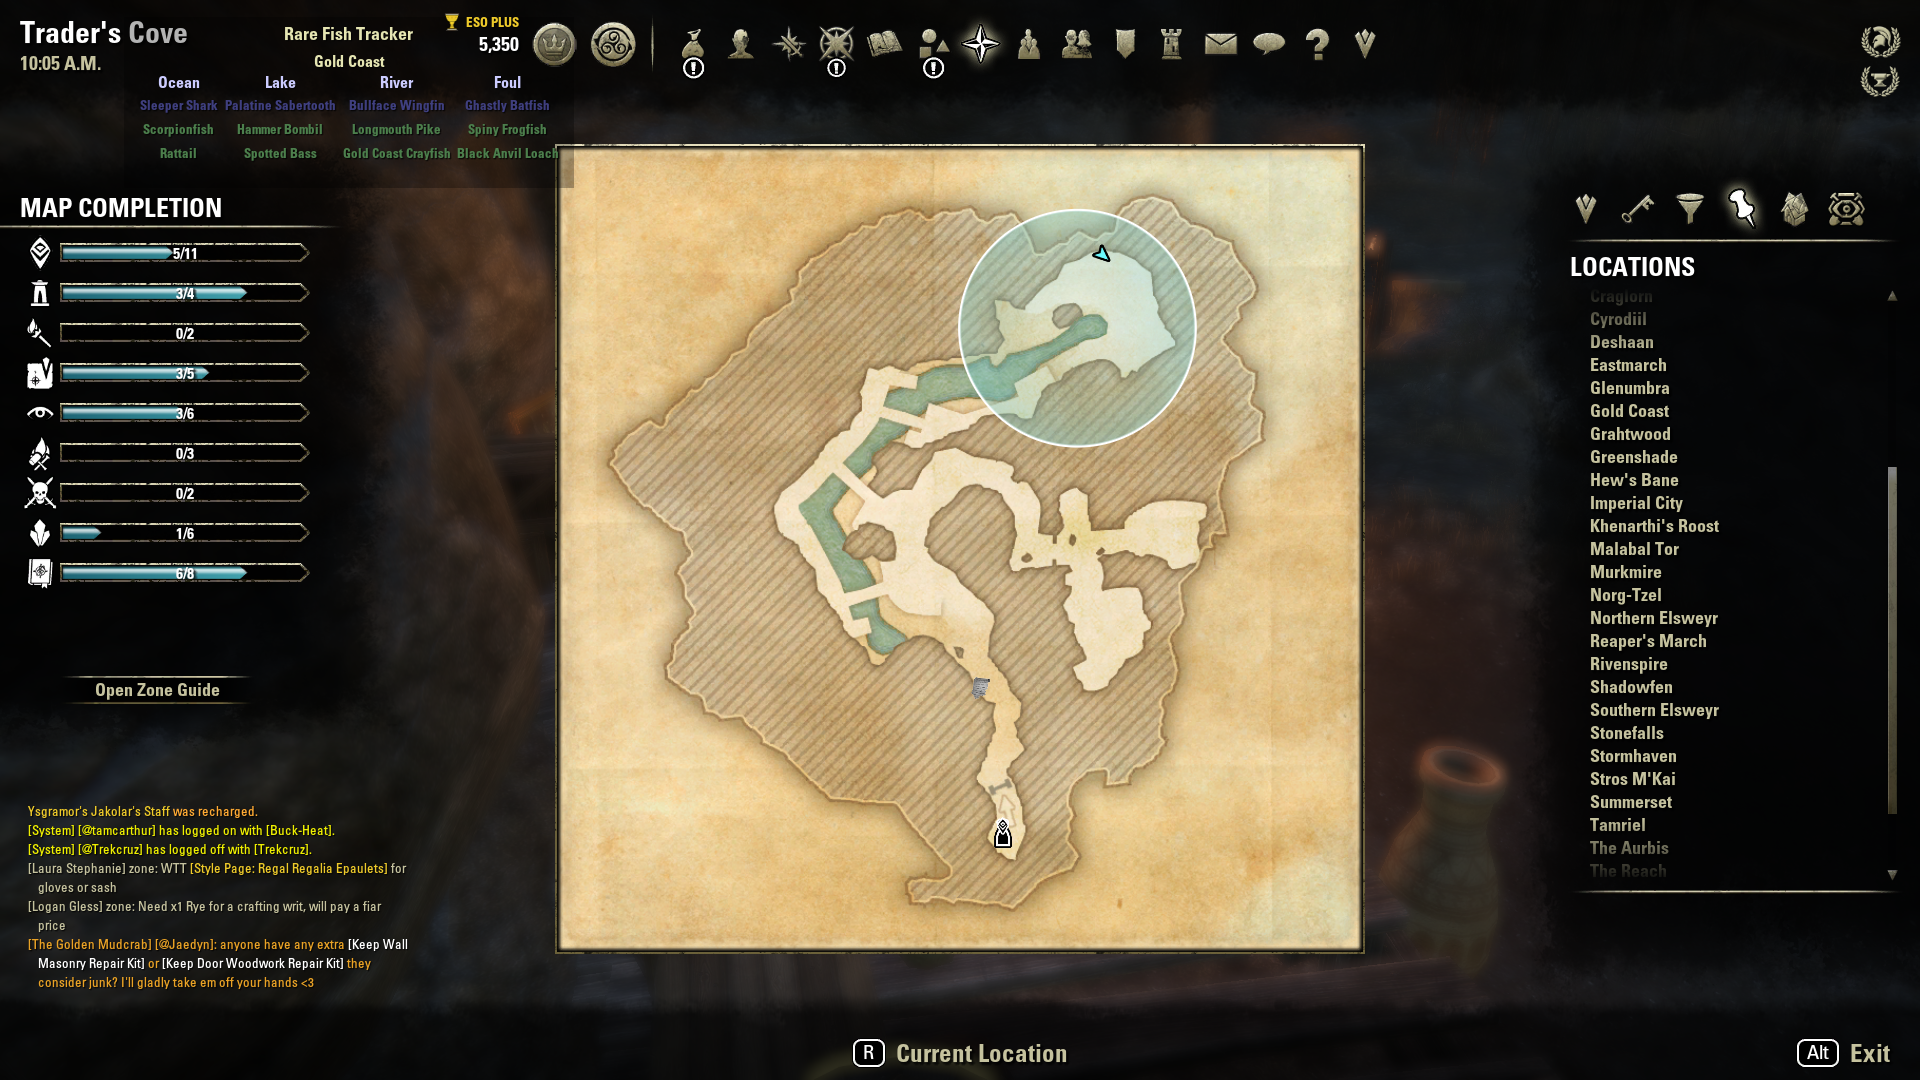
Rinweril Location #1 
Rinweril Location #1 Map 
Rinweril Location #2 
Rinweril Location #2 Map

SAVILIAN COLUS (Poison) – Smuggler’s Den
Savilian Colus Location #1 
Savilian Colus Location #1 Map 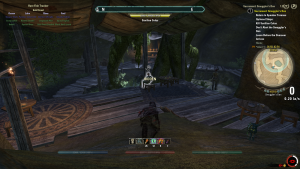
Savilian Colus Location #2 
Savilian Colus Location #2 Map 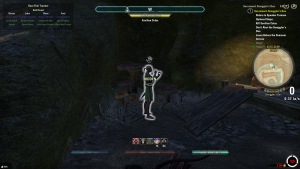
Savilian Colus Location #3 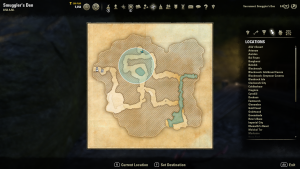
Savilian Colus Location #3 Map


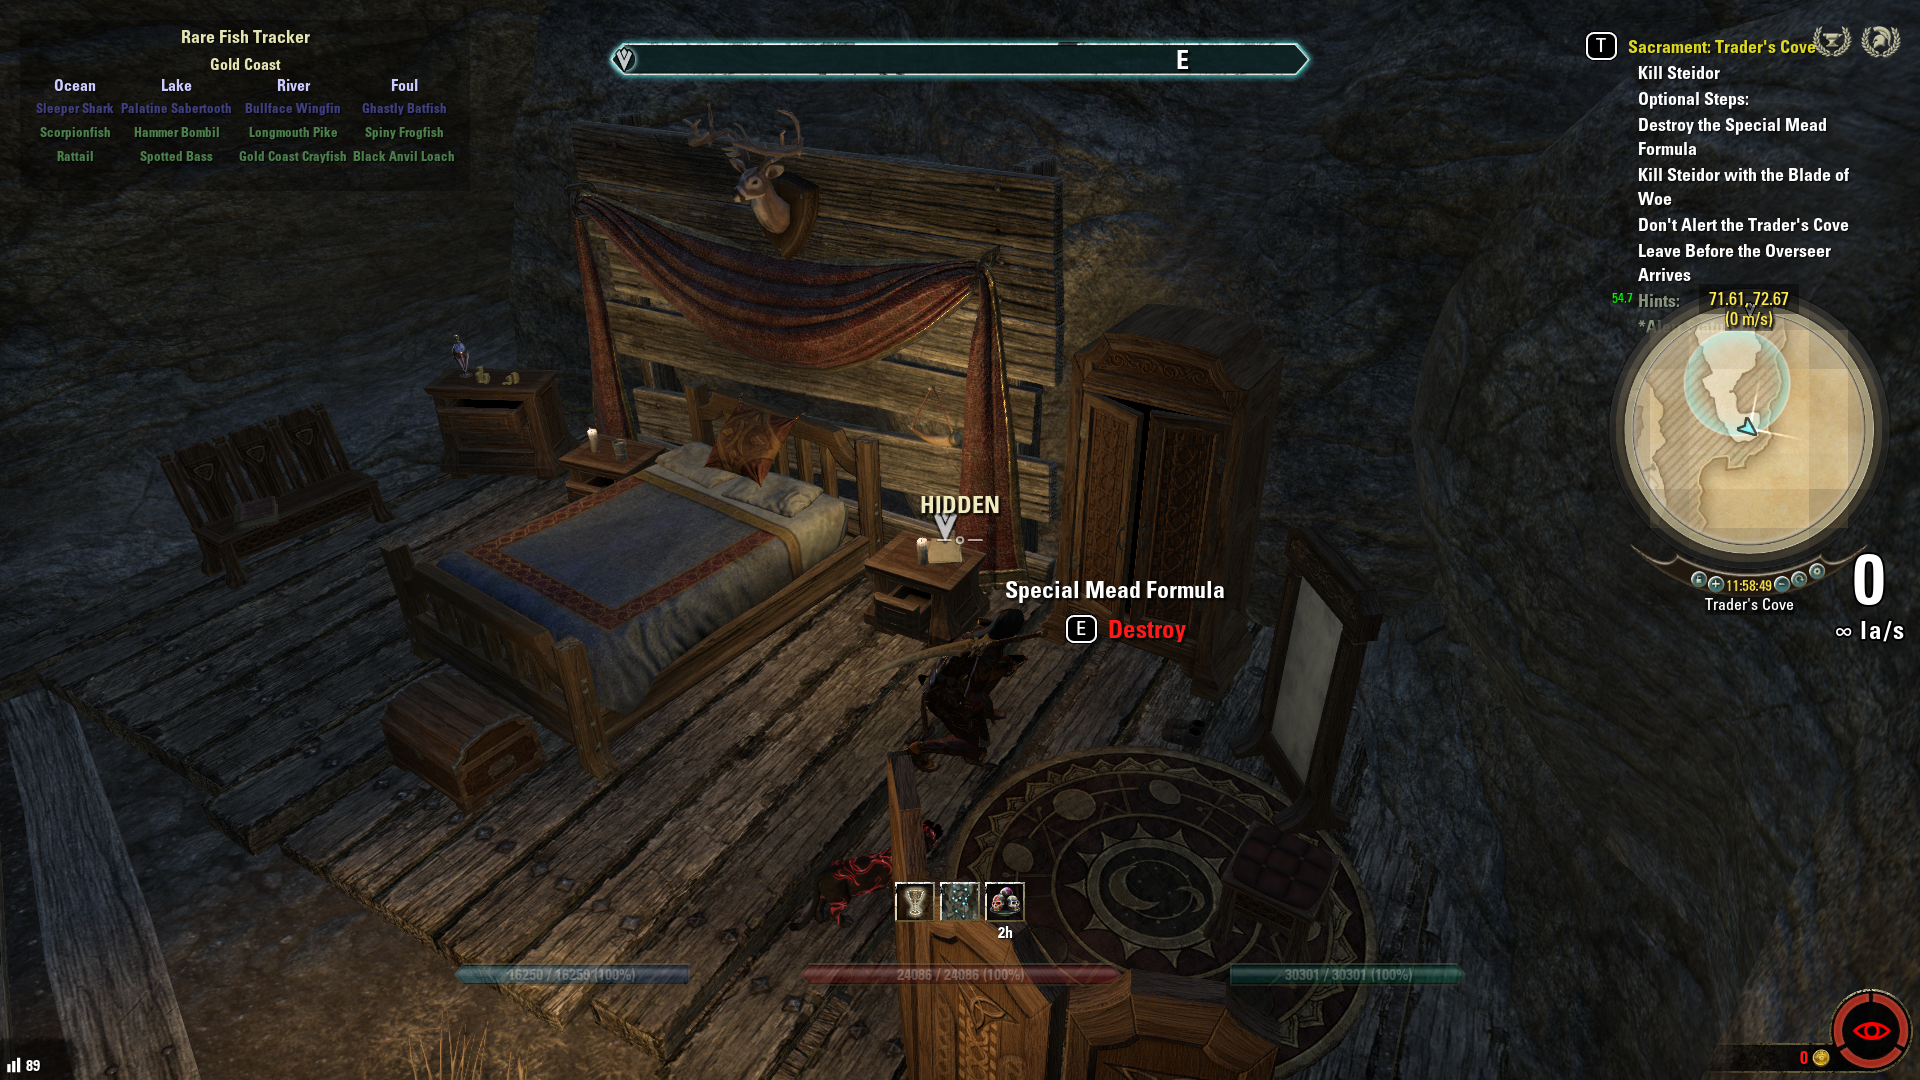
SPECIAL MEAD FORMULA (Destroy) – Trader’s Cove
Special Mead Formula Location #1 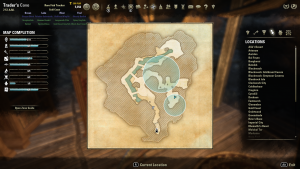
Special Mead Formula Location #1 Map 
Special Mead Formula Location #2 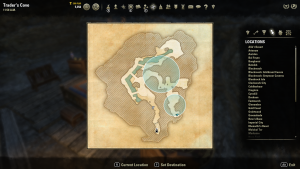
Special Mead Formula Location #2 Map


STEIDOR (Blade of Woe) – Trader’s Cove
Steidor Location #1 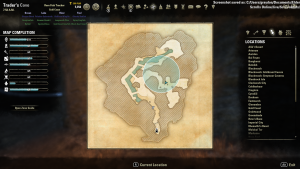
Steidor Location #1 Map 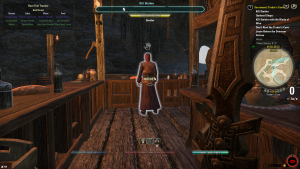
Steidor Location #2 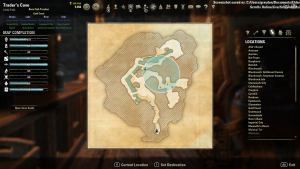
Steidor Location #2 Map


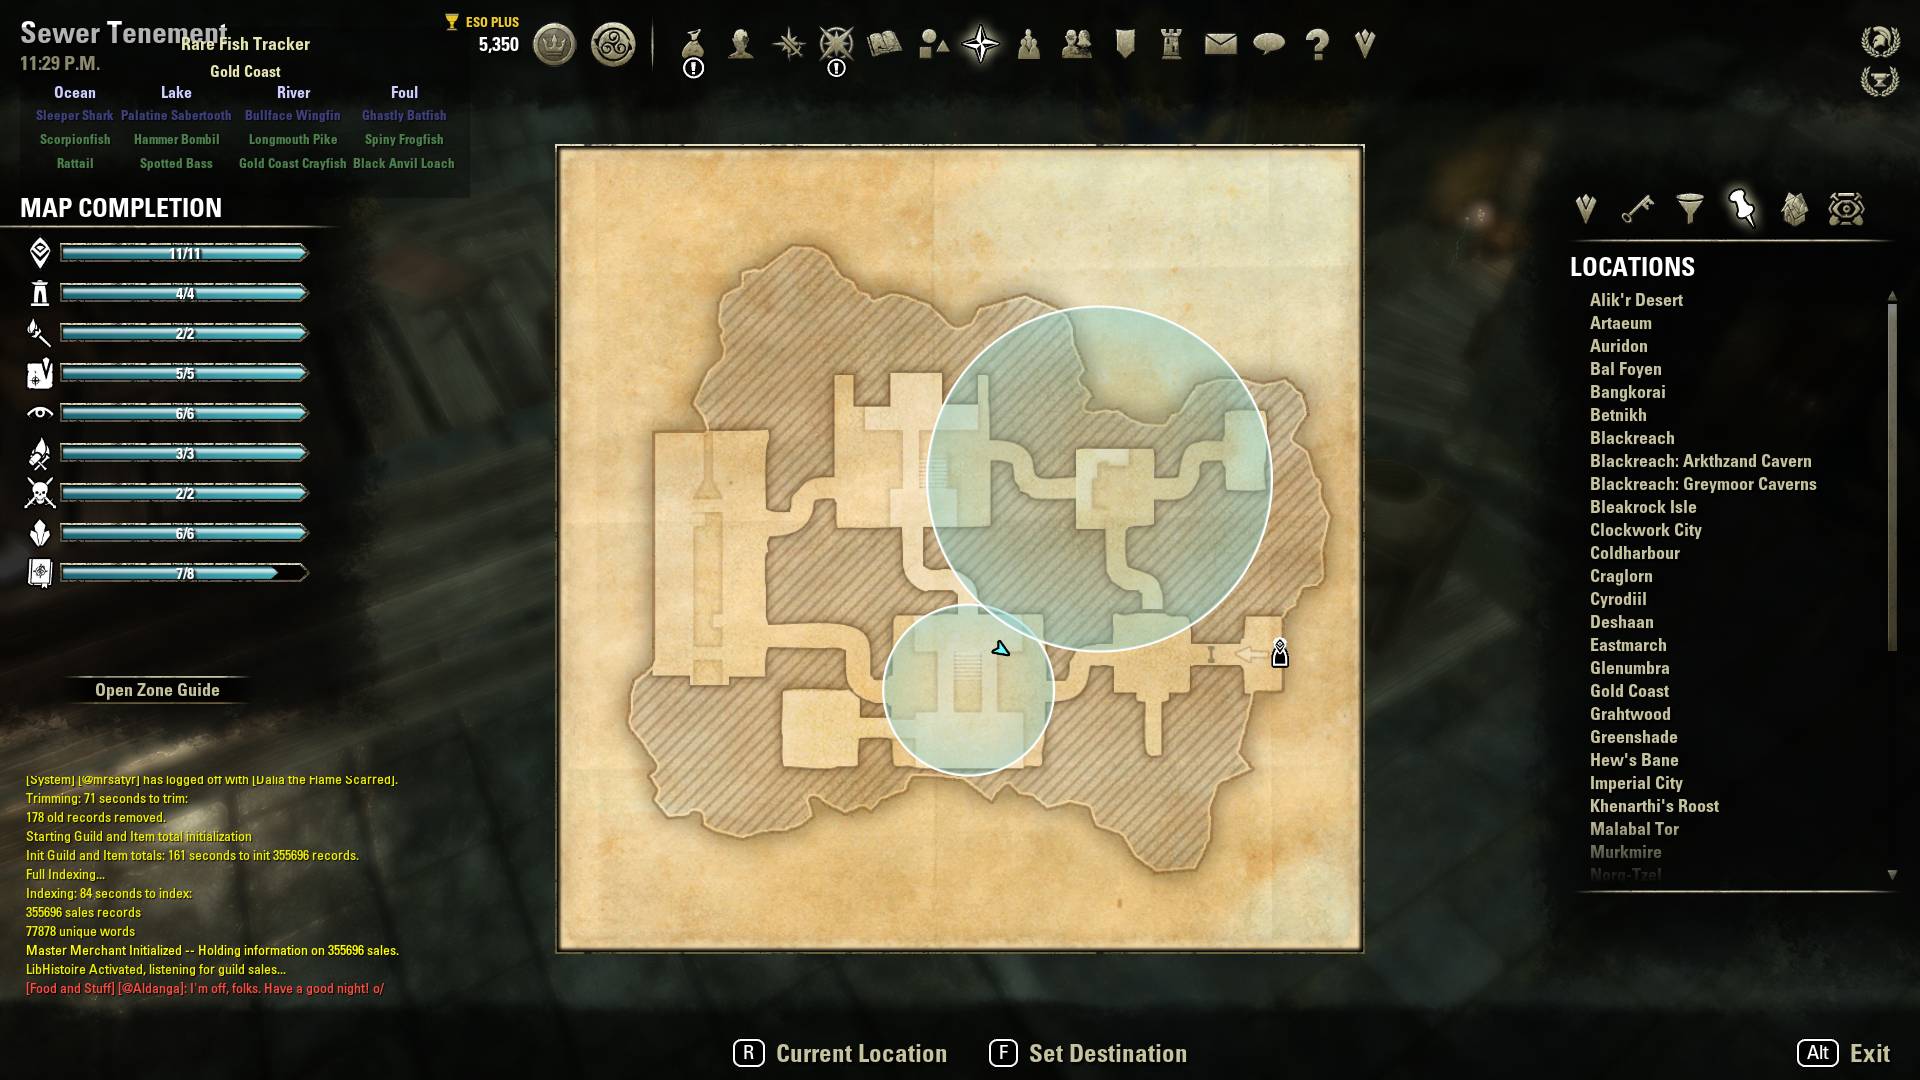
TALRAHAL (Poison) – Sewer Tenement

Talrahal Location 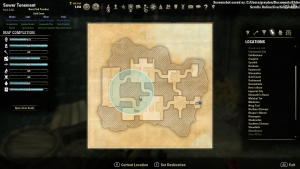
Talrahal Location Map
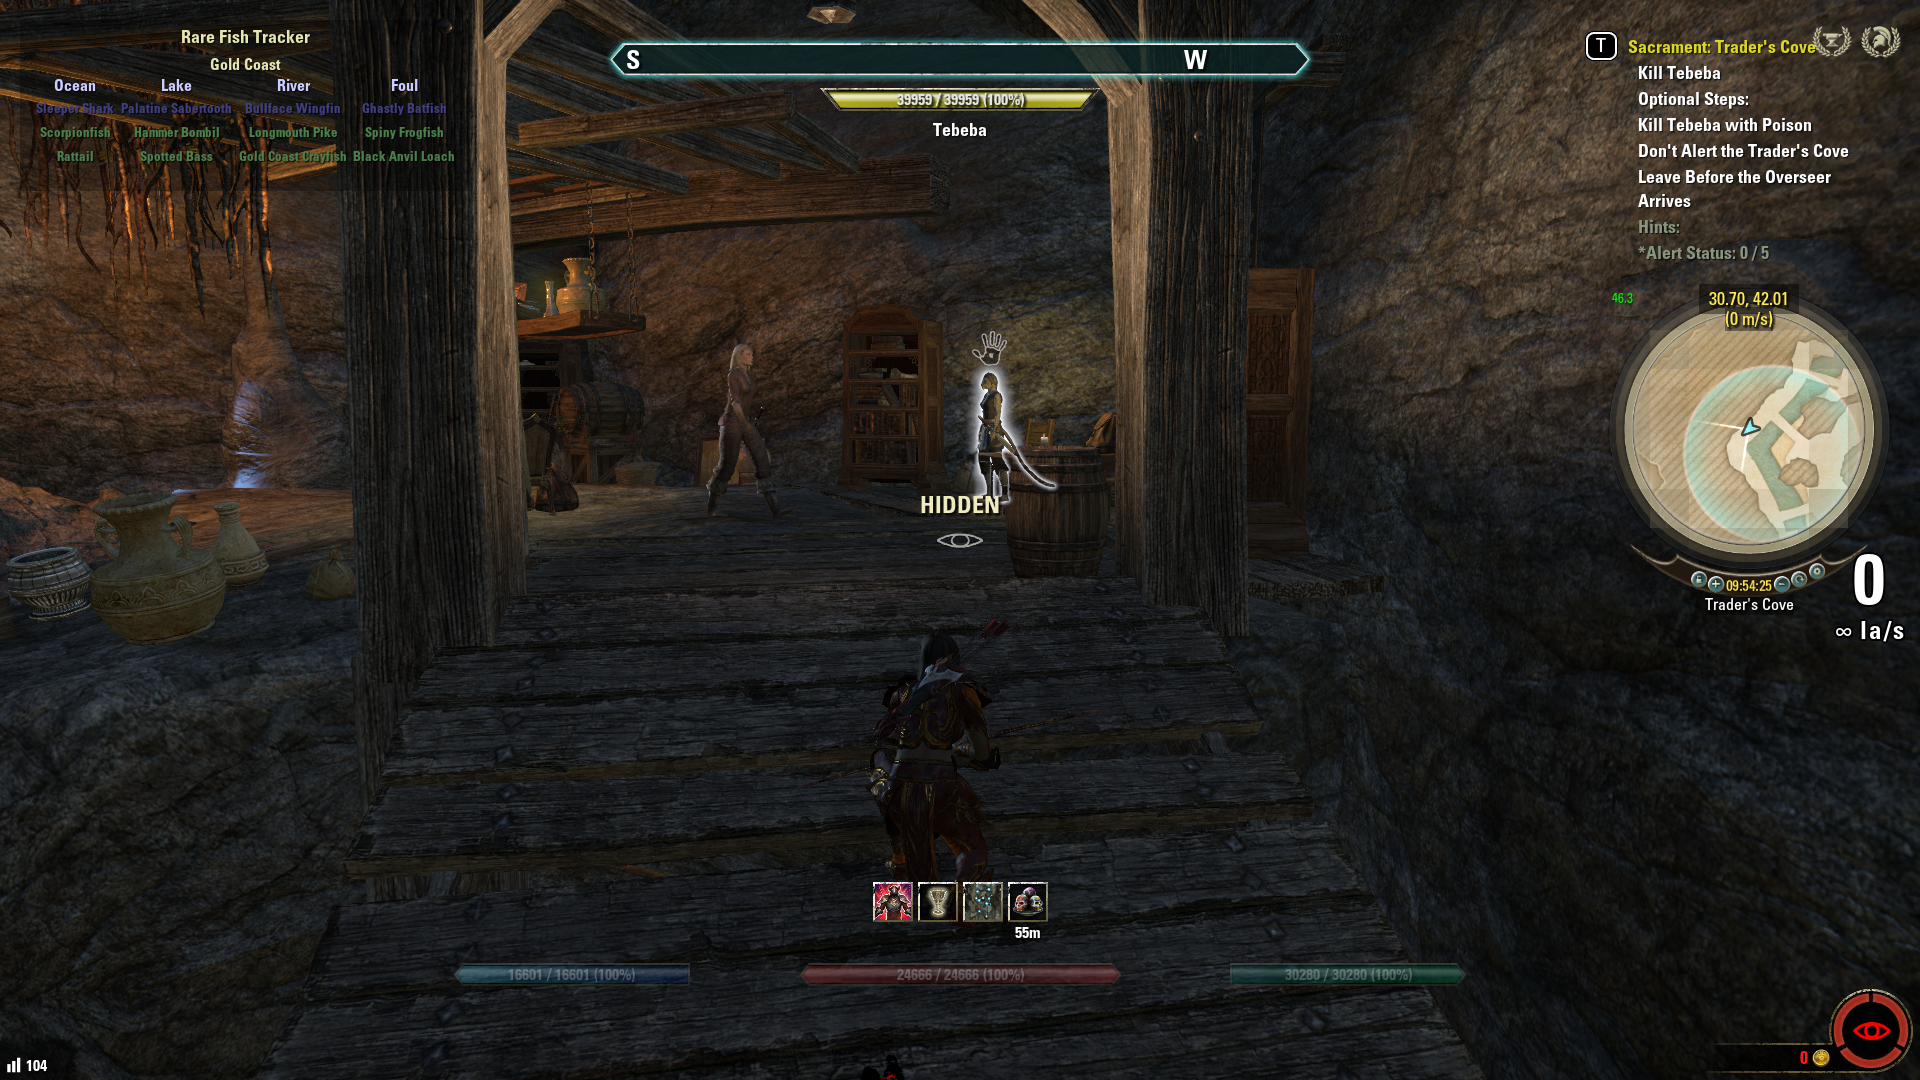
TEBEBA (Poison) – Trader’s Cove
Tebeba Location #1 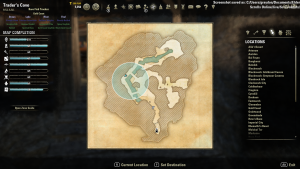
Tebeba Location #1 Map 
Tebeba Location #2 
Tebeba Location #2 Map